Estimated reading time: 13 minutes
If you have worked on many older guns, chances are pretty good that you have run into a good candidate for today’s project. You know the ones, ”That’d be a nice rifle if the barrel wasn’t so rough”. Or perhaps, you have a family heirloom that you would like to be functional but the bore is like a bad section of sewer pipe. Or even if you have an old rifle in an obsolete caliber with no ammunition available (.25 rimfire might be an example of this) but want to actually be able to shoot it. It is quite possible to repair a lot of those old rifles-even if you can’t find another barrel or don’t want to completely replace the original barrel for one reason or another. Enter barrel relining.
Table of contents
What we’re looking at today is how to reline an old barrel. Believe it or not, it is quite possible to replace the rifled portion of the barrel in a lot of cases. There was a point in time that this kind of repair was not unusual. It’s not so common today, but the practice is just as sound and useful as it was 100 years ago.
The Barrel Relining Rundown
There is a certain amount of controversy regarding some situations where re-lining may or may not have been suitable (the Italian Vetterlli conversions to 6.5×52 during WWI would be an example). What everyone can agree on is that it is safe and suitable for lower-pressure cartridges. So just keep in mind that there are some limitations to this process as you consider something for relining. Rimfire calibers and black powder cartridges are typically OK in this regard. Conveniently, where a lot of these firearms were neglected after firing black powder loads or corrosive ammunition, there are a lot of them that need this work done to them.
The subject of this article is the barrel from an old Stevens Favorite. These were single-shot rimfire rifles. It was chambered in .32 rimfire, which is obviously an obsolete cartridge that no longer has ammunition produced for it. While some folks have managed to find a way to actually reload for .32 rimfire, the bore of this barrel was in pretty poor shape anyway. So, I decided to reline it to .22lr. This article is not intended to be a complete set of step-by-step instructions. It’s intended to be a decent overview of how barrel relining is done to give you, the reader, a good idea of how it works. I will also include some suggestions on how to do some of this stuff for those of you who don’t have a lathe.
Barrel Relining Tools
I did most of the work for this job on a lathe. But according to the instructions I received with the drill, you can do this with a hand drill (and I have actually seen this suggested elsewhere as well)-though I imagine it would be more difficult. In order to take this job on, you need the barrel liner, the proper-sized liner drill for your liner, your preferred cutting oil, some red thread locker (I just bought some from a local source), and a chamber reamer. Lastly, you’ll need a few hand tools (like a hacksaw and a hammer) and some emory cloth.
I did all of the crowning work on a lathe. But if you’re using a drill, you’ll need some piloted crowning tools like this. That’s just an example, and obviously what type of crown you want will determine what tools you need. Also, you can turn the chamber reamer by hand with a tap wrench.
Drilling and Installing the Liner
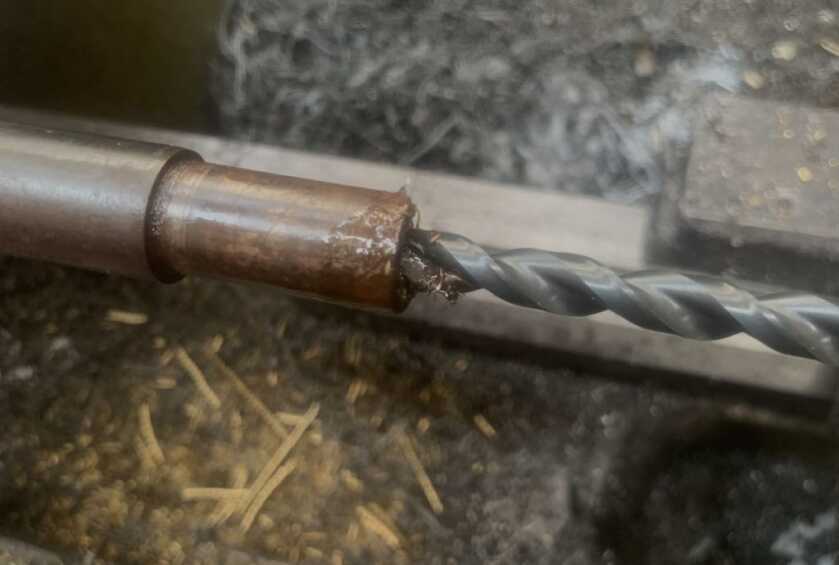
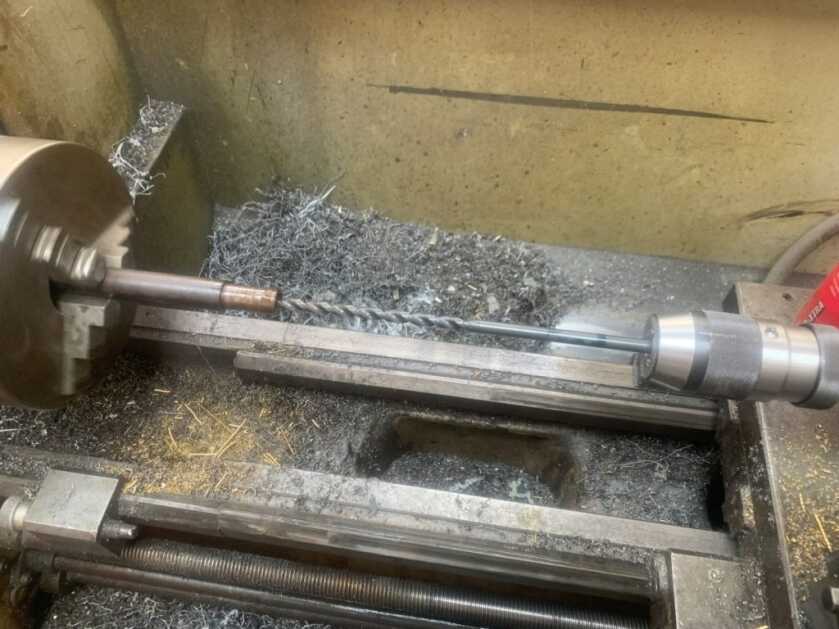
Obviously, the first thing that I had to do was to disassemble the rifle. The next step is to drill the barrel to take the liner. The smaller portion of the drill acts as a pilot, guiding the drill down the bore. I set my lathe to turn about 100 rpm (it’s lowest setting). Use lots of cutting oil and go slow. Go a little at a time, pull the bit out of the hole, and clean the chips out of it. If you go too far, the drill flutes will pack with chips and cause it to get stuck or even break off in the barrel.
This part is pretty tedious, and you’ll want to start hurrying it along. DON’T. That’s when you’ll get into trouble with it. Slow and steady wins the race here. Unless you’re drilling a pistol barrel (or you have a longer drill than I do), you’ll have to drill from both directions to get it all drilled out. You’ll need to go past the halfway point a bit to make sure the drill actually gets the whole length to size. If you’re riveting the liner, use a chamfer tool on either end. This will allow you to displace material from the liner to rivet it in place.
Something To Remember When Barrel Relining
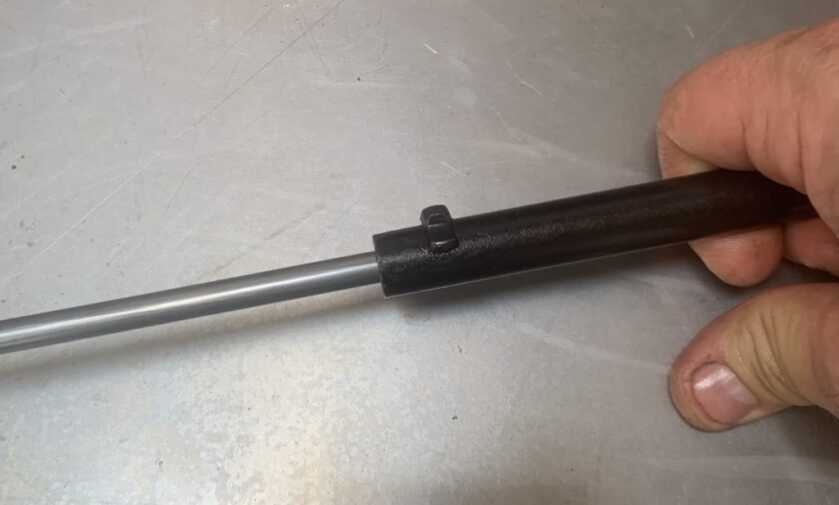
When barrels were relined years ago, the liners were soldered into place. And you can still do this if that’s what you prefer. However, certain types of thread lockers are perfectly suitable, particularly for these lower-pressure cartridges. First, make sure the liner will easily slide into the drilled barrel. You should be able to just slide it in with little resistance. Do not even consider trying to drive the liner in with a hammer if it’s too snug; you’ll only ruin the liner. You don’t want to find out it won’t go in after you’ve applied the threadlocker. If it’s too snug, run the drill through the snug spot again.
Then degrease the inside of the drilled barrel and the outside of the liner. I use acetone for this task because it’s readily available and dries quickly. Then I coated the inside of the drilled barrel with the threadlocker. I made sure it was completely coated on the inside by putting some in and rotating the barrel around. I repeated this until I could see the threadlocker coating the whole inside of the drilled barrel. Then slide the liner into the barrel. Make sure that you put it in the right way, as these liners are directional. Your particular liner should be marked in some way – whoever you bought it from should be able to provide this info. Once the liner is properly positioned, set it aside for the threadlocker to cure.
Riveting the Liner
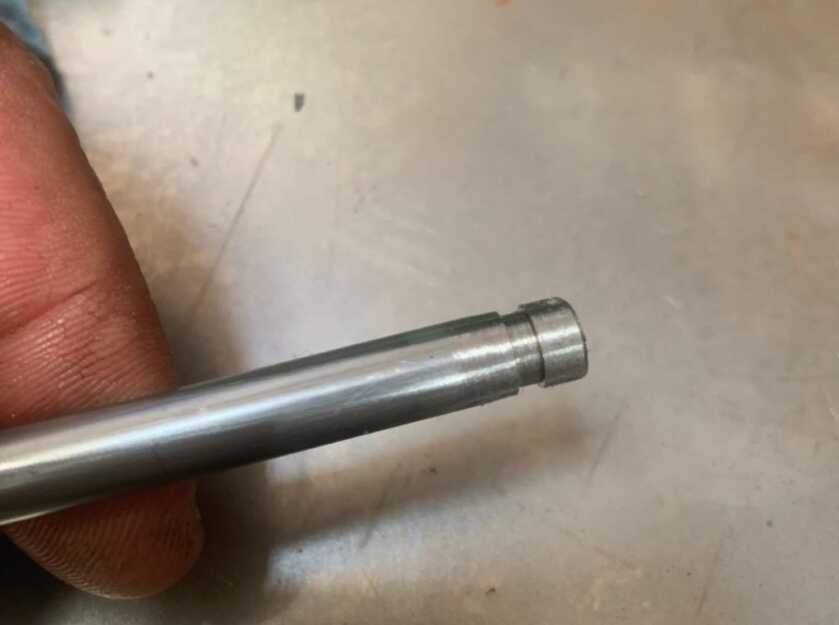
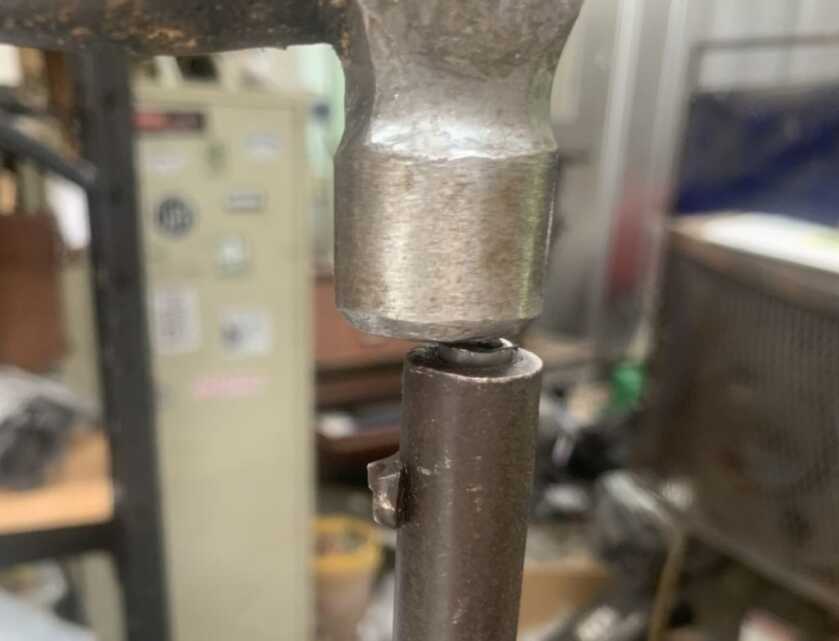
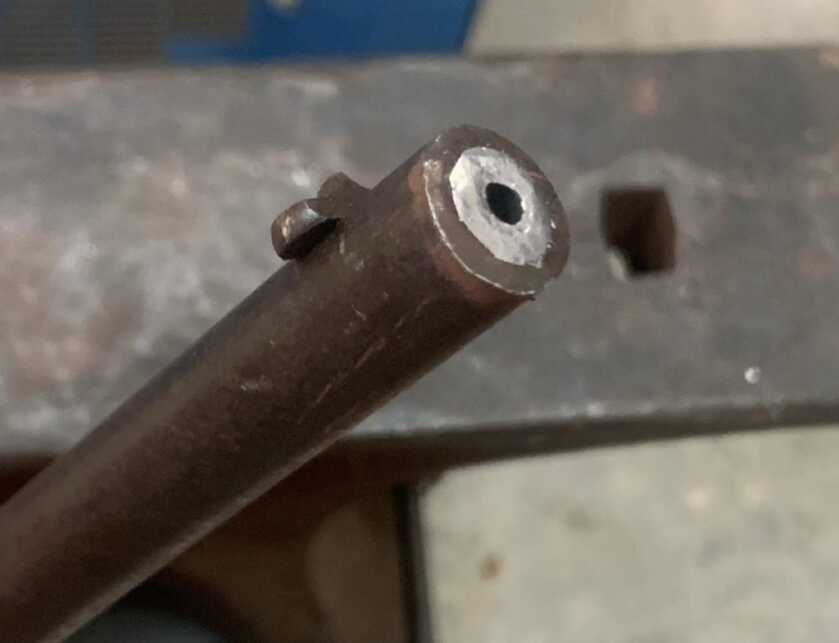
After the threadlocker cured on the liner, I took the steps to “rivet” it in place. Riveting is the process of peening the metal from the liner over the chamfer in the barrel on both ends. This is supposed to ensure that it remains in place. This is a step that some people omit from barrel relining. And from what I understand, that’s probably just fine. I decided to rivet this one because I felt more confident that I would be able to get the appearance I wanted if I riveted the liner in place. I haven’t done enough of these to form an opinion as to whether or not I consider it necessary or not.
At any rate, the process itself is pretty straightforward. I cut the excess liner off of both ends, leaving about 1/8”(or even a bit less), sticking out. I took a punch that was the right size for the curved radius or taper, to end up at the edge of the liner. Really, you could use anything with a tapered end on it for this. I hit it with a hammer to peen that edge over slightly. This starts the riveting process. From there, I set one end on an anvil(you can use any hard metal surface), and started hitting the other end with a hammer around the liner.
Relining Is Delicate Work
Think lots of small taps, rather than a couple of big hits. The liner material is pretty soft, so it doesn’t take a whole lot of force to “move” it. Occasionally, I’d flip it over and work on the other end. I kept working on the ends like this until all the material was peened over the end, and no visible space remained between the end of the liner and the barrel.
Chambering
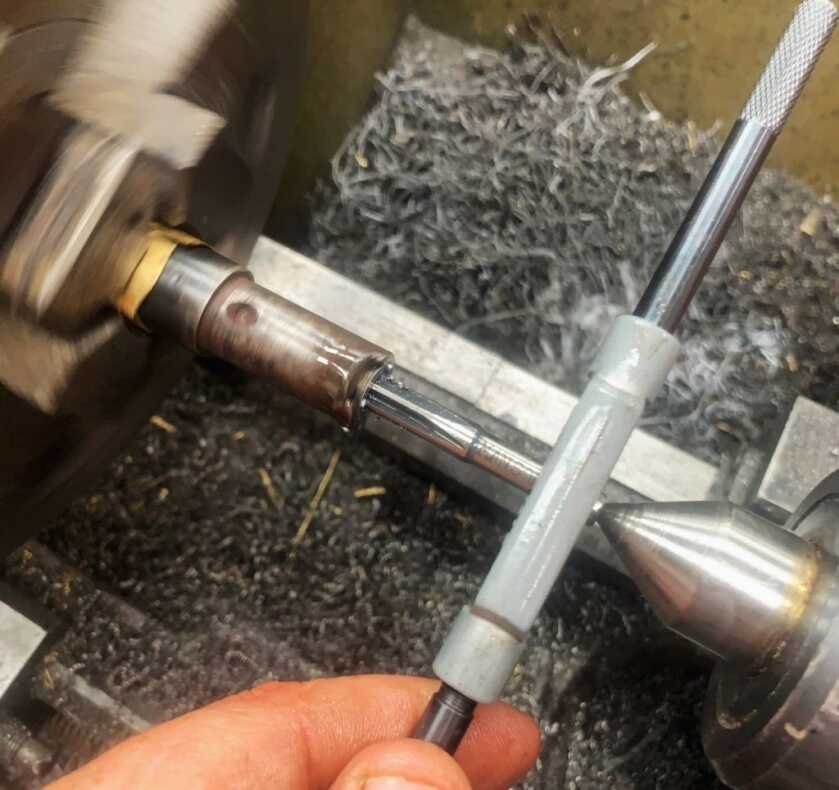
Once I had the liner riveted in place, I set the barrel up in the lathe for chambering. First, I had to remove the excess metal from riveting as it was in the way. You could do this with a file if you are so inclined. So, I started by indicating in the barrel off of the OD. I made a couple of facing passes in the lathe to remove some of the excess material and square up the barrel face. Then I used a chamfer tool, and then a deburring tool to remove enough of the material to get the chamber reamer in the bore.
Chambering is a bit like drilling. Go a little bit then pull the reamer out and clean and put some cutting oil on it. You want to be pretty diligent here. Because if the reamer catches a chip, it’ll gouge the chamber wall and ruin the liner. So go slow, stop often, and use plenty of cutting oil.
SEE MORE: NRA Advanced Machine Shop Class or How to Chamber a Barrel – Part 2
Headspace Concerns
Rimfire rifles headspace on the rim. And so the rim cutout is the critical dimension for headspace on a .22LR. However, there are 2 different kinds of .22LR breach face/chamber combinations. One type has the rim cut completely into the chamber and has a flat breachface. The other has a recessed breachface that holds the rim of the cartridge. The chamber does not have the rim cutout. Obviously, these require 2 different approaches to chambering the barrel. So, take a good look at the breachface of the firearm you’re working on to make sure you know what type of chamber you need to cut.
The rifle I’m working on has the type with the rim set down in the chamber. I have a .22lr headspace gauge, but you could use a couple of different .22lr rounds to check this. This is probably the only time I would suggest a possible substitute for a headspace gauge. I’m not going to get into the specific dimension I used, in order to encourage anyone considering this project to figure out how the headspace spec applies to their particular project.
Deburring the Liner
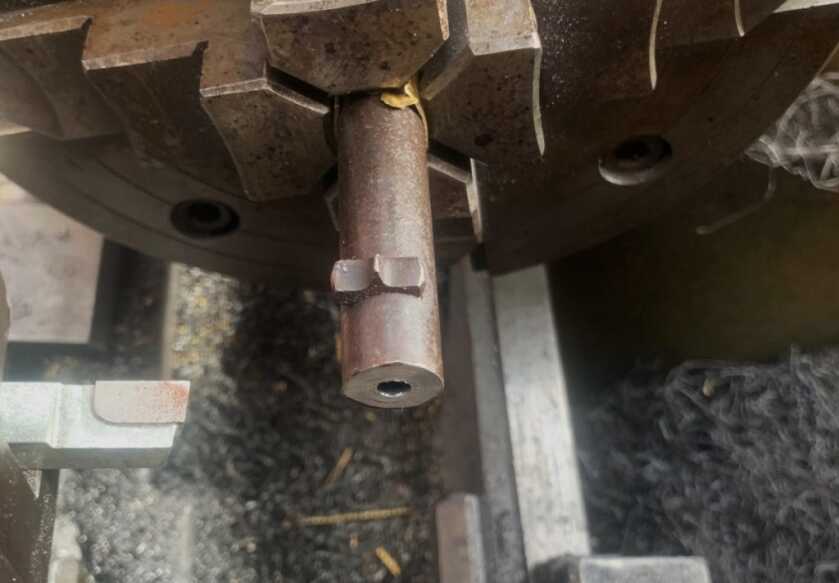
The next step was a bit trickier than when I re-crowned other barrels because I had the metal peened over from riveting in the way of the bore. So, I couldn’t indicate off the bore to crown the barrel until I removed this material. But remember that we really don’t have a whole lot there and that if we remove too much, we risk ruining our now-installed barrel liner.
While I was able to get away with removing the material in the way with a typical “rout-a-burr” deburring tool on the chamber end, I would discourage you from attempting to use such a tool on the muzzle end. The reason is that on the chamber end, when you inevitably scratch the inside of the bore with the tool, you’ll clean it up with the chamber reamer anyway. On the muzzle end, you’re obviously not going to do that. So be careful in removing the metal on that end. I made several facing passes to clean up the excess material, just until I could get the pin gauge in the bore to indicate with.
Crowning
The type of crown you choose is going to drive how you would do it to some degree. A lot of these older .22 rifles I’ve seen have flat crowns. This particular rifle did, and so that’s the type of crown I chose to use after installing the liner. Just keep in mind that there isn’t a lot of extra material there to work with.
Once I had removed the extra material, crowing the barrel was pretty straightforward. I used a pin gauge to indicate off the bore before actually cutting the crown. Then I faced the barrel and liner off. After facing, I used a 60-degree chamfer tool in my floating reamer holder to complete the crown. Lastly, I polished the muzzle with increasingly finer grits of emory cloth until I was happy with the finish. If you’re using a drill, you’ll use the piloted tools to do this work.
Finishing Up My Barrel Relining
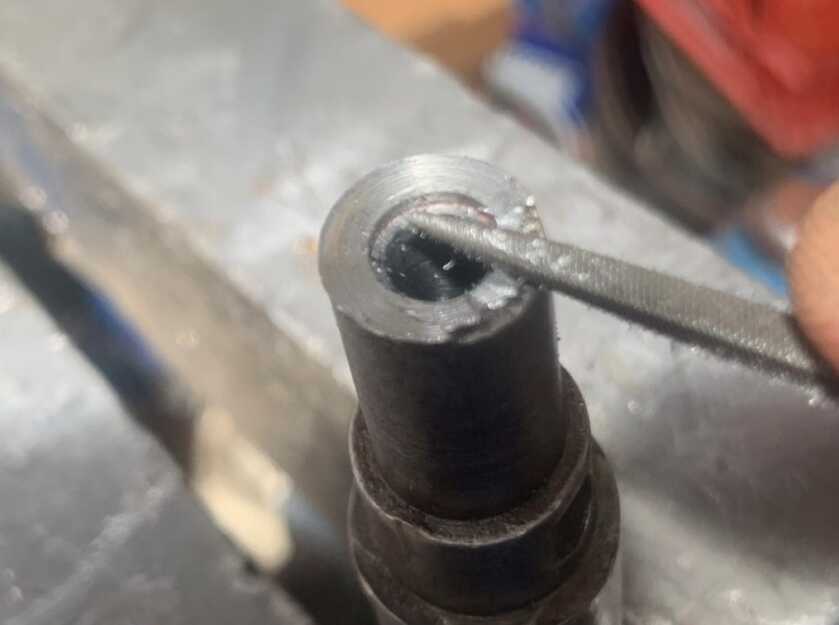
With the liner installed, chambered, and re-crowned, the only thing left was to cut the liner to match the ejector cutout in the barrel. I just used a couple of needle files to take it down to size. Since there wasn’t a whole lot of material to be removed, it only took me a few minutes to file it down to match. Before filing it back down to match the old groove in your barrel, take a good look at how your ejector actually needs to fit. Some of these old guns have enough wear and damage to the breech face that the extractor cutout may be oversized and you may want to repair some of that with the liner.
You should consider putting some kind of mark on the barrel showing that it has been relined. If you have changed it to a different caliber than what’s marked on the barrel you really need to put a marking on it to reflect its new chambering. I have a laser engraver in my shop, so I used it. But you could just use a hammer and letter punch set.
Relining a barrel is a way for you to take an unusable rifle or pistol and bring it back into functioning condition. It’s a great option for collectible old rifles or sentimental firearms because you’re still keeping the original barrel. The process does have some limitations but is still useful for a lot of guns. So, if you’re a hobby gunsmith looking for a new challenge and have an old .22 with a sewer pipe for a barrel, try relining it. Until next time, Happy ‘smithing!
*** Buy and Sell on GunsAmerica! ***

As it so happens I, too, have an old Stevens Favorite 1894 #17 .22 LR that desperately needs a new bore. I’m trying to find someone still doing this process that can re-line this little rifle. I just had a smith repair the damaged extractor (6:00 position) but he’s unwilling to attempt a re-line. Where can I find someone expert on .22 caliber rifle re-lining? Anyone?
I HAVE A KRAG IN 30 40 THE BORE IS SHOT CAN IT BE RE LINED
Interesting article! I may have to look for an old single shot for my grandkids who are coming of age.
I grew up on a single shot 22 as my first gun but I don’t currently have one so I may have to go shopping and will keep this in mind for a winter project.
Thanks, very informative for a non-smithy without a lathe.