The M1 rifle is an iconic piece of American history. These days they are getting harder to come by, while at the same time being in higher demand while becoming more and more expensive. Being a history buff, and somewhat frugal with my projects means that the idea of obtaining an original M1 to modify or tinker with or build on is not an acceptable option.
Original production M1 receivers are getting expensive and hard to find. Commercial M1 receivers can sometimes be found, but they’re not exactly growing on trees either. And not every commercial M1 receiver has been made to spec. So what’s a builder to do? Enter the drill rifle.
At one point in our nation’s past, it was decided to take what were then extra M1 rifles and modify them for drill use. These rifles were modified by making them not able to fire, or be easily converted to do so while maintaining the appearance of being a functional rifle. These were used by ROTC detachments and similar groups who didn’t have regular weapons of their own for color guard duties and similar.
If you look at a drill rifle like a sort of parts kit, they can actually have a lot of value. No, you aren’t going to be able to just file a few things and have a functional M1. But if you replace a few parts, you can have exactly that. This article is about how to salvage the usable parts off of a drill rifle.
These rifles can be found for a reasonable amount of money. I bought mine from the CMP’s South Store. I purchased it with the idea that I was really just after the receiver. They were around $400, which was pretty reasonable considering what I had in mind for it. I picked out what I considered to be the best looking one of the bunch. If you’re looking for a drill rifle to use as a project, I would suggest finding one that you can look at first. These rifles were “demilled” in various different ways, and each one is a little bit different. Some are easier to deal with than others.
Each drill rifle is “demilled” a little differently in order to make them non-fireable. This rifle had the barrel welded to the receiver, the gas cylinder & lock welded together (which in turn welded the gas cylinder lock screw in place), the bolt face welded, the rear of the bolt ground, and a rod welded into the barrel. The welder who did this work must not have been too terribly interested in what he was doing, as most of the welds were little more than blobs on the surface. This is good for my purposes, as it leaves more usable parts.
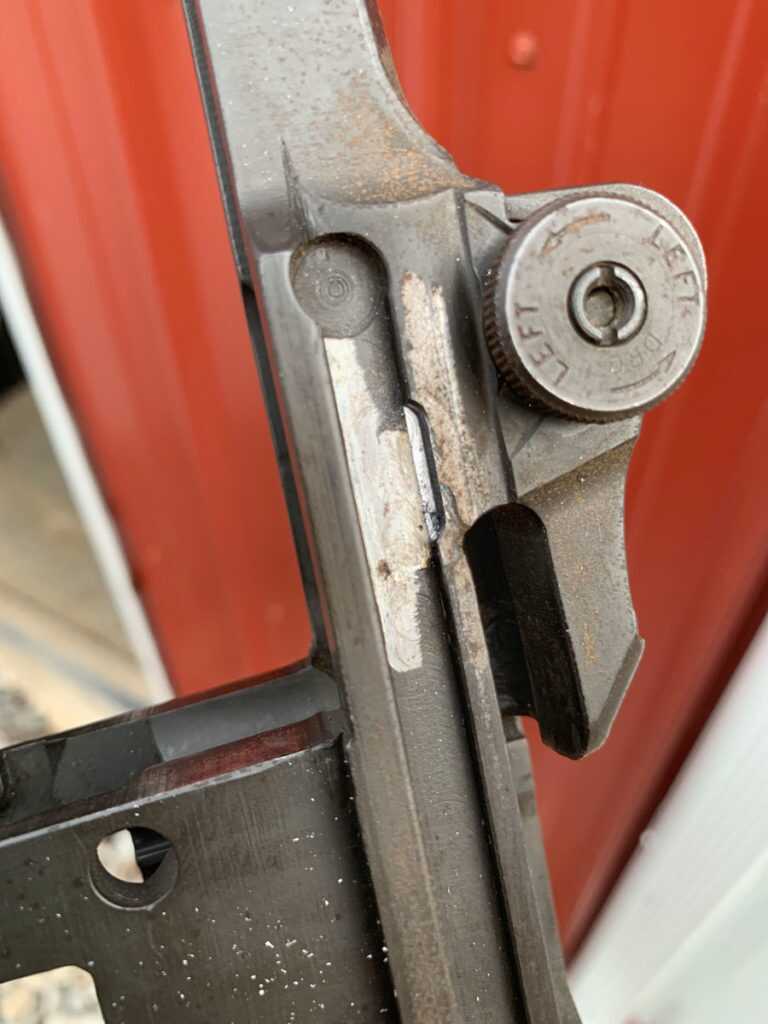
The first thing I had to do was obviously to field strip the rifle. However, my rifle had been modified to not allow the removal of the operating rod by a weld (oprod for short) in the notch. So once I had removed everything I could, I needed to remove the weld blocking the removal of the oprod.
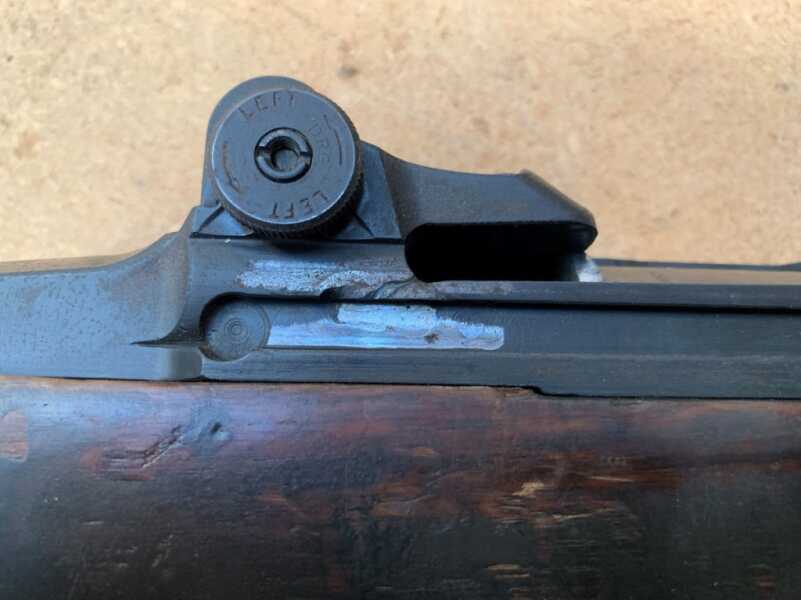
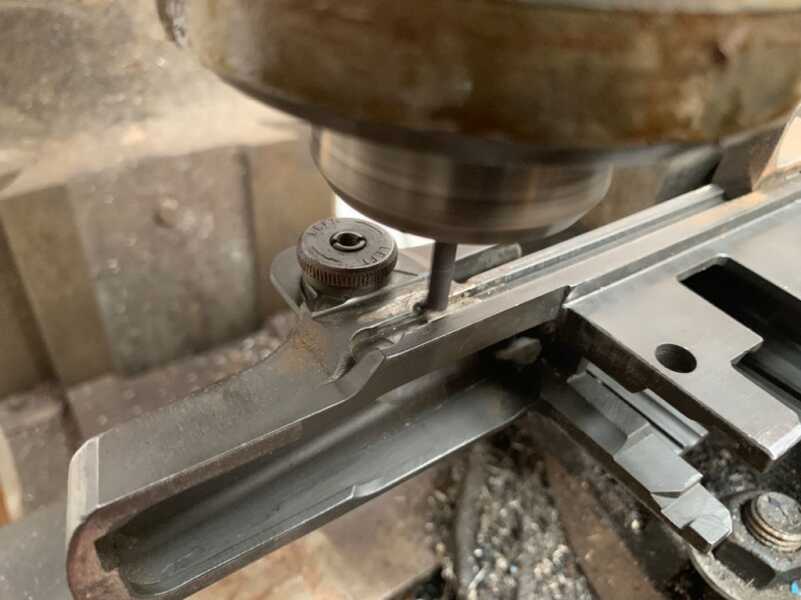
Here is the weld on the oprod track. This weld prevents removal of the oprod. Be careful in machining it out, as there is not a whole lot of room for error here.
I set the action up in the milling machine and used a carbide endmill to carefully remove the weld from the notch. If you go too far, you run the risk of cutting the notch into the receiver. Go slow and be careful not to cut into the receiver any more than absolutely necessary.
After that, it was time to remove the gas cylinder lock screw, gas cylinder, and gas lock. These parts were all held together with a weld. The gas cylinder lock screw also had a little weld holding it in. But this was little more than a small blob, which I removed with a file. The other weld was the one weld on this rifle that was burned in pretty good. So I ended up milling out a portion of the whole assembly with a carbide endmill in order to disassemble it. As such, these parts are not usable in their current state.
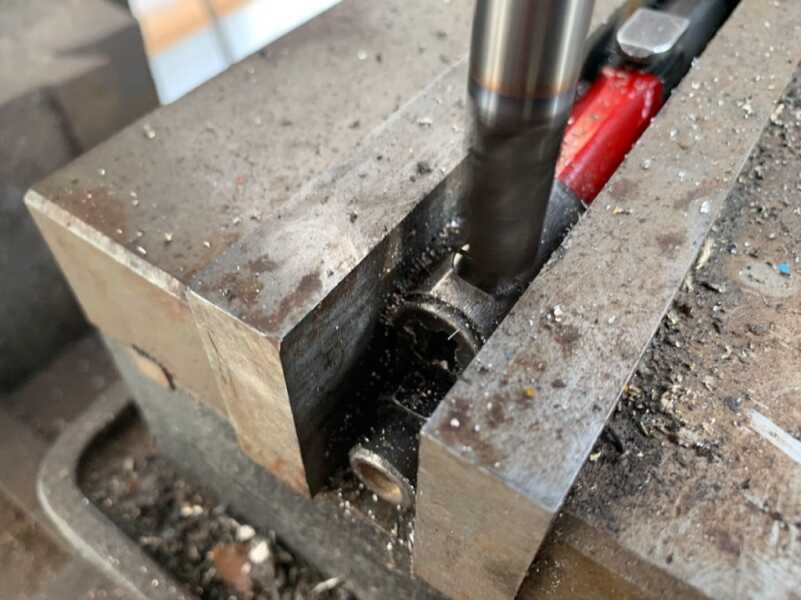
The weld that held together the gas cylinder parts needed to be machined out. I used a carbide endmill for this purpose.
Before I moved onto the next step, I removed the lower band and rear sight assembly. I suppose you could leave the rear sight assembly on if you’re just building another M1, but I decided to remove it. The lower band should be removed as it will be in the way of the next step. Fortunately, it’s just one roll pin to remove it.
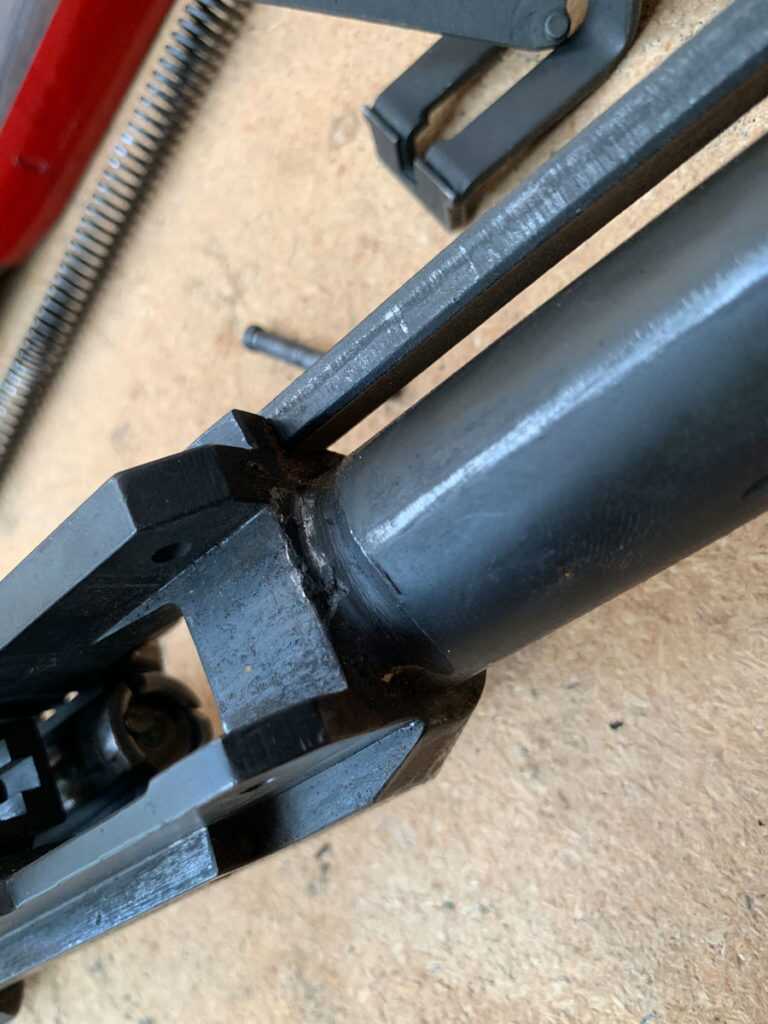
Next is removing the barrel from the receiver. The barrel was welded onto the receiver, but fortunately, it wasn’t too deep. But the weld still had to come off. I very carefully set the barreled action into the lathe. I did this because I felt it gave me the most control with regard to being able to remove the weld material without damaging the receiver. The fact that I wasn’t trying to save the barrel worked in my favor, as I didn’t have to worry about damaging it. I used a really slow RPM, as this quite obviously isn’t a rigid setup. I took really light cuts (as in a few .001”s at a time), and eventually, I got the weld almost completely turned off of the barrel. If you do not have access to a lathe, you could remove this weld through other means. Just be very careful not to damage the receiver face.
With the weld removed, it was time to remove the barrel from the receiver. I made the action wrench and barrel vise I used for this (because I didn’t have the patience to wait for one to be shipped to me), but these tools are available from a number of sources as well. The barrel typically requires a lot of torque both to install and remove. Take care in using the receiver wrench to ensure that you do not damage the receiver. I tend to use some good penetrating oil, such as Kroil, to help with jobs like this. I prefer to let it sit for 24 hours or so after applying the oil, to allow it time to creep into the threads.
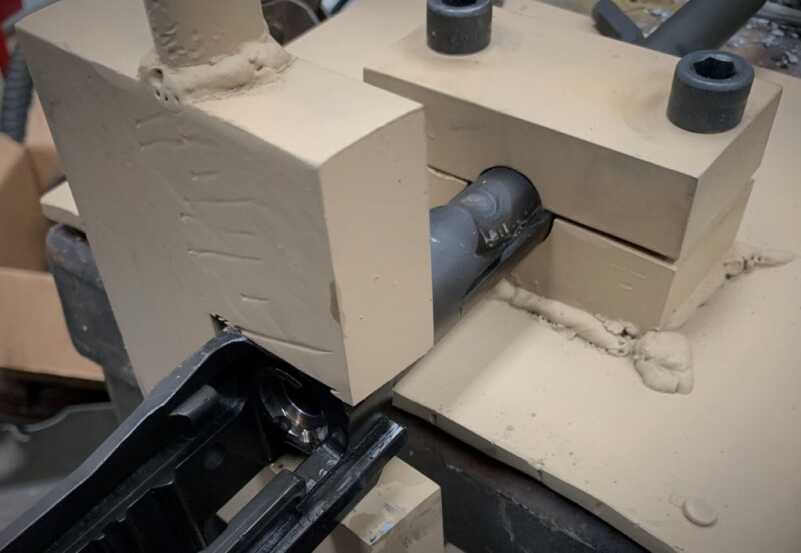
Removing the barrel from the receiver. Care must be taken to ensure the receiver is not damaged in this process.
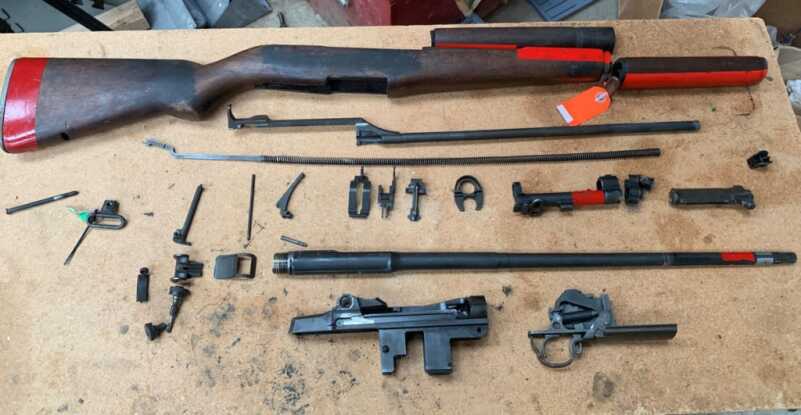
At this point, the rifle is almost completely disassembled. At this point, I was able to take a good look at the parts to determine what was still serviceable and what wasn’t. The receiver, which was the main part I was after, was OK. In fact, most of the parts were actually usable. The trigger assembly in this rifle had not been modified and it functioned as it should. So I did not disassemble it as I did not see a need to do so. After looking over the oprod a little for damage, I measured the gas piston with a micrometer. It was in spec. So, the oprod was also usable.
Given what this rifle was for-and as such likely endured, the furniture wasn’t in terrible shape. I was expecting it to be a lot worse when I got everything apart. The stock wasn’t in too bad of shape, though the butt plate has seen better days. The handguard was ok shape, save for a small crack. The upper handguard was in decent shape.
The bolt and its components need to be replaced. The bolt face was welded on. While removing the weld wouldn’t be a problem, the heat from welding the bolt face is. Likely the hardness of the bolt was affected. It was also ground on the back side as well. Since this is a pressure containing part, it should be replaced. It might be possible to salvage some of the components, such as the extractor and ejector. The springs for these were likely ruined by the heat as well, and if you intend to use these components they should be replaced. The firing pin was ground with the rest of the bolt and would’ve been affected by the heat from welding the bolt face as well. So given all of that, and the fact that what I was planning to do with this involved a new bolt anyway, it’s just going to be an interesting paperweight.
In the end, the only parts that weren’t usable were the bolt assembly, barrel, gas cylinder lock screw, gas lock, and gas cylinder. From what I’ve seen, a stripped M1 receiver goes for about what I have in the whole drill rifle. And I ended up with a lot of good parts I didn’t expect. This could be just the ticket for those BM-59 parts kits that are missing pieces. So if you want to build a custom M1, or need a receiver to modify to assemble that neat BM-59 kit you found, and you don’t want to commit the sacrilege of cutting on an original, take a look at a drill rifle.

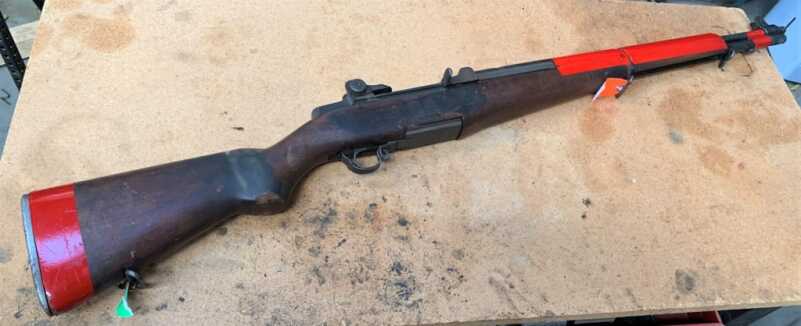
There is another side to the drill rifle story. Back in the 50’s the Army took 400 brand new H&R Garands and removed the stocks for drill riffles or parade guns. A number of years ago, the Army gave CMP the H&R’s and they put them in new walnut stocks and sold them to the public.
Real good write up good detail thank you
Too bad their is no way to end up with a cheap BM-59 receiver – that way you could go magazine fed. Oh well! Those days are over! At least there are still some parts kits left over – not exactly cheap, but then – cheap parts kits don’t exist anymore either.