Typically speaking, I don’t write about AR builds for a variety of reasons. I personally feel like the topic has been “beaten to death”, so to speak. There’s a literal crapton of articles and videos on them out there already. I think most of you reading this would be rather underwhelmed with such a thing. However, today I’m going to make an exception for a rather unique build.
I really like “Retro” ARs. Anyone who knows me personally will attest to the fact. What is a “Retro” AR you ask? I personally see them as the models of M16 and AR15 before the M16A2. You know, the ARs from the 1960s and in some cases the late 50’s. They’re lightweight, handy, easy to shoot, fun little rifles. To me, the more modern examples look too much like work. I guess if you spend enough time carrying one for a living, they’ll have that effect on you (though I must confess I do have a little soft spot for my issued M4). For a long time, the only options for these older model rifles were either an expensive pre-ban Colt SP1, or building the model you wanted from rather hard to find parts (if you wanted to do it right, anyway). Since I haven’t happened upon an SP1 I could afford, I built clones of the models I found interesting. Building “Retro” ARs is actually what got me into homebuilding.
But there was always one model that I couldn’t build because the parts were completely impossible to find. That was in part because it wasn’t actually an AR15. The rifle I really wanted was the original Armalite AR-10 from the late 50’s-the AR that started it all. There were a few examples built from extremely rare parts kits as semi-autos in decades past. But those and the parts kits were and are WAY out of my price range by the time I even became aware of their existence. Armalite actually did produce a retro-styled AR-10 some time ago. But in the 15 or so years since they released that model, I think I’ve only ever seen one example. So my “Retro” AR-10 idea was just that, only an idea.
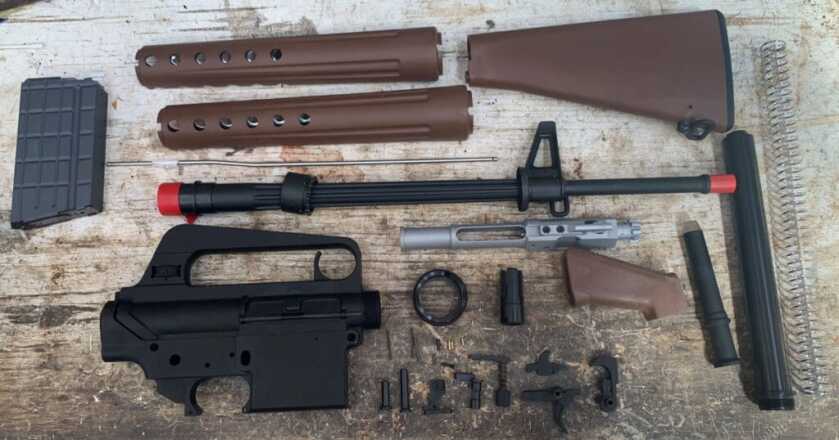
Then all that changed recently. Brownells produces an AR-10 that was styled like the original rifles from the 1950s. It’s called the BRN-10, and there are a couple of different variants they sell. But even better, they sell the parts separately. As a matter of fact, they have a whole line of retro AR rifles and parts if you’re after a different model. To be sure, these BRN-10 rifles are not exact clones of the original rifles. It was not practical to make the internal parts like the originals, so DPMS pattern parts are used in the .308 models. The lower receiver comes with a chunk of the lower parts, as they are specific to this lower and modeled after the original parts. The upper receiver comes with the charging handle, and the upper is only compatible with BRN-10 uppers, as are the lowers. The bolt carrier is DPMS compatible but cosmetically similar to the original. The handguard slip ring is here. The barrels are here, the furniture is here, and the flash suppressor is here, though all of these have a few options. Brownells also produces a proper retro magazine for their rifle. I’m not sure if these are intended to be limited production or not, so if you want to build a BRN-10 don’t wait!
I started this build by assembling the handguard slip ring components. The barrel nut was already on the barrel. So I needed to install the slip ring, spring, and snap ring onto it. It’s pretty straight forward, but it is a little tricky to get the snap ring in place. The handguards came with the heat shields separated, so I put those together next-which was just a matter of putting them in place and pressing the tabs into place.
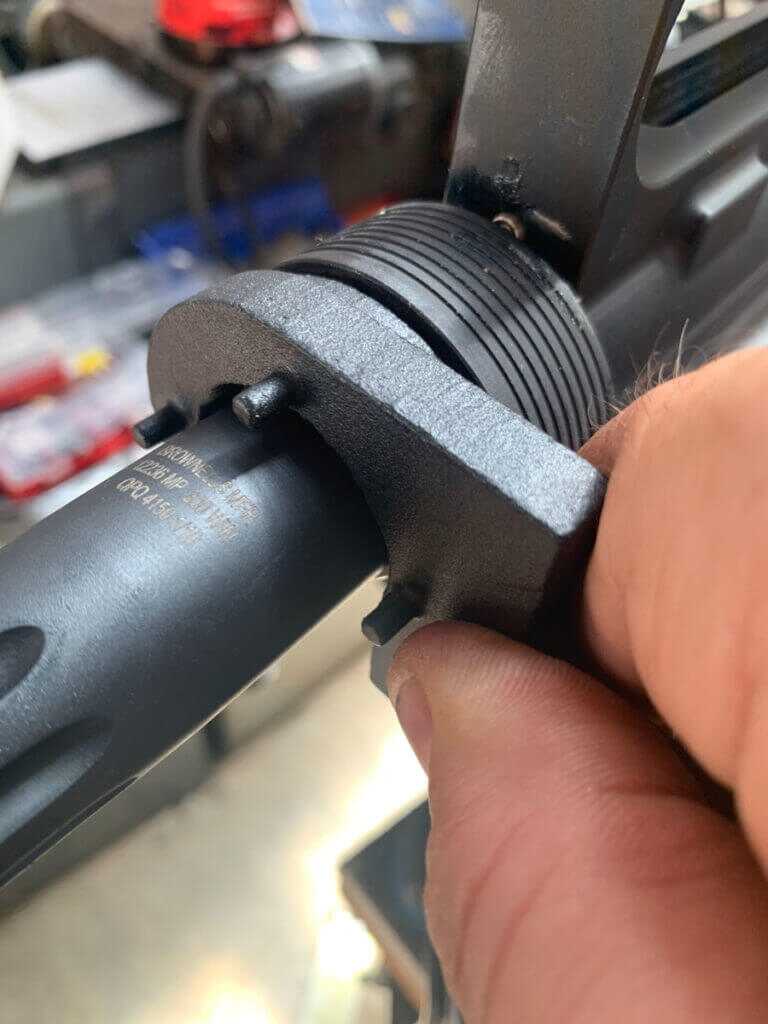
With that done, it was time to install the barrel. I always put grease on the barrel extension and the barrel nut threads to make it easier to tighten the parts, and more importantly to disassemble them later should the need arise. The upper receiver needs to be in some kind of a fixture intended for this task to ensure it isn’t damaged in the process. Then I use a barrel nut wrench and a torque wrench to tighten down the barrel nut. The torque spec calls for a minimum of 30 ft-lbs and most sources say a maximum of 80 ft-lbs of torque on the barrel nut. Typically, I find I need a fair bit more than the 30 ft-lb minimum to get the “teeth” on the barrel nut rotated to properly clear the gas tube. However, the barrel nut on this rifle had the teeth located out of the way of the gas tube entirely, so this was not an issue. I tightened it a little past the minimum spec (I don’t like to be at the absolute minimum torque). I screwed on the Flash Suppressor and tightened it down. Then I installed the gas tube and its roll pin.
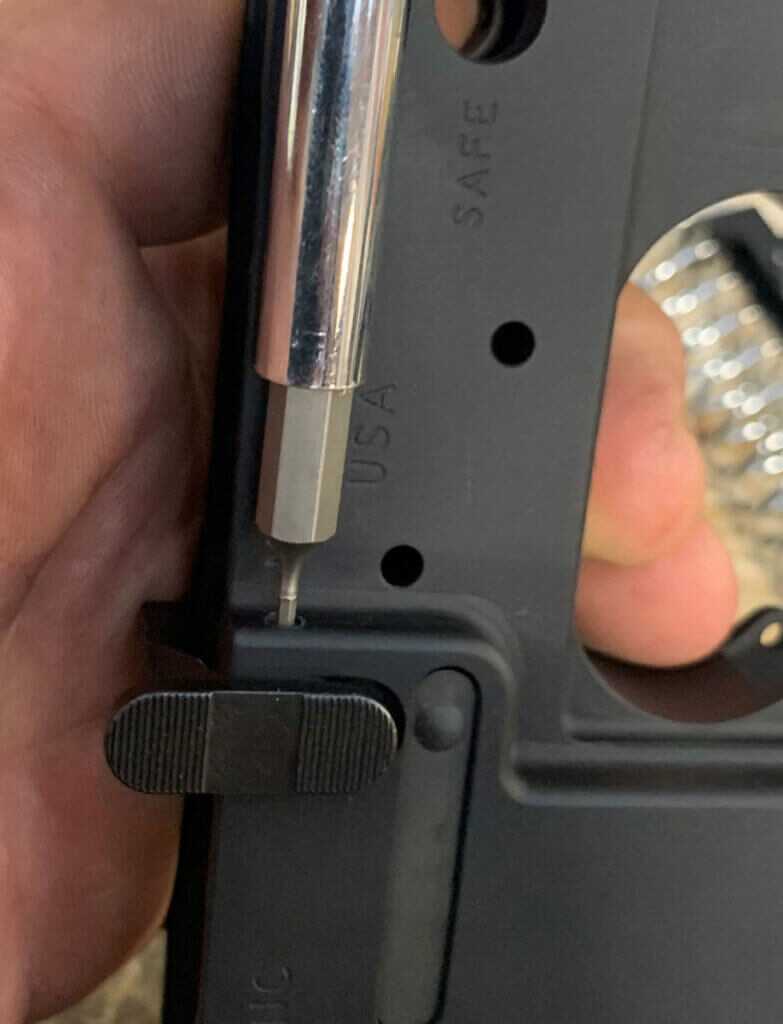
I began assembling the lower receiver by installing the magazine catch assembly. To do this, you install the catch on its side of the receiver and on the other you install the spring and button. Initially, the catch was pretty snug. But after applying some oil and moving it for a little bit, it loosened up to where it should be. Then I installed the bolt catch. It also has a spring and detent, which obviously has to go in place first, and then the catch goes into place. The bolt catch on these is held in place by a sort of “screw-pin” as opposed to the usual roll pin. The trigger guard is installed with a roll pin. Take care as you do this because it’s quite possible to break off the tab of your lower. I find it’s easier to put the roll pin in with the front of the trigger guard open.
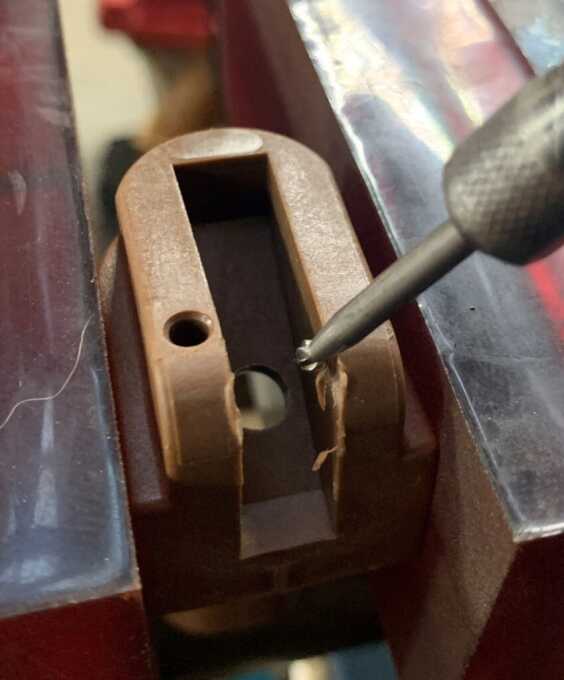
Next, I installed the Fire Control Group (FCG). The trigger, spring, disconnector, and its spring are put together, put into the lower receiver, and then the pin is installed. Then the selector is installed. The selector detent is installed and its spring goes into the hole on the top of the pistol grip. There is a difference at this point from the typical AR15 build. The rear takedown detent and spring go into a hole under the pistol grip, like the selector, instead of their usual spot on the rear of the lower. The pistol grip itself needed a little fitting to go onto the lower, but this is not terribly unusual. The pistol grip is held on by a special lock washer and a screw. Make sure your pistol grip screw will go all the way into its hole before you install the grip, as I have received lower parts kits that didn’t have the right screw.
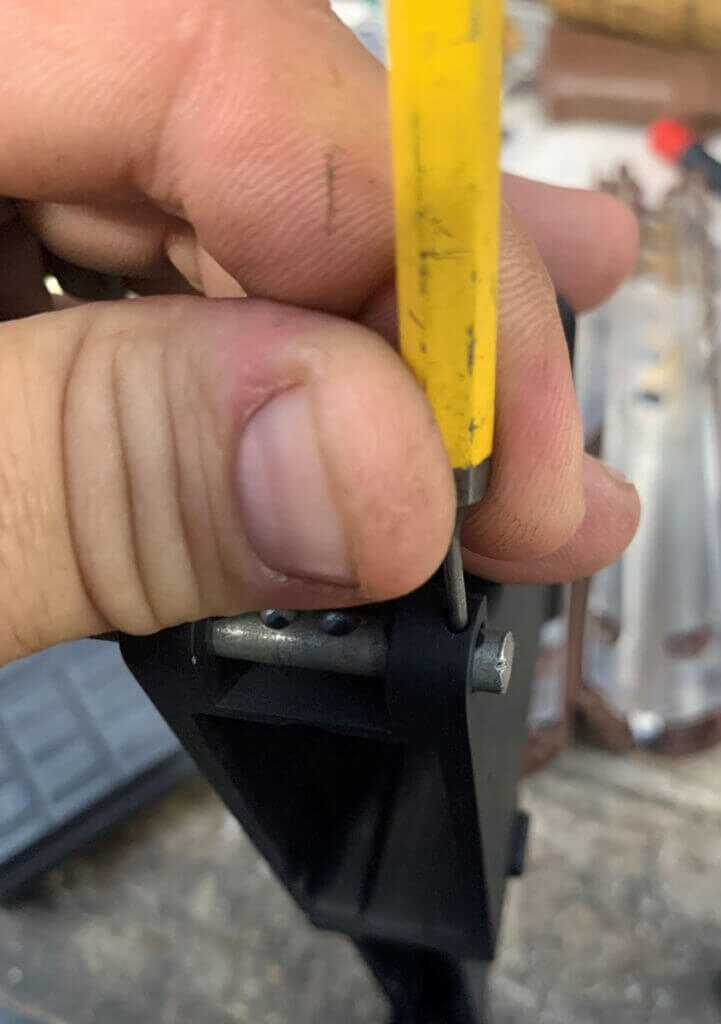
The front takedown pin, spring, and detent are a little tricky to install on any AR build. I have a trick for performing this task that you may find makes this job easier. I use a ¼” clevis pin like you can find at your local hardware store, as a slave pin and to help install the spring and detent. I slide the clevis pin into the holes for the takedown pin, in the opposite direction the takedown pin goes in. I rotate the clevis pin around until the end hole lines up with the hole in the lower for the spring and detent. Then I put the spring down into the hole and the detent on top of it. It will just sit there in the hole of the clevis pin. I use a 1/16” punch to push the spring and detent down into the receiver, and then I rotate the clevis pin so that the hole is no longer lined up. This keeps the spring and detent held in place. Then I carefully push the takedown pin into place, and in doing so the clevis pin is moved out of the way. The detent will go right into the groove on the takedown pin if it’s properly lined up. If it isn’t, just rotate the takedown pin until the detent clicks into place. Now your front pin is installed, and if you did this right you didn’t launch your pin. This takes considerably longer to describe than it does to actually do it.
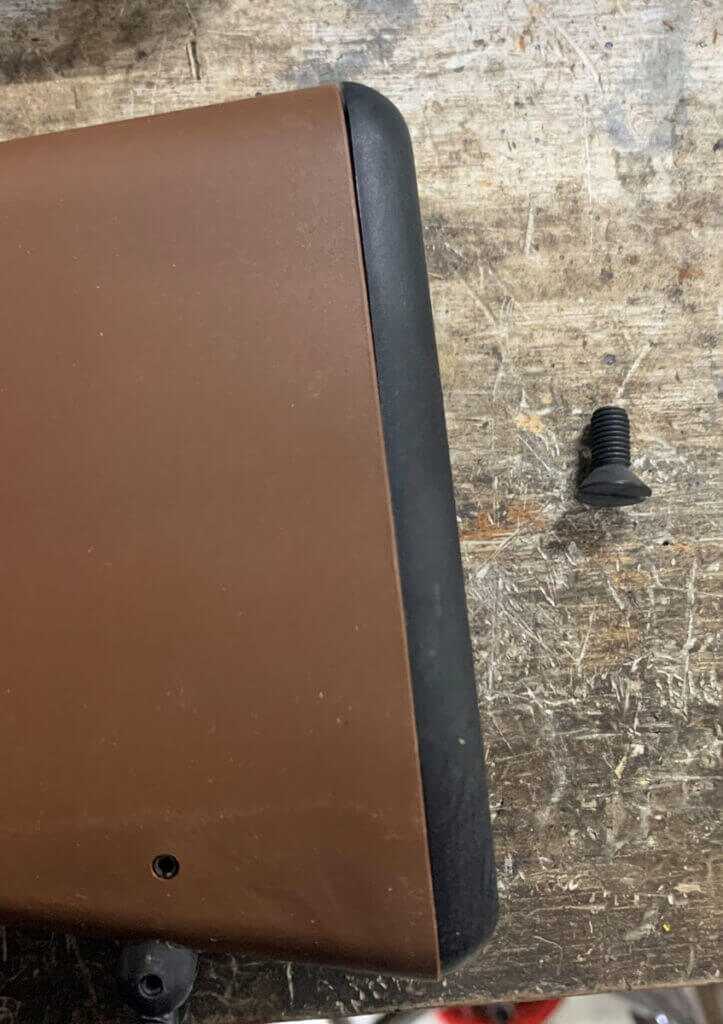
Next, I installed the buffer tube. The buffer tube retains the buffer detent and spring, and these parts need to be in place before the tube is screwed all the way in. Press the detent down and tighten the tube. Next, the stock is installed. Being that the stock in this build is the shorter A1 length, it does not have a spacer, and it uses a shorter stock screw. The stock from Brownells came with this screw. The stock slides over the tube and is held in place by the stock screw. Then it’s just basic assembly to finish putting the rifle together. I function tested it to make sure it was working properly.
After I function tested the rifle, it was time to test fire it. I have a specific procedure for test-firing any new build. First, I fire one round. The bolt should lock to the rear after it’s fired on this build. I check the casing for any signs of a problem. If it’s good, I fire two rounds. If the rifle cycles like it should and the casings look good, then I fire three. The idea here is that if there is a problem in the rifle that would cause it to fire multiple rounds, you only have a couple of rounds in the magazine when it happens rather than a full magazine. If it fires all three of those without issue and the casings all look good, the rifle is safe to shoot.
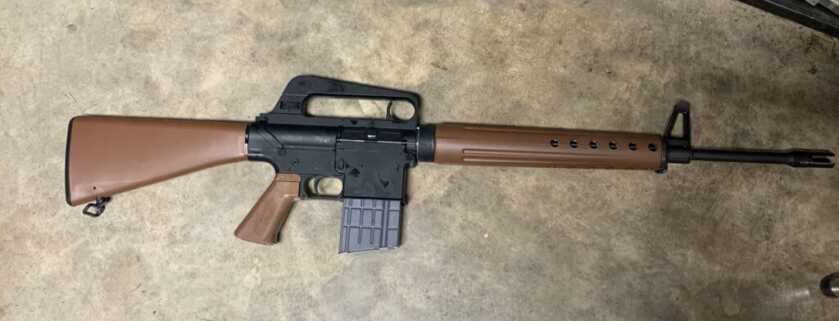
“Retro” ARs are neat rifles, and very interesting to research and build. Brownells did a really good job creating their likeness of the original AR-10. While it’s not an exact clone, it looks right in the right places and the internals are compatible with easy to get modern components. You can buy a complete BRN-10 rifle from them, should you prefer. But then you don’t have the fun of putting one together. Until next time, Happy Building!

Very disappointed with Brownels. I was pricing the parts. $805 without the BCG. Then to find out that the BCG has been discontinued.
Priced everything out yesterday. And wanted to think about it over night, came back today to order from Brownell’s, in one day they priced almost all the parts at more than double to put this build together yourself, you might as well pay them for a ready built rifle now, it will cost you almost the whole amount now to put it together yourself. Oh well knew it was to good to be true. The dishonesty of some companies. You would think it was 9mm ammo or somethin.
I like the article. I ordered my parts a few minutes ago.
I believe the BEST technique, not the only one certainly, is to torque the barrel nut with the upper receiver, by a splined shaft inserted into the breach’s barrel extension.
Companies are building them and they aren’t that expensive. Geissele Reaction Rod comes to mind. Even mag pul came up with a tool that doesn’t just grap the takedown pin holes but actually locks into the barrel extension splines. In my mind, all upper receiver work revolves around holding the steel barrel tight while adding aluminum parts to this foundation. Now think about a composite barrel, like an original AR-10 or 21st century carbon/kev barrel.
Nice, concise article, the way I like them, for me who also likes the originals, but, you left me hanging at, “…got me into home building.” Would like to hear that story.
Well If you’re interested, I’ll oblige.
I always wanted an M16A1 and a CAR-15 with the short barrel/long flash suppressor setup. 10-15 years ago, no one was then producing any such animal of either type-or at least not correctly. So the only options were all pre ban Colt SP1s(which still lacked the forward assist that an A1 should have) or a few other similarly priced pre-ban models. The E-4 pay I was receiving at that time wouldn’t allow the cost of those(that would’ve been a LONG time living off of ramen noodles!!).
So I started looking at what I could do to piece them together. First, I found an M16A1 upper half(less bolt carrier) and had a local ‘smith finish it out for me(this was before I started doing this stuff myself). AR parts weren’t as cheap or available then. So it was expensive, but I was happy with what I got.
Then I took this precision rifle class and needed to “borrow” the lower to use on a special upper for the rifle in that class. Again this was before $40 lowers were a thing. After the class I really liked that rifle so I decided that I’d keep it and find another lower to re-build my A1. I kept all of the lower parts that were A1 specific, so all I needed was a lower.
At the same time, I found a stripped A1 upper for my CAR-15 project. It was at this point I figured out that I needed to be a bit more specific if I was going to be happy with it. So I decided on an XM-177E2.
At that time, I had just PCS’d to Fort Campbell and was going to deploy for my 3rd tour in a few months. This was fall 2007, and I knew we were going for 15 months(and I wasn’t entirely convinced it couldn’t be longer, given my previous experience) Obviously 2008 was an election year, and I wasn’t really sure how that was going to go. The AWB was still pretty fresh in my mind, so I decided to buy a couple lowers so that my builds would be “pre-ban” just in case a new ban was imminent and I couldn’t find any lowers when I returned from the middle east.
I scrounged most of the rest of my parts off of ‘net for the XM while I was over there. Miraculously, someone actually made a lightweight 11.5” barrel assembly for a brief period around that time(I think it was CMMG). So I came home in late 2008, and my parts were waiting. One particular evening I got a wild hair and decided to put my lower together for my A1 myself rather than pay someone else to do it. It went pretty well(especially considering I had few few tools to speak of) and I was hooked. Then some time later, I figured out how to permanently attach the FH and install the barrel(the A1 already had this assembly done).
By that point I was “short” (meaning not much time left in the Army, for those of you unfamiliar). I didn’t really have a solid plan going forward. Then I thought, “man, it would be cool if I could make my own parts rather than have to wait on someone else for them.” That’s how I got the idea to go to school for machining. As they say, “the rest is history.”