Just a few years ago, the idea of an 80% receiver that you could complete in a home shop and build into a firearm was an unknown concept to most shooters. Now there are a variety of different models available in such a format, with all sorts of different options, and different difficultly levels to complete. The Kalashnikov is no different in this regard. The design of the AKM and its derivatives lends itself to the home builder, as it was designed to be produced en mass with as little sophisticated manufacturing as possible. As homebuilders, we are predominately interested in the receiver, it being the actual “firearm”. With the AKM type rifles, the receiver is basically just a bent piece of sheet metal.
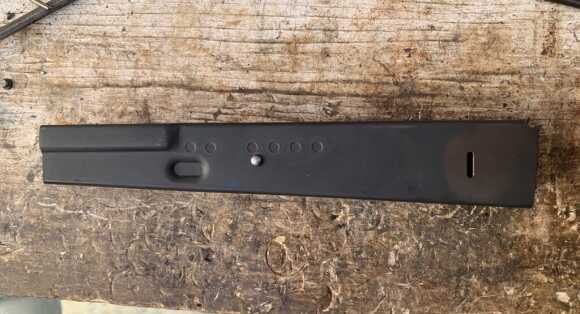
Until recently, anyone wanting to build an AK from something like an 80% receiver really only had one option, a flat. Honestly, if you have a little bit of metalworking experience, a flat is not a bad option. But it requires a few things that a novice homebuilder might be intimidated by. Bending the receiver in and of itself can be tricky. Also, the general consensus is that the receivers need to be hardened to some degree, or at least in a few critical places. There are a lot of things that can go wrong trying to heat treat a piece of sheet metal that needs to keep its shape. Recently, pre-bent, pre-hardened 80% receivers have become available. Basically, this just leaves the holes to be drilled, which requires a lot less tooling to accomplish.
For this particular build, I wanted to show that you don’t need a bunch of machinery to complete an 80% receiver and build a rifle. So I used a drill press (specifically because drill presses are quite inexpensive) for the receiver work, and a 20-ton hydraulic press for the assembly work. However, if you’re using a new barrel, that hasn’t been pre-headspaced, you’ll need a vise for your drill press to properly drill the barrel pin hole. Since I was attempting to put more emphasis on the receiver completion, I summarized the rest of the build procedures. Those details are in previous AK build articles I’ve written for GunsAmerica (and will also likely be in future build articles), should you want that information.
For this build, I’m putting together a Yugoslavian M72 RPK clone. The M72 is essentially their idea of an RPK, itself the squad level light machine gun. Basically, the RPK is an AKM with a longer, heavier barrel, a bipod, and a beefed up receiver and front trunnion. This was done to allow the weapon to deal with the higher heat from the higher rate of fire. The Yugos took a little bit different of an approach with their AKs in general. All of their AKs used the RPK style thicker receiver and front trunnion. The M72 had a unique cooling fin on the barrel and a heavier profile than other RPK variants. If you served in a combat capacity in Iraq, you probably have seen an M72. They were relatively common in theater, as were Yugo AKs in general. The Iraqis also had assistance from Yugoslavia in producing their own AKs and produced an M72 copy called the “Al Quds”.
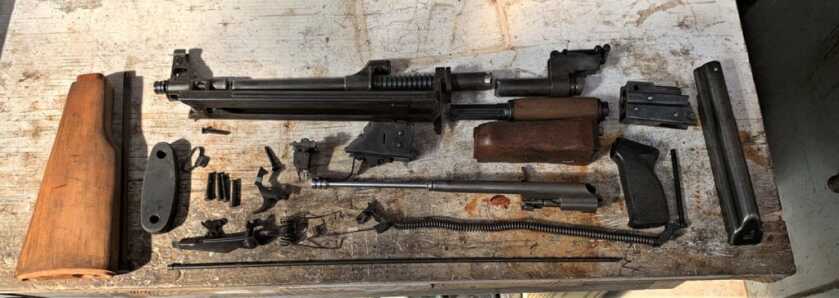
For the build itself, I used an M72 parts kit that I obtained some time ago from APEX Gun Parts though, at the time of this writing, they are sold out. These parts kits are also available from Numrich for $312. For the receiver, I used an 80% pre-hardened blank. But the particular place I got it from said they do not have any of these available at this time. Childers Guns also has a similar 80% blank in the Yugo pattern available. I bought the receiver blank drilling fixture and the trunnion hole drilling fixture from AK-Builder. I used an original barrel that I bought in a bunch of other parts some time ago. New, US-made barrels are available from AK-Builder.
A quick note on the legal issues is in order before we proceed. Like always, make sure you comply with all federal, state, and local laws and regulations if you attempt a build like this one. Also aside from the obvious NFA rules, you must also be in compliance with 922r. 922r states that certain rifles may not have more than 10 foreign-made parts off of a specific list. Because of that, it is necessary to replace enough parts on the list of counted components with US-made parts so that you have no more than 10 foreign-made parts on the list. Fortunately, there are lots of US-made AK parts of all different shapes and sorts, so it is not particularly difficult or expensive to meet this requirement. Do some research and make sure your build is legal where you live before you begin.
First, the old receiver and barrel stubs must be removed from the parts. While a bit tedious at times, it is pretty self-explanatory. So I’m not going to go into a bunch of detail of it. Basically, you remove the pins from the barrel components and press out the remnants of the old barrel. You also drill out the old rivets and remove the old receiver pieces.
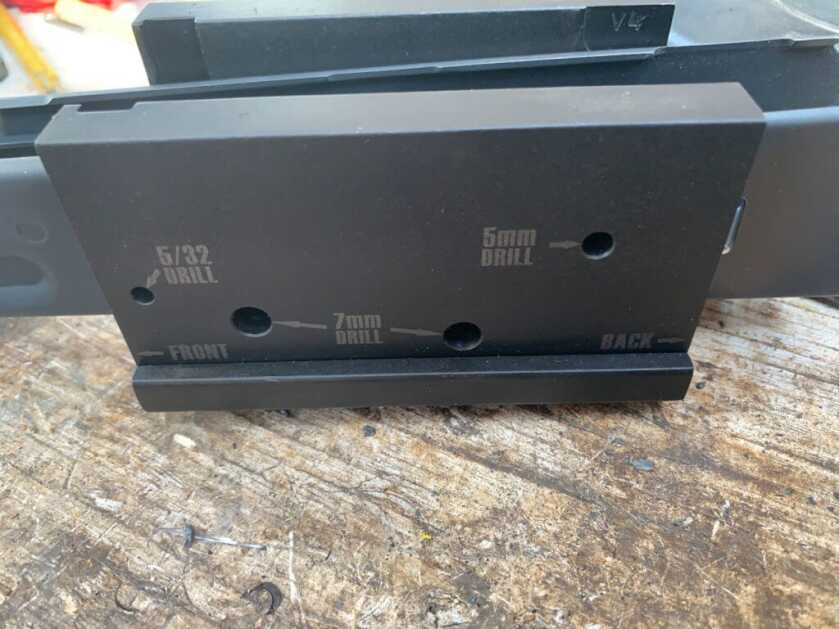
As I mentioned earlier, I used an 80% receiver for this build. So the next step was to complete it. I used the AK-builder drilling fixture to drill the FCG (Fire Control Group) pinholes and the selector holes. The drill bits are all provided, though you won’t use them all for this type of receiver blank. An aluminum block is provided in the kit to put under the fixture while you are drilling, to ensure the fixture sits flat. There is a thin steel place that is also provided. It slides into the receiver on top of the rails to support the receiver while you drill the holes.
The holes are not intended to be drilled straight through both sides, but from each side separately. This is especially important with the FCG pinholes, as they are 7mm on one side and 5mm on the other (if you look at the pins in your kit it’s pretty obvious). Next, I drilled the holes for the selector. There are two on one side and one on the other. After the selector holes are drilled, there is a small web of material left between them that needs to be removed. I used a 1/8” endmill to machine out the majority of it, and then I finished it up with a file. All in all, I highly recommend this fixture. It is REALLY easy to use.
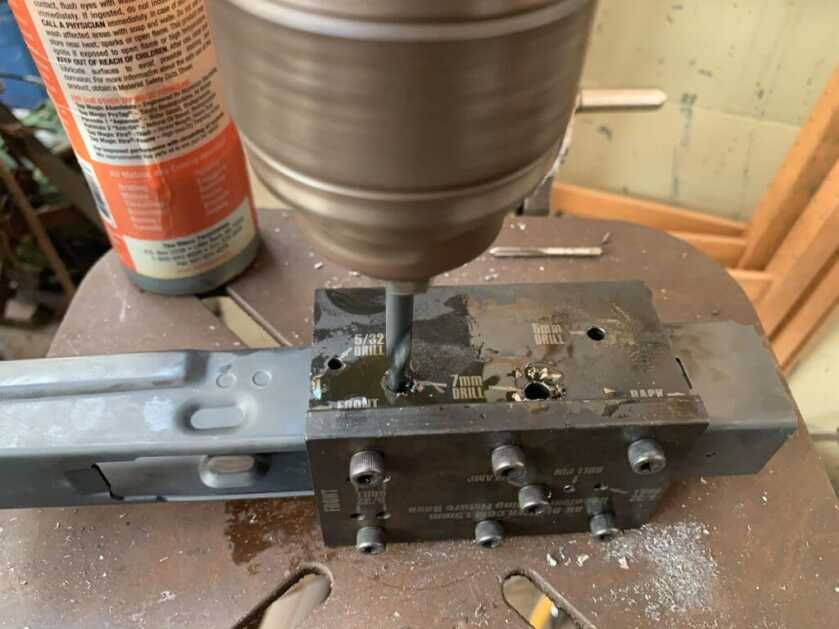
Next, I needed to drill the holes for the front and rear trunnion rivets. I used the Trunnion drilling fixture from AK-Builder for this. This fixture is intended for use with a milling machine or drill press. I used a drill press, in keeping with the theme of not using a bunch of expensive equipment. How this fixture is intended to work is that the trunnion is put on the fixture, line up the hole to be drilled, and then the receiver is slid on and the hole drilled.
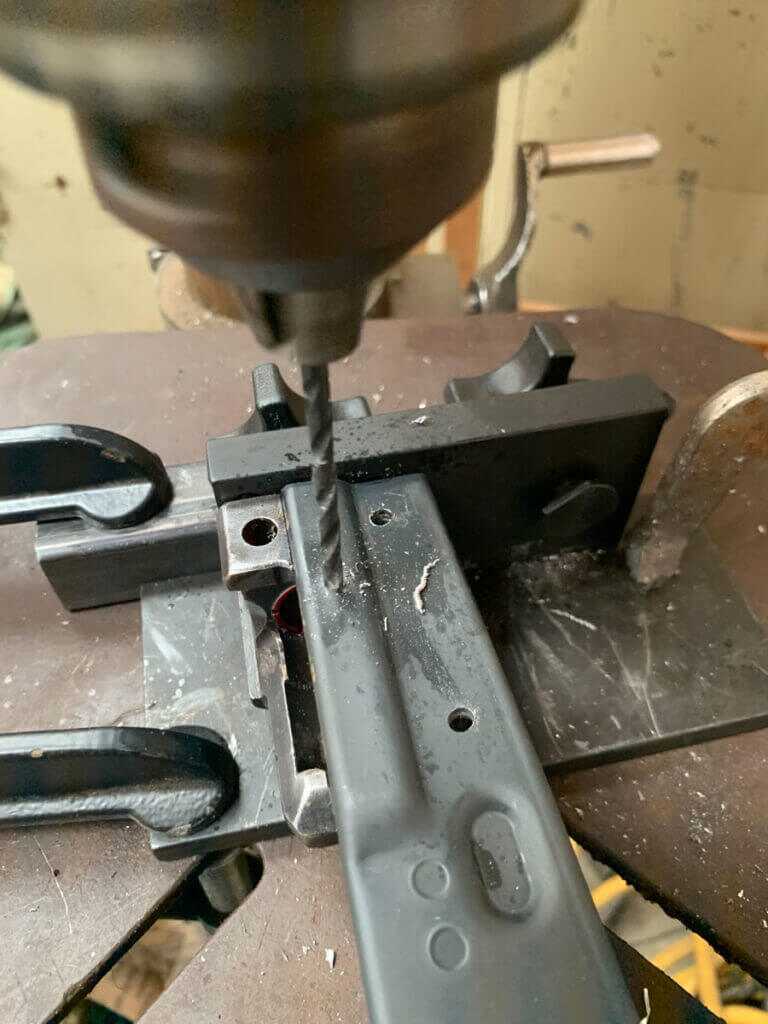
Obviously, you need the receiver to slide on and off fairly easily for this to work well. My particular receiver and front trunnion fit together a lot tighter than that. We are dealing with bent sheet metal after all. I’m going to describe what I did to deal with this, as I think it’s a reasonable possibility when performing a build like this. I did some fitting, to where it would go on with some pressure. Unfortunately, I didn’t feel like I could get it to come off so easily without removing an excessive amount of material. So, I clamped a piece of steel tubing behind the fixture, to help keep it in place against the extra force from putting the receiver onto the trunnion. This is in addition to clamping the receiver to the drill press table already. Then after drilling the hole, I loosened the fixture and took the receiver and trunnion completely off when it was time to take the receiver off of the trunnion.
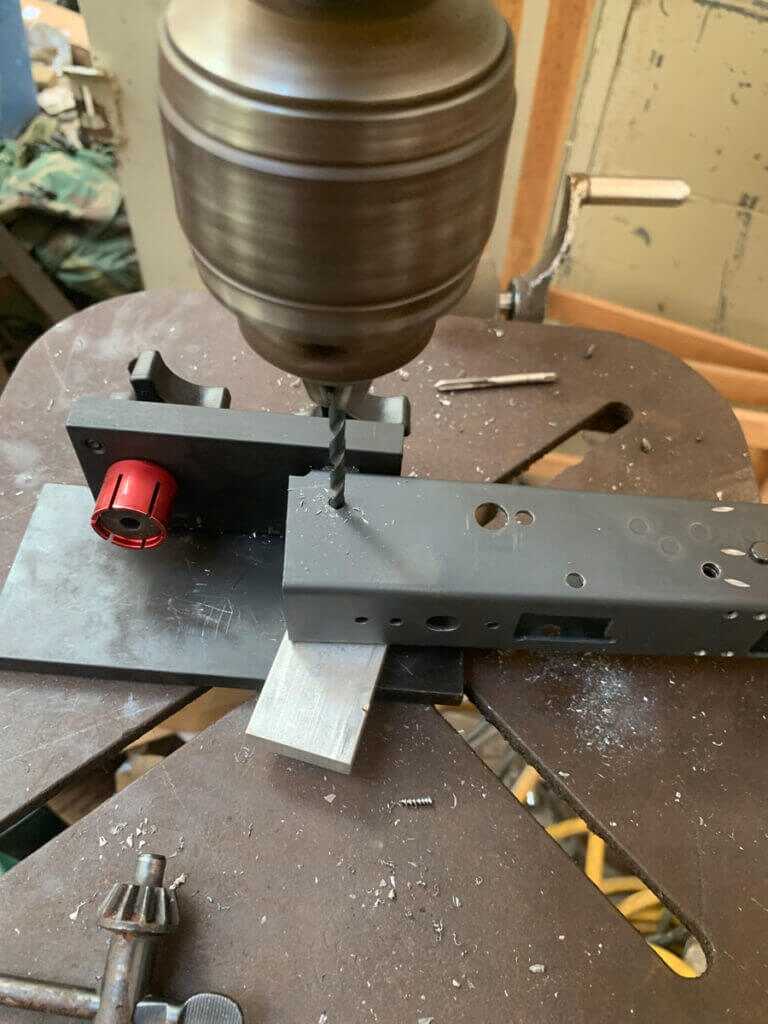
Fortunately, the rear trunnion fit very nicely. I was able to drill those holes in the manner they were intended. The provided instructions suggest that you should drill these holes all the way through. That’s exactly how I drilled these holes. I made a mistake when I forgot to put the aluminum block under the receiver when I drilled one of the holes. The whole thing shifted slightly and my hole was misaligned. I had to weld that hole closed and re-drill it. So, don’t forget the block! The last thing you need to do to complete the receiver is to fit the ejector. Carefully remove a little bit of material at a time until it fits the slot in your bolt and bolt carrier.
Once the ejector is fitted, the rest of the build is similar to any other AK build. Since I was using an original barrel, I already knew where the components would go on. I simply lined them up and pressed them on until the slots in the barrel for the pins lined up with the pinholes in the parts. I use anti-seize whenever I install press-fit parts in order to help them go on a little easier, and off easier if needed.
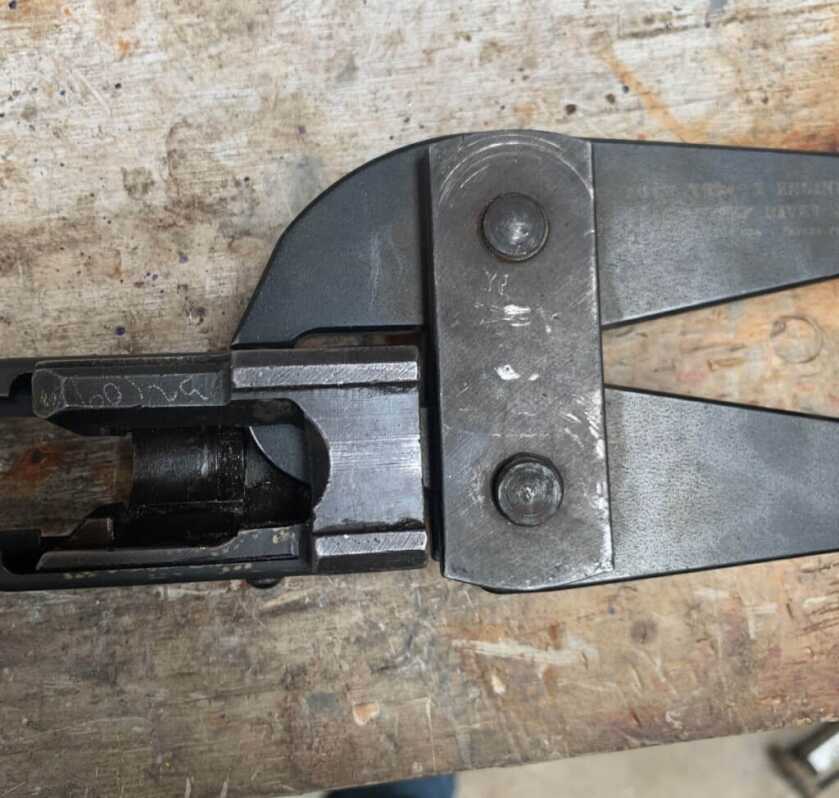
Before the barrel is installed, the front trunnion must be riveted into the receiver. The M72 trunnion is installed in a similar manner to most any stamped receiver AK variant. The one thing that is a little different is that there is 1 long rivet used along with the short rivets-instead of just short rivets. A lot of times, I’ll rivet the trigger guard in place at this point in the build. However, I do not recommend that for this or any other Yugo type build. I always wait to rivet the rear trunnion in place until the barrel has been installed because if you need to press it back out its much easier to do so without it. With the M72 and other Yugo models, there is no pistol grip nut per se. There is a plate that serves this purpose. It gets riveted on the receiver, under the back of the trigger guard. The last rivet in this plate also goes through the rear trunnion (which in typical Yugoslavian fashion is itself quite a bit different from a standard AKM). So given all that, it’s much easier to wait until the barrel is pressed in before proceeding with any more riveting. I’m passing this on so that you save a little aggravation that I had when I figured this out. Fortunately, I have extra rivets.
As I mentioned earlier, I am using an original M72 barrel for this build. But, it did not come with this kit, and hence was not specifically headspaced to my bolt and trunnion. I figured that I would press it into place and go from there. In this case, all I really had to do was make sure it was straight and press it in until the slot in the barrel for the barrel pin aligned with the hole in the trunnion. Not terribly difficult, but still some care is required. Once the barrel was in place, I checked the headspace. Fortunately, it closed on the GO, but not on the NO-GO-just like I’d hoped it would. So I pressed in the barrel pin. If you were building a parts kit with a barrel that had already been headspaced (such things do exist), you would basically do what I described (always confirm with GO and NO-GO gauges). If you’re using a new barrel, you’ll obviously need to machine the hole for the barrel pin.
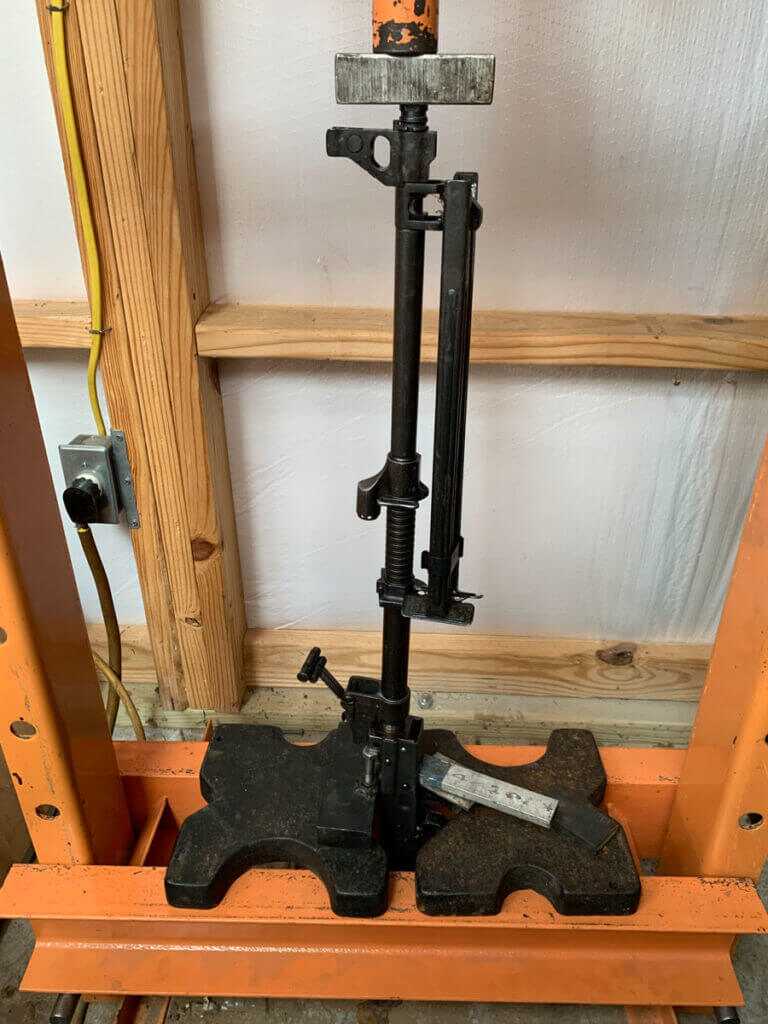
With the barrel installed, I installed the rear trunnion. It has 2 long rivets through the sides in typical fashion and one short rivet that passes through the plate on the bottom I mentioned earlier. There is a slot on the left side of the receiver. This is for the rear sling mount. Some kits do not include this part, and some do. It has little tabs that you put through the slot and bend outward. After that, the furniture, FCG, and remaining parts are installed. Now the rifle is complete and ready for function testing.
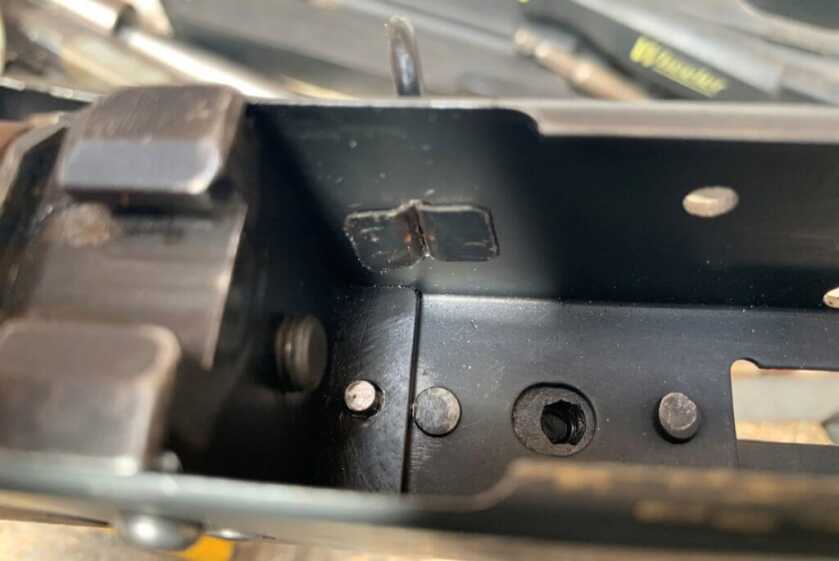
The last things to do are function testing and test firing. I say this every time I write about a build because this is extremely important. Before putting any live rounds through a new build, a function test needs to be done to ensure that the FCG is working properly. I also run a few dummy rounds through as well to make sure the rifle will properly. Once that’s done, its time to test fire the rifle. Do not just load a full magazine into your untested rifle! Load and fire 1 round. Then check the casing for any abnormalities. If everything is good, fire 2 rounds and check the casings. If everything looks good, fire 3 rounds and check those casings. If you get through that without any problems or oddities, you’re probably safe to proceed with normal firing.
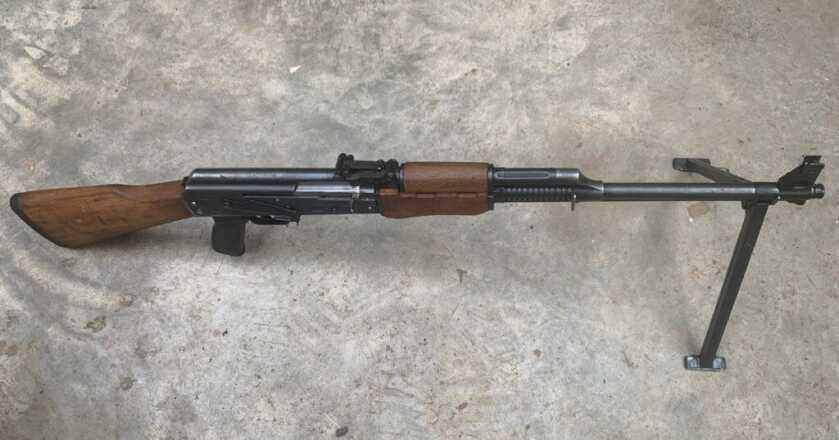
As you can see, it is quite possible to build an AK from an 80% receiver without a lot of equipment. It does not require a whole lot of special skills to do either. Hopefully, this will inspire some of you would-be AK builders to give it a shot. Until next time, happy building!

I build to gain experience, its not a cost thing its a; can I gain useful knowledge and understanding that may be useful later. If you just want to buy a AK then that is the right path for you. I love to build not just firearms but anything I can. Gaining more and more knowledge that is stored between my ears comes in handy for many other times. Knowledge is the only thing that you can take with you, and no one can take that away.
This is a thing from the past maybe 10 years ago or longer ago. Parts kits are costing almost as much as a built rifle now. Try and find or buy a parts kit and then purchase a barrel and all the little things needed to assemble this along with the tools that are needed.
Seriously, are you not aware of the reasons MOST (not all) people build instead of buy?
In fact, I’ve found that you can get a screamin deal on a built rifle, but money isn’t the main reason people do the build.
Why do a build when you cant get parts, good information but kind of useless
Numrich is showing kits in stock, Childers is showing receivers available, and AK-Builder is showing barrels and FCGs available. Not sure what parts are unavailable for this build.
From a Philosophic and even a common sense P.O.V., Knowledge is NEVER “useless”.