Originally, I set out to build an upper solely to test the Bergara 20” AR-15 barrel so I was not looking to spend a ton of money on a new handguard. After a failed start using a free float tube that I got on sale, I was on the hunt for something that was affordable, free floating, and modular. There’s no shortage of cheap free float rails for the AR-15 but you just don’t know what you’re going to get from those companies. My searching led me to Aero Precision and their ATLAS S-One free float rail that appeared to check all the boxes in my list of criteria for what I was looking for. It was made by a well-known company in the industry, it was lightweight, free-floating, modular, and best of all it was inexpensive at only $110 from an online retailer.
The ATLAS S-ONE 360
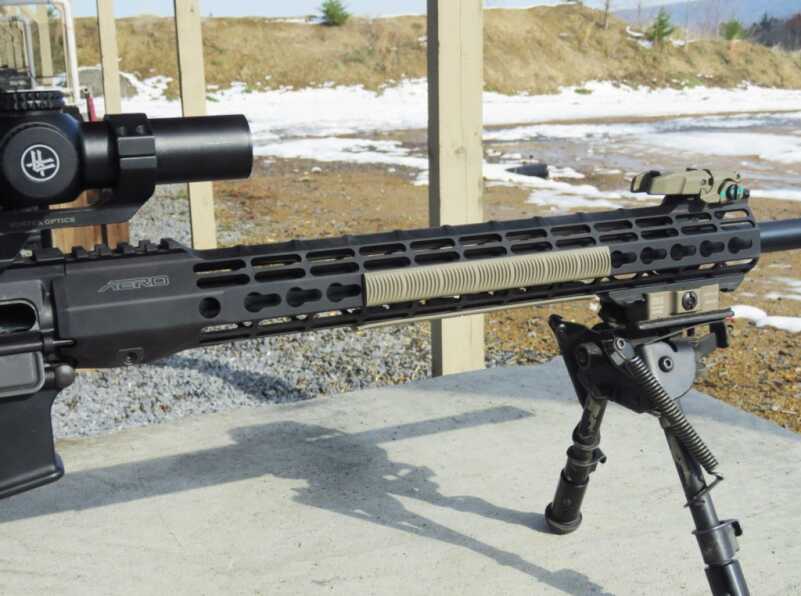
I’m not sure if S stands for slim but this is one skinny handguard with an outside diameter of 1.5” and weighing a scant 12.41 oz for the 15” KeyMod version that I have here. Constructed of 6061-T6 aluminum with either a black hard coat anodized finish or a Cerakote FDE finish, there’s no doubt this handguard can stand up to what you throw at it.
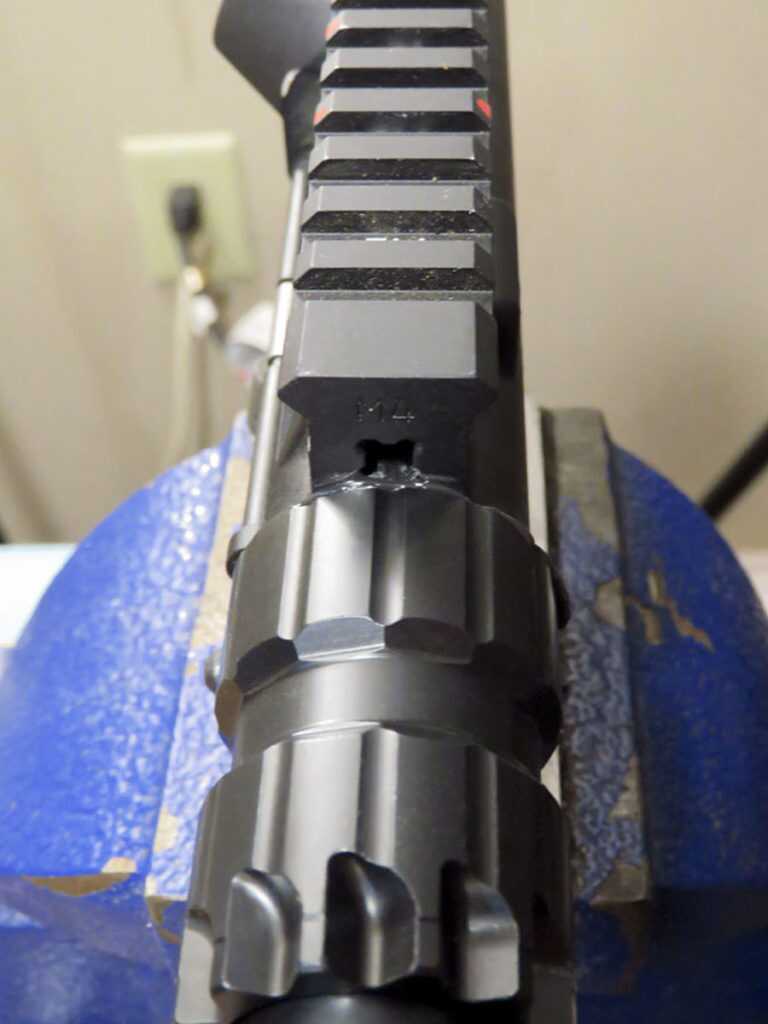
Attachment points for modular accessories are at the 3, 6, and 9 o’clock positions and the top of the rail has Picatinny rail slots for iron sights or other accessories at the extreme front and extreme back end. In between those rail sections, the S-ONE has a slanted top with ridges for easy indexing, in fact, it wouldn’t be too hard to put some skateboard tape up there for more traction too. One thing that caught my eye when I was checking out this rail was the anti-rotation feature and where some handguards have little nubs of aluminum, the S-ONE actually slides back over the receiver. This not only makes for a slick looking setup but it’s also incredibly robust so there’s practically no chance of it failing. Unfortunately, the way that it slides over the receiver means that most billet upper receivers may be too wide to accept the rail.
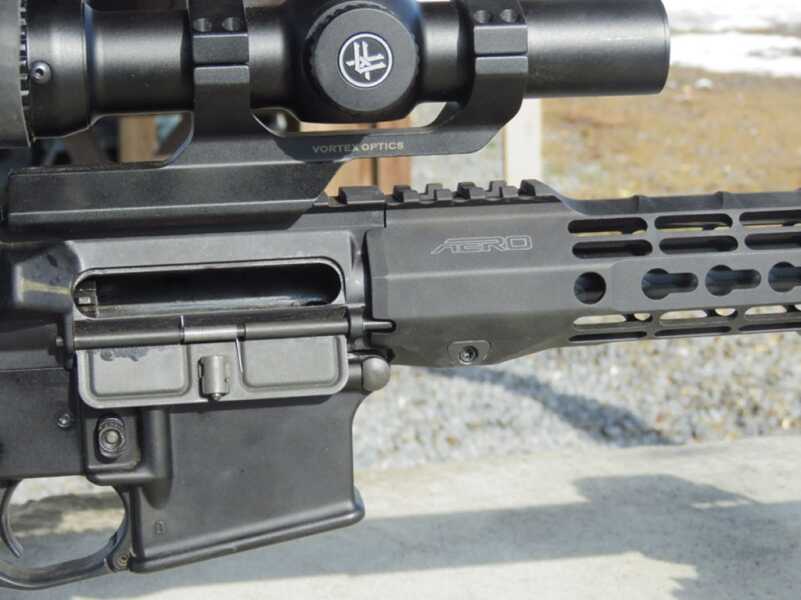
The handguard comes back over the receiver to prevent unwanted rotation. Just forward of the barrel nut are QD sockets at the 3, 6, and 9 o’clock for a sling.
| Specs | |
| Manufacturer Origin | Made in USA |
| Attachment Type | KeyMod and MLOK available |
| Material | Machined from 6061-T6 aluminum |
| Finish | Anodized Black or Cerakote FDE |
| Actual Handguard Lengths | 7″ – 7.25″, 9″ – 9.19″, 12″ – 12.56″, 15″ – 14.94″ |
| Weight(s) | 7″ – 4.76 oz / 9″ – 5.34 oz / 12″ – 6.81 oz / 15″ – 7.69 oz |
| Other | – Mounting Hardware Weight: 4.72 oz |
| MSRP | $119.99 |
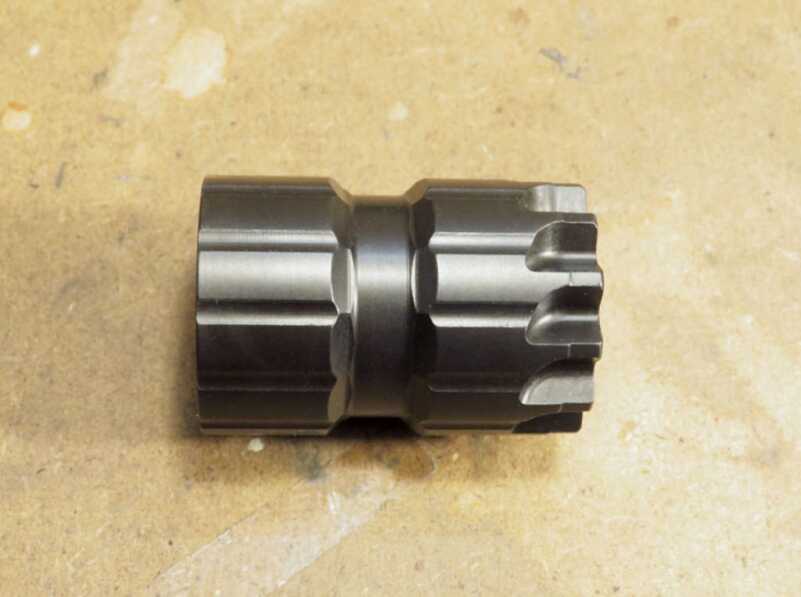
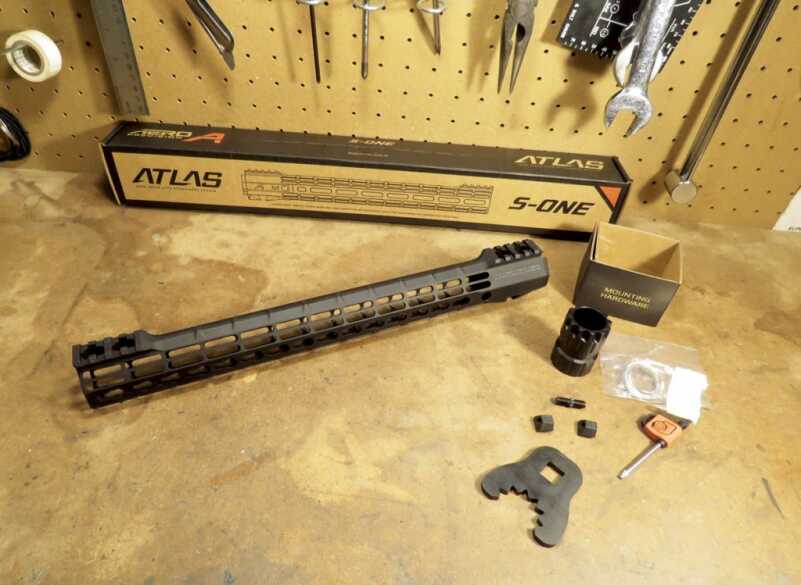
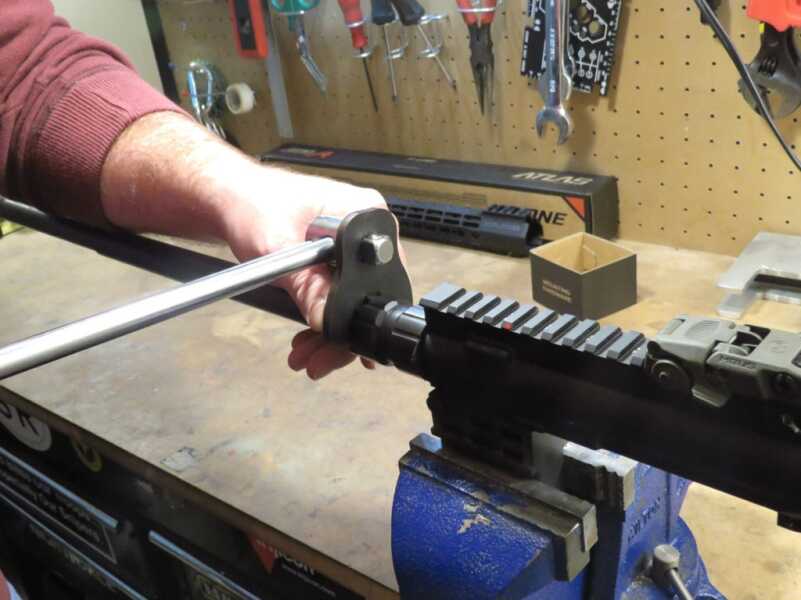
The barrel nut is proprietary to the ATLAS system but Aero Precision provides a barrel nut wrench in the box.
Now, ATLAS is actually an acronym, the tactical world loves acronyms, which stands for Aero Taper Lock Attachment System and it’s actually pretty cool. In a nutshell, two tapered nuts clamp onto the proprietary barrel nut by way of a turnbuckle screw to provide even pressure and no distortion. A ratcheting index pin keeps everything properly indexed during the install and works as an added measure of security to prevent loosening up over time. The mounting system is specific to ATLAS but Aero Precision was thoughtful enough to give you everything that you need to do the install, except instructions. That’s right, I opened up the box and found no installation instructions but having assembled a few AR’s it wasn’t hard to figure out what went where. That being said if you feel like you need some help Aero Precision does have instructions on their website, located HERE for installing the S-ONE. To be perfectly honest, I was quite surprised by the amount of engineering that went into this rail considering its street price.
Installation Notes
While the ATLAS S-ONE was incredibly easy to install, even without the directions, I felt that there were a couple of things I should point out. First, the barrel nut, while low profile, is not exactly index free, you still have to get the grooves on the nut to line up with the hole in the receiver for the gas tube.
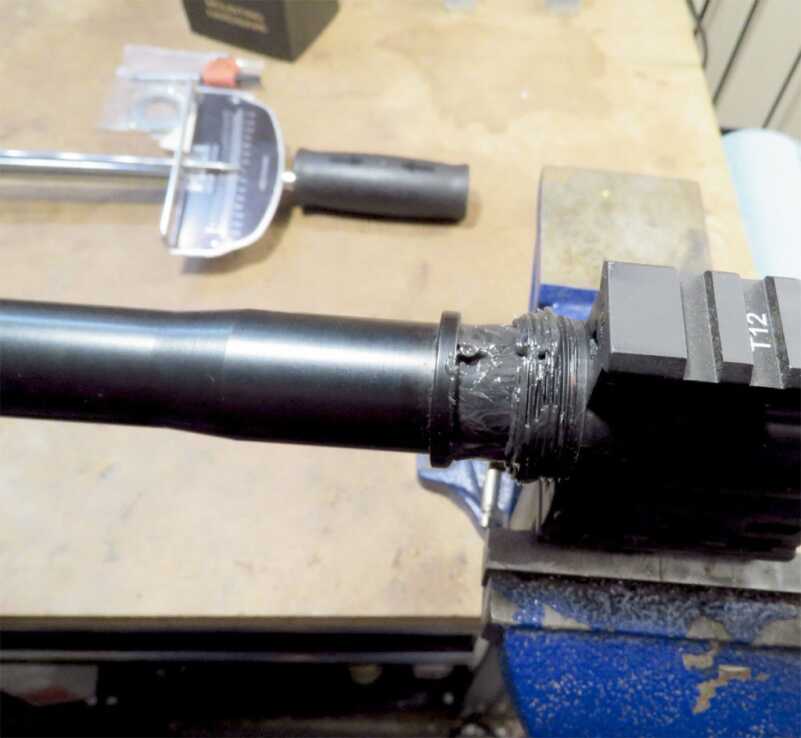
It’s advised to grease the receiver threads, preferably with moly lithium grease (sans graphite), when installing the barrel nut to prevent galling.
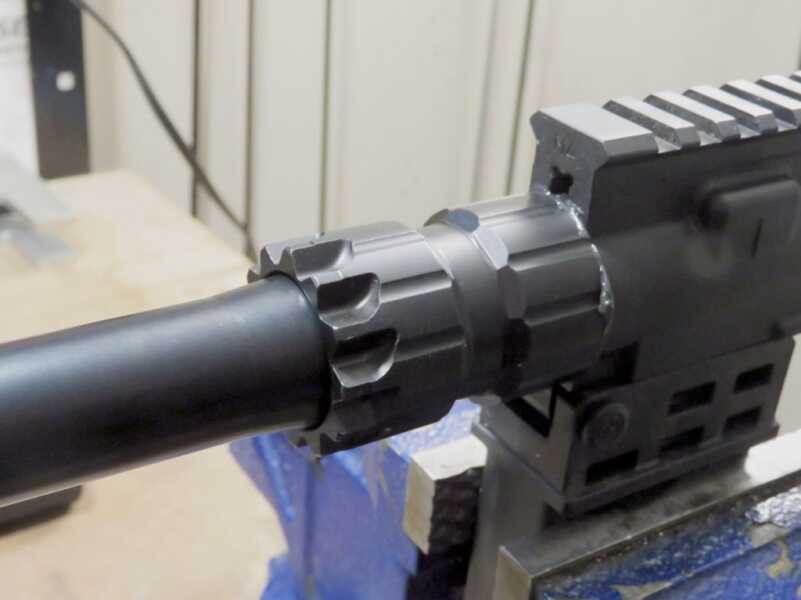
The barrel nut is substantial and lends plenty of support to the handguard to reduce deflection and prevent unwanted contact with the barrel.
Aero Precision provides shims if you need help getting the barrel nut timed but I had no issues getting the groove aligned with about 45 ft/lbs of torque.
Inside the rail, the gap for the low-profile gas block is pretty tight, probably less than 1/8″ on either side so you need to be conscious of your gas block alignment during installation. Lastly, when installing the taper lock nuts you need to be sure the geared portion of the turnbuckle stays centered up in the groove with even space on both sides. There’s no specific torque value for the turnbuckle screw shown but if everything is installed correctly the taper nuts will be flush with the sides of the rail.
Modularity
Although the KeyMod method of attachment has fallen out of favor with some users, that’s ultimately the version that I went with for this upper. To be honest, I chose KeyMod because I have quite a few KeyMod accessories already so it made sense to go that route instead of buying certain items all over again. It also allowed me to set the handguard up in a few different configurations to see how different accessories influenced the feel and utility of the handguard.
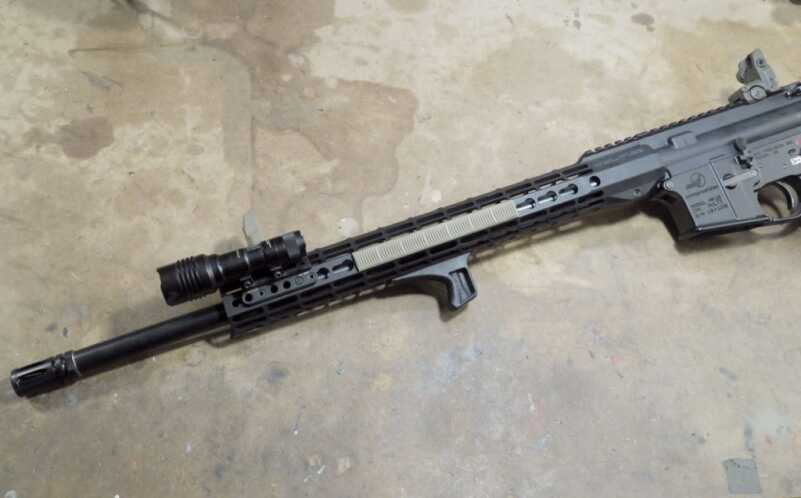
Being a modular handguard, the S-ONE is easy to set up in multiple configurations for long range, self-defense, and other situations.
Set up to run slick with just rail covers and iron sights the rifle felt pretty light and nimble, in spite of the heavy profile 20″ barrel. Adding a Streamlight weapon light and BCM KAG created a do-all rifle upper that could handle just about any situation you might find yourself in. Each accessory seemed to have a different KeyMod compatible keeper and yet they all went on without any drama. The Ergo rail covers that I used were also very nice and provide a textured surface for a secure grip regardless of the situation or shooting position.
If KeyMod is not your preferred attachment method then fear not for the ATLAS S-ONE is also available with MLOK compatible slots at the 3,6, and 9 o’clock. The MLOK version of the rail also only weighs about a quarter ounce more than the KeyMod version of the same length.
Range Time
The testing of this rail dovetailed into the testing of the Bergara AR barrel that I had, which allowed me to evaluate the ergonomics of the handguard during live fire and how it handled heat transfer.
When I first saw the amount of clearance between the rail and the gas block, I admit there was some concern that there could be some interference. Throughout all of the rounds fired though, there was no observed rubbing or contact between the inside of the rail and the gas block. This should be reassuring to those that might be loading up a bipod for a long-range shot or really taking in the slack on a rifle sling off of a barricade.
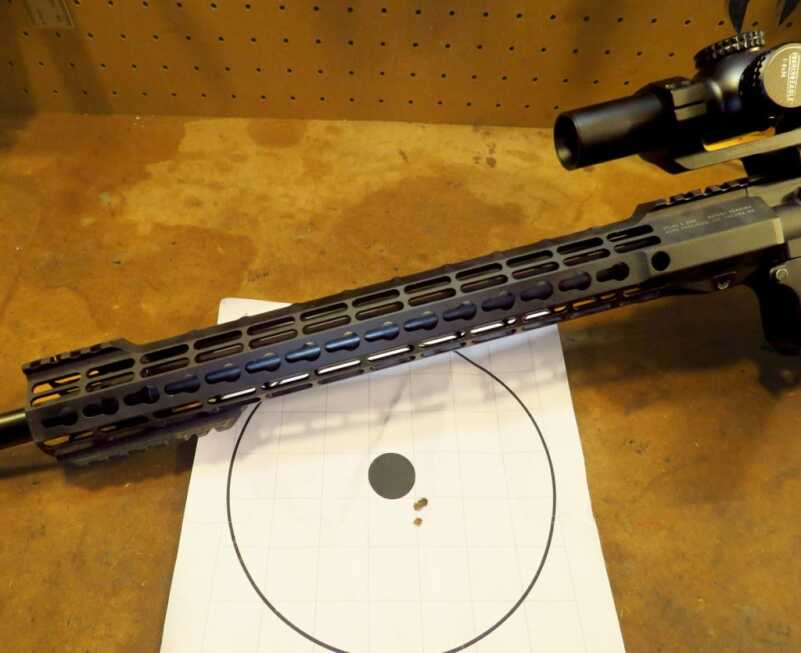
When zeroing the Vortex 1-6 Strike Eagle I was more than satisfied with the accuracy as well, shooting several groups where the rounds were stacking on top of one another.
The ergonomics of this handguard are quite good and that became apparent to me during my range time. Some modular handguards can feel blocky and awkward, even when run without any accessories attached to it but this didn’t seem to be the case with the S-ONE. The sloped top and gentle contours negated any sort of “cheese grater” and helped it feel like a natural extension of the arm. I’m also not sure if it’s by design but the slope on top seemed to perfectly match up with my thumb when doing a thumb over grip.
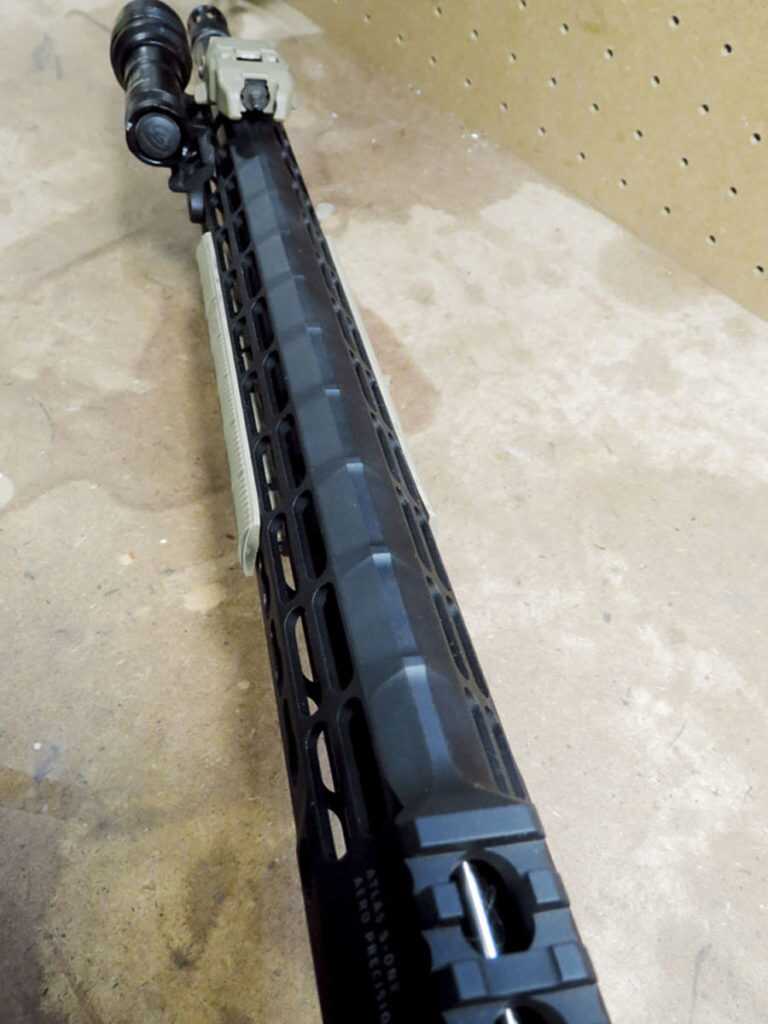
It’s easy to get a good grip on this rail and still be able to activate accessories like a weapon light and flip up sights without having to shift much.
In regards to heat transfer, after long strings of fire, this handguard performed admirably as well, due in part to the multiple slots cut into the rail for ventilation. Initially, I would’ve thought that as lightweight as the handguard is, it would’ve heated up in no time, making it uncomfortable to hold on to. However, during testing, I found that even after doing several mag dumps as fast as I could the handguard was still comfortably cool to the touch. I’m not sure how many rounds it would’ve taken before the rail would’ve become uncomfortably hot but I know it exceeded the amount of ammo I had that day.

The S-ONE is a fantastic option for 3-gun competition, precision gas gun, or anywhere you need a lightweight and durable modular handguard.
Wrapping Up
I’ve owned and used a number of AR-15 handguards over the years and there’s certainly no shortage of them out on the market. Why should you buy this rail though? Well, in my opinion, this is the best bang for the buck that you’re going to find when it comes to a free-floating modular rail. You can absolutely spend more money on another rail with similar features but at what point does it become a game of diminishing returns? The ATLAS S-ONE is light, tough, available in either one of the popular mounting options, easy to install, and comes with all the tools you’ll need to install it. I’m not saying that I’m going to replace the other rails that I have but, in the future, I don’t see spending as much as I have in the past now that the ATLAS S-ONE is an option.
For more information on the ATLAS S-ONE visit Aero Precision.

I run the 9” Atlas S One on my 11.5” 5.56 SBR. I really am pleased with how well it fits on the Aero M4E1 receiver set. I didn’t like the feel of a front flip up due to the short picatinny rail. So I went with the Daniel defense iron sights. Slick set up.
I run this in a 9.5″ length on a 10.5″ .300Blk with an Aero Precision M4E1 upper & lower. It is a tight little package! In my opinion Aero is tops for best value to quality on the market.
On your torque pic the torque setting will be off due too the angle. You need too correct by rotating 90 degrees counter clock wise, but sense there is a wide range of torque you might be ok. Good range day for all.
The pictured setup for the torque wrench is correct. If the barrel wrench is placed so it extends straight out from the end, the moment arm of the wrench would be longer, resulting in higher actual torque being applied to the barrel nut. That is a lesson I was taught more than 25years ago while earning my airframe and powerplant mechanic rating. Every fastener has a torque value, and improper use of torque wrenches was not tolerated.
Yes, the torque adapter setup shown is correct as it does keep the torque lever length constant.
31 years experience automotive dealership.