I’m sure most of you reading this have heard about the Polymer 80 Glock style pistol frames that are intended for home builders. These can be completed with no machine tools and only a few common hand tools. I’m also sure that there’s some of you who would like to build a pistol but aren’t into polymer-framed, striker-fired pistols. Some of you are “garage builders” and looking for something a little more challenging than an AR build. Some of you are just diehard 1911 fans. If any of this sounds familiar, this build is for you.
Most 1911 builds from years past required some fairly complicated machining unless you were going to start with a completed frame (What fun is that?). Homebuilding took a big step forward with 80% frames becoming available. But these still required some machining, which is beyond what most folks have the capability to do in their garage. Enter the Stealth Arms Phantom Jig.
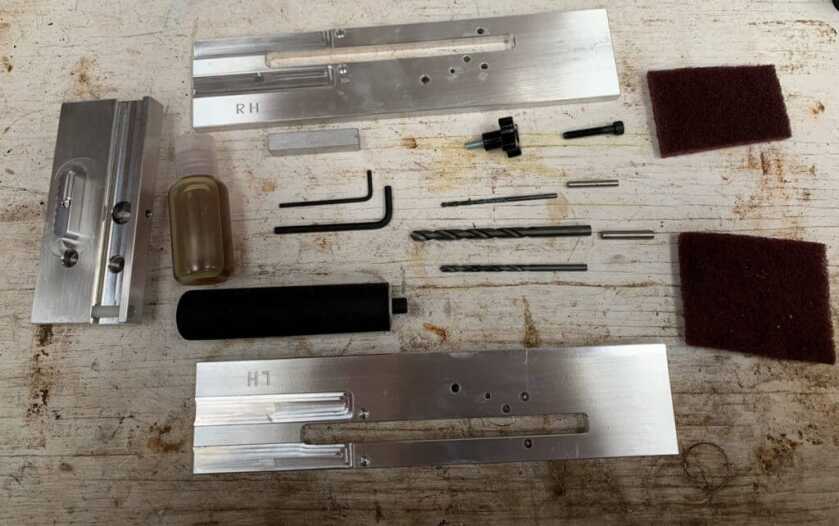
To back up a step, completion of an 80% 1911 frame requires drilling the hammer and sear holes, cutting the frame rails, and cutting the barrel seat. The Stealth Arms Phantom Jig is designed to allow the home builder to complete one of these frames with things you probably already have. You need a drill press, a sturdy vise, and some elbow grease. The Phantom Jig really makes it possible for the “garage builder” or “kitchen table gunsmith” to build a 1911. The Jig comes with all the drill bits needed. However, there are also a few special tools you may or may not need to assemble your frame once you’ve completed it depending upon the particulars of your build.
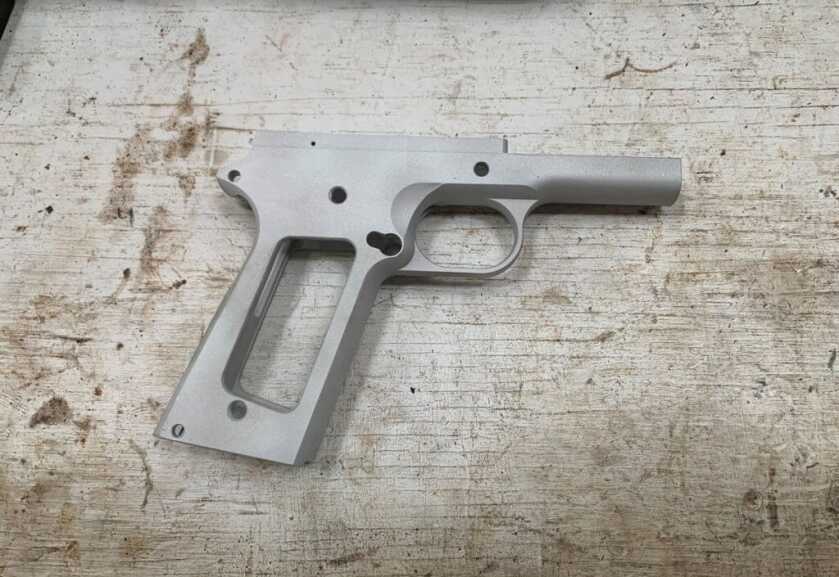
To be clear, there are some limitations to this method of finishing a 1911 frame. The Phantom Jig is not really intended for use with steel frames. Stealth Arms reports having mixed results in completing steel frames with it. Some of you may have some reservations about an aluminum frame. However, aluminum-framed 1911s are not some new concept. Colt introduced the aluminum-framed Commander in 1949. So aluminum-framed 1911s have been with us for quite a while now. Aluminum is 1/3 the weight of steel and doesn’t rust as steel does. These are good attributes to have in a handgun frame.
I bought the Phantom Jig and 80% frame at the Knob Creek Machine Gun Shoot from JSD Supply. You can purchase the fixture directly from Stealth Arms as well, and there are a number of sources for 80% Aluminum 1911 frames. I had a bunch of other 1911 parts already that I used for this build. I used a slide and barrel from an Argentine Colt-Systema, which is a 1911A1. The other parts were takeoffs or leftovers from previous 1911 projects. I decided to build a GI type 1911A1 because it’s easier to assemble and less expensive. But you can build yours as simple or elaborate as you like. For those of you wanting a build similar to this one (but don’t have a pile of 1911 parts lying around as I did), you might try one of the 1911 builder’s kits from Sarco as they are very reasonably priced. Or alternatively, Stealth Arms sells a variety of 1911 build kits and parts themselves. However, my main focus here is the actual completion of the 80% frame, rather than the finer points of assembly. These details will likely be different for you depending on the specifics of your particular build. Now, on to building!
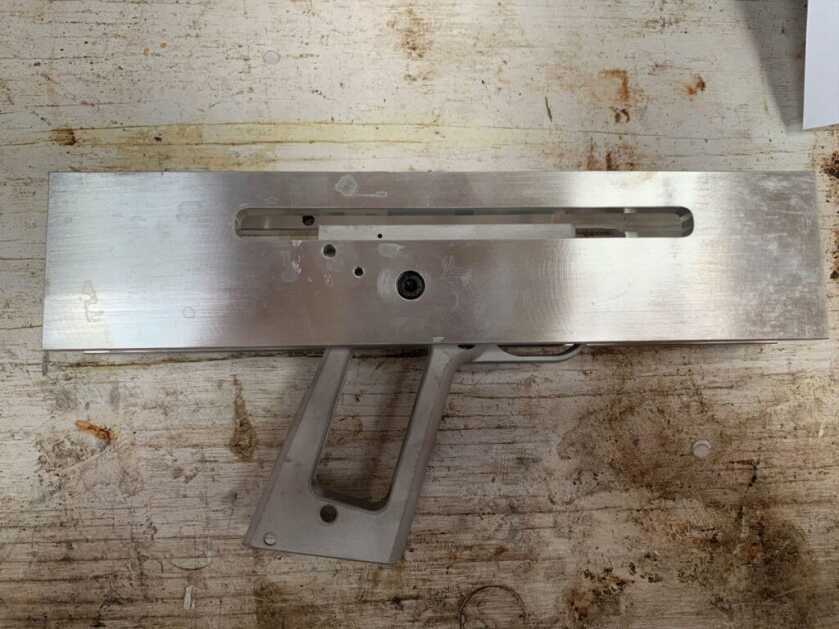
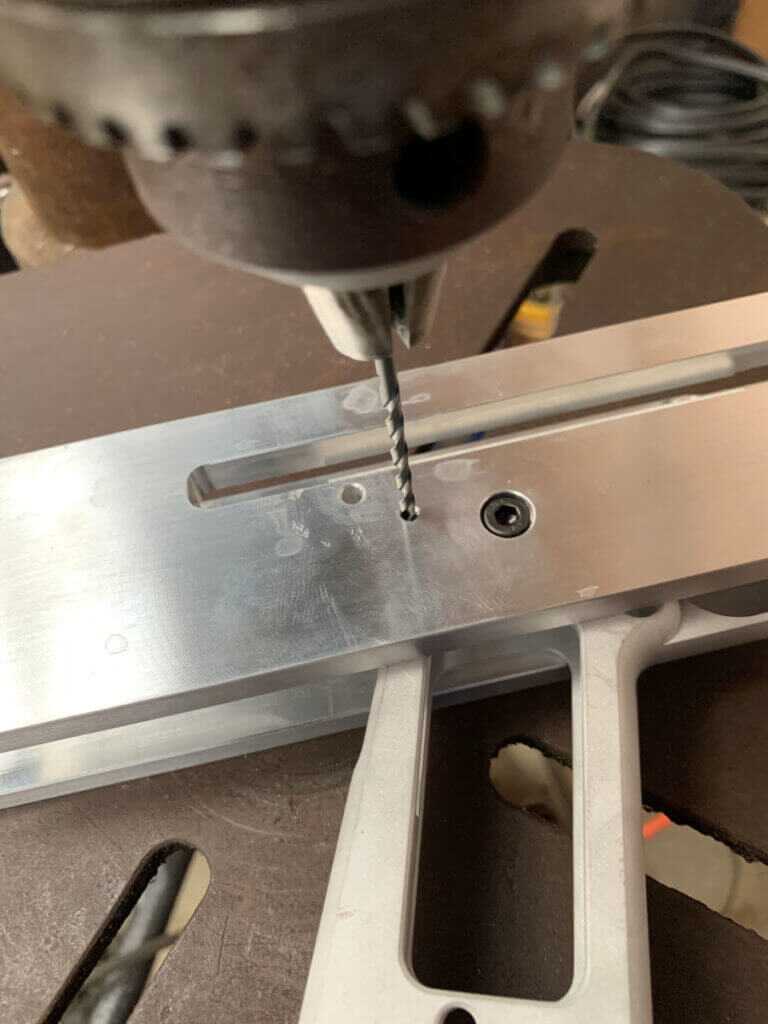
The first operation is drilling the hammer and sear pinholes in your drill press. Do not try to drill the pinholes with a hand drill; you will trash your frame. Line up the jig until the drill bit goes straight into the corresponding sized holes without binding. Drill the holes one side at a time. Do not try to drill all the way through or the drill bit may walk and mess up your holes. Drill down until you feel the bit breakthrough inside the frame. Then flip it over and do the other side. This drilling operation will leave burrs on the inside of the frame, so after you’ve drilled the holes use a file to remove them so everything will go together properly.
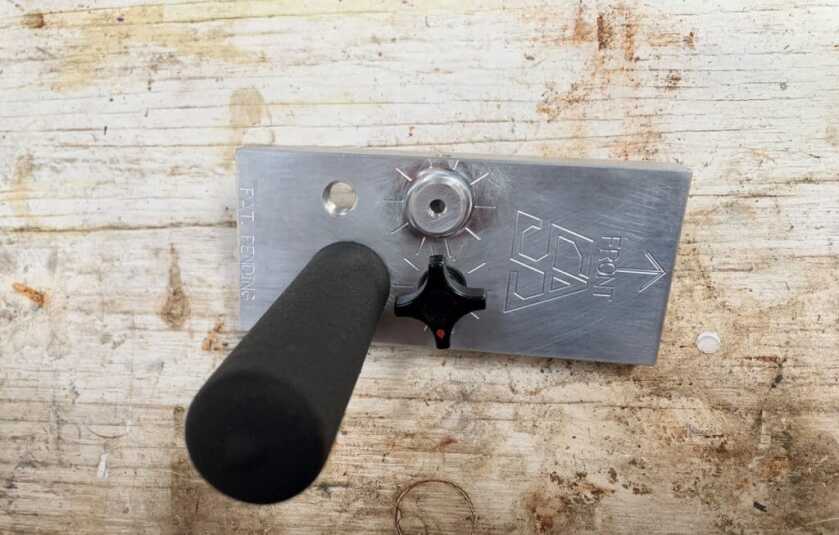
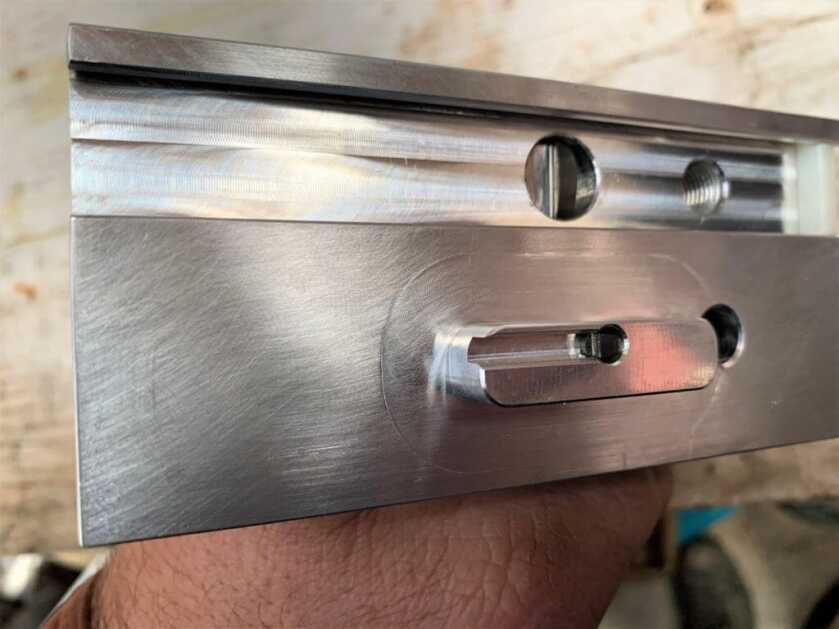
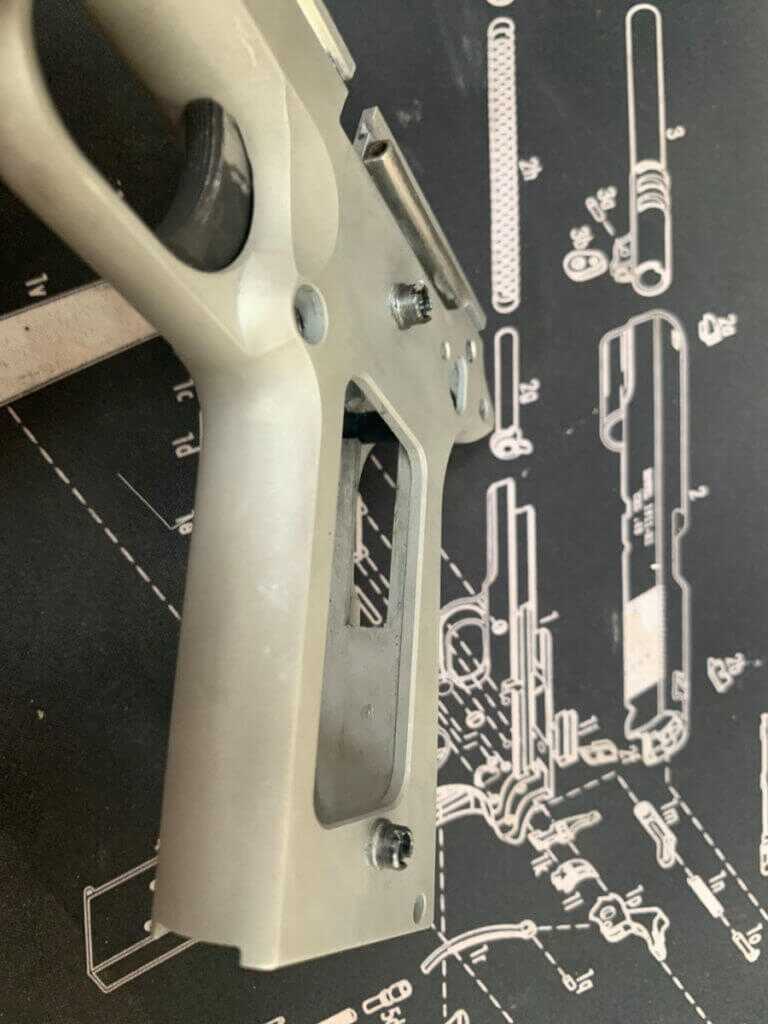
The next operation is cutting the frame rails. The car comes partially assembled, so finish putting it together first. Make sure everything is tightened down properly, and that the barrel seat cutter is out of the way with its set screw tightened to hold it there. Put the spacer block in the side opposite the one you’re cutting on to support the jig in your vise. You use the knob to advance the cutter. It has 10 evenly spaced marks on the plate around the knob to use as a reference. You need to advance the cutter 1.9 revolutions from your start point to get to the full depth of .061”. Make sure you mark both your start point AND the knob so that you know where you need to stop. Keep the fixture oiled up so that it slides smoothly. I found it was preferable to take cuts of about ½ of one of the increments for the knob. It usually took a few passes at each of those for it to “clean up” after each adjustment. Obviously, after you finish one side, you need to complete the same operation on the other.
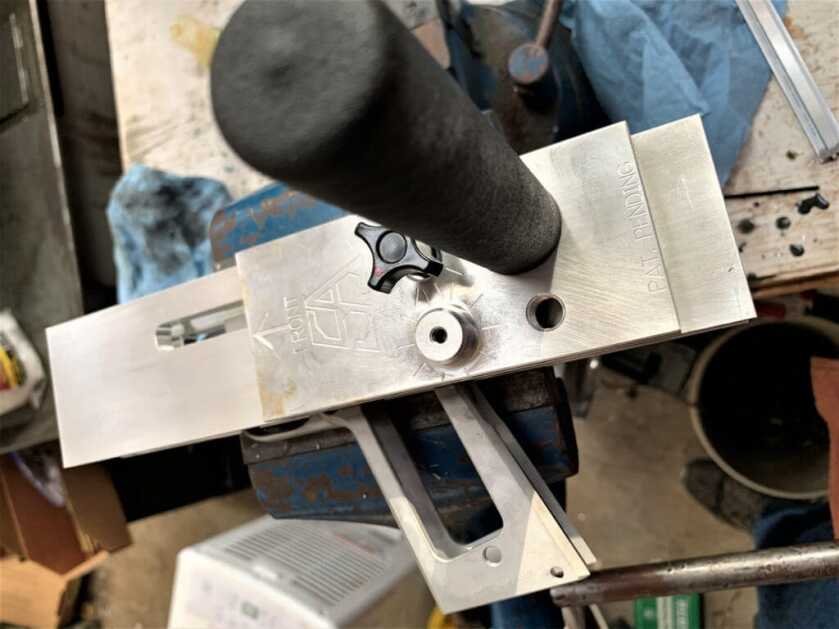
After finishing both frame rails, take the frame out of the fixture and use the ¼” drill bit to countersink the pinholes you drilled earlier. Be careful as you do this. You don’t want to go too far, just far enough for the pins to sit flush. You’re basically just going to “kiss” the holes with this drill bit, as the aluminum will cut very quickly.
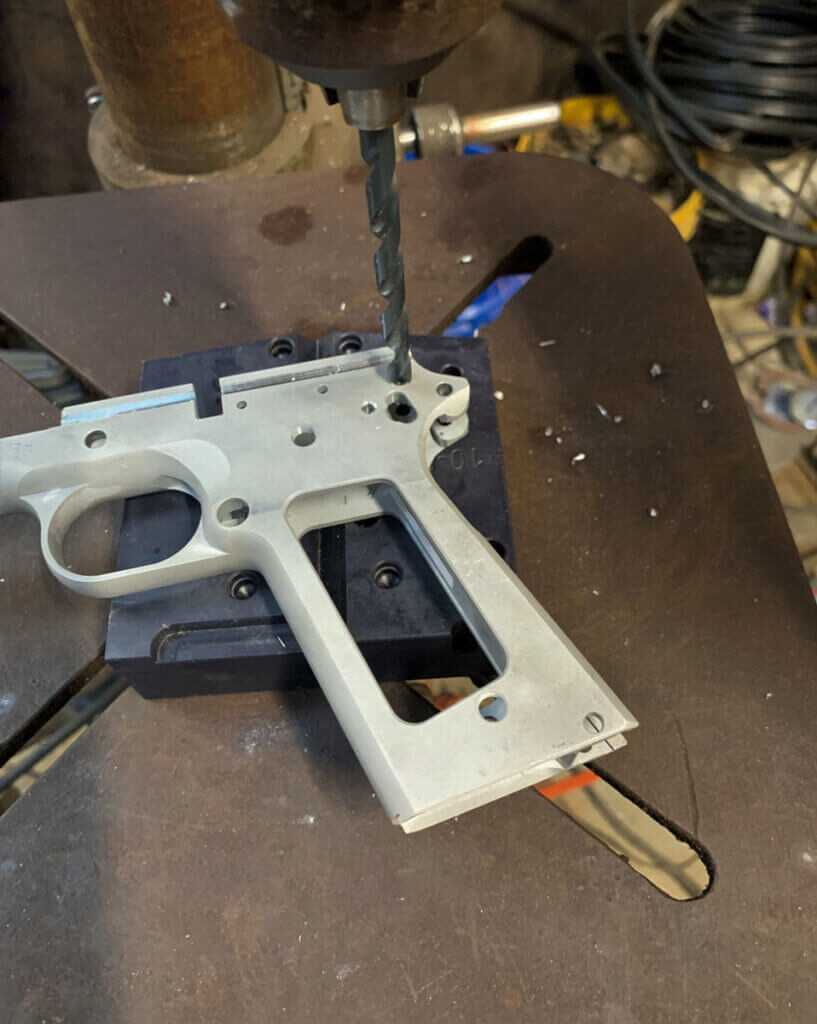
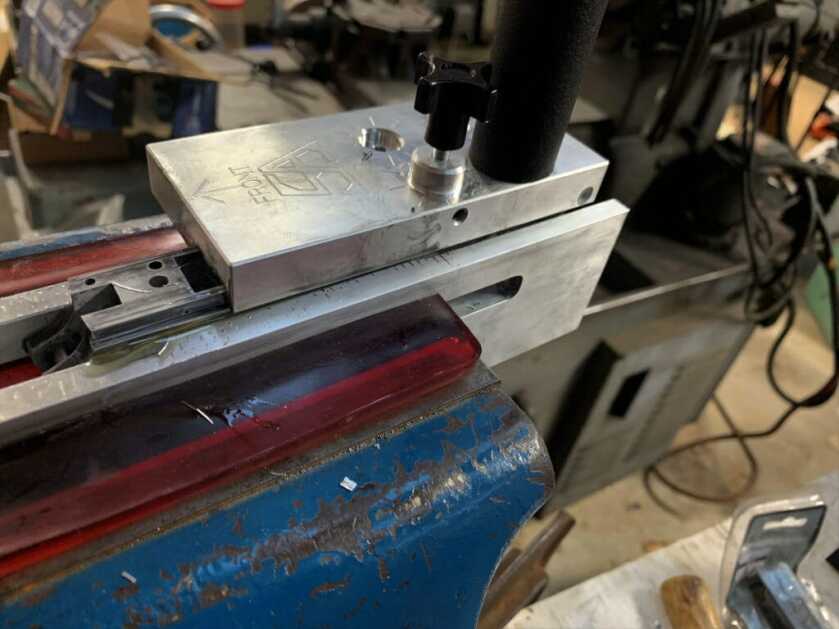
Next, it’s time to cut the barrel seat. Put the frame back in the fixture, this time into the upper pin positions for the next operation. Move the knob and the handle to the other position on the car. Make sure you retract the other cutter out of the way and secure it. The fixture car slides onto the slide rails and has a rubber stop on one end. Like the rail cutting operation, you use the knob to advance the cutter. And like the rail cutting operation, you need to keep the fixture oiled up. You need to advance the cutter 2.4 revolutions to get to the proper depth of .077”. The radius cutter has square ends on it, and if you see those edges beginning to cut-STOP. You’re going too far. Your frame is now complete!
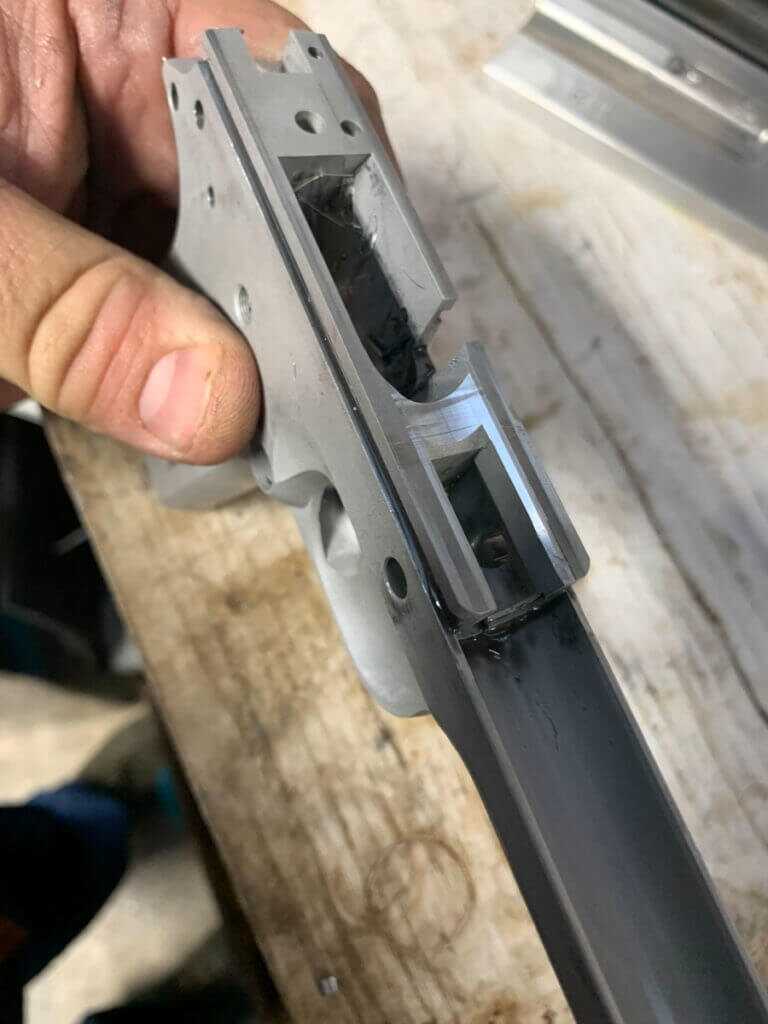
Now that your frame is complete, it’s time to assemble your 1911. Again, details regarding assembly will vary widely based upon not only what configuration 1911 you’re building, but also which specific parts you choose for your build. I would HIGHLY suggest that you do some research if you do not already know how to assemble your 1911. I would also recommend that you obtain a copy of The Colt .45 Automatic: A Shop Manual on the 1911s so that should you run into an unanticipated problem you’ll be able to sort it out. I suspect some of you 1911 folks probably already have this book, as it is invaluable for 1911 work. Since there are a lot of different aspects to assembling a 1911 depending on what specific parts you are using, you will likely find that you need to do some extra work that I didn’t mention. This manual will help you with it.
Before you begin assembling your pistol, clean all of the chips of metal out of your frame to prevent them from getting into your other parts and binding things up as you’re trying to fit them. If you have built ARs or Glock style pistols (such as the Polymer 80) you will find that 1911s do not typically just go together like those. Usually, a fair amount of fitting is required when assembling a 1911. So if your parts don’t just slide right on, don’t be alarmed, it’s perfectly normal.
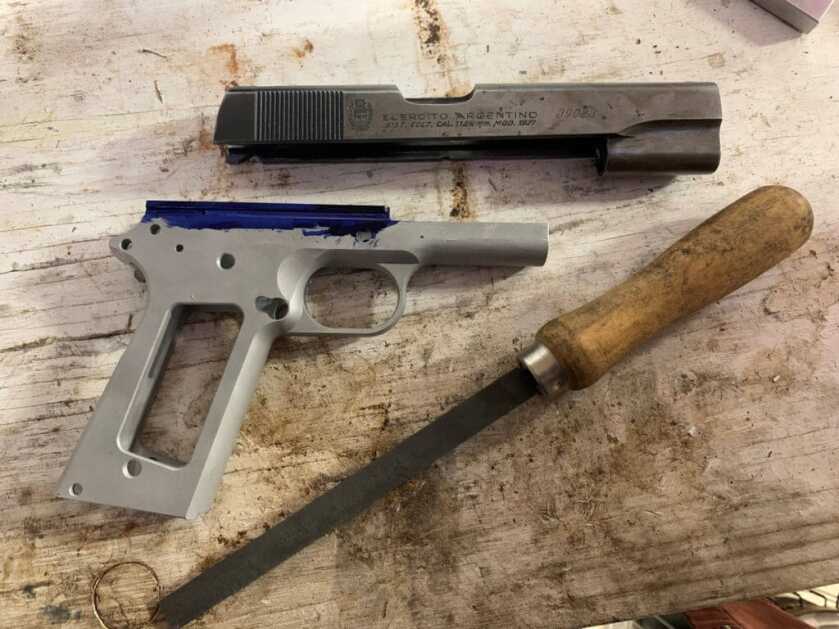
I needed to fit my slide to the frame. If you end up doing the same, you’ll want to put something on your frame and slide so you can see what surfaces need fitting. I used dykem or layout die because I had some, but even a marker will do the trick. I also needed to fit my trigger. In addition, you will also need to install the plunger tube onto your frame (though there are some frames where it’s actually machined into the frame rather than being a separate part that you need to install). This typically requires a special tool to stake it into place. The ejector also bears mentioning. There are a few ways to install the ejector, but there really isn’t a plug and play option that I am aware of. Do not even think about putting the ejector in place and trying to cut the pin groove by drilling it- the drill WILL walk and you WILL destroy your frame. So do your homework before attempting to install your ejector. The grip bushings are supposed to be installed with a special tool as well, though I surmise you can probably use a properly fitting screwdriver for this if you exercise some care. All of my other parts installed without any further fitting required-though again, you may not find this to be the case in your build.
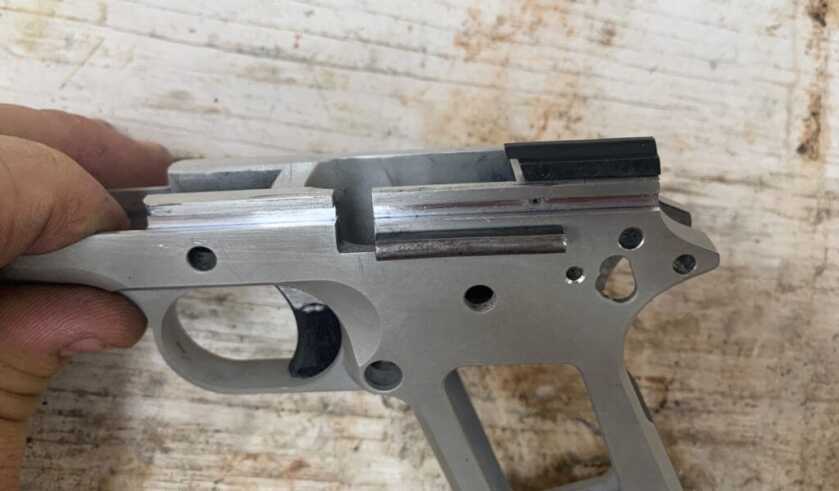
Always function test your build without live ammunition to ensure the fire control group is working properly before you attempt to test fire. I use dummy rounds or “snap caps” when doing this to make sure everything else is working as well. When you do test fire, don’t just load up the magazine and go to town. This is especially important when test firing a handgun because you don’t have as much control of it as you do a rifle if something goes wrong. Load one round first. If everything functions properly, and the fired casing doesn’t show any abnormalities, then load two. If everything cycles and functions properly, load three. Once you’ve shot three with no problems, you should be good to go.
Once you have test fired your pistol and confirmed that it works properly, you’ll want to go back and put some kind of finish on your frame. 1911 parts are predominately steel, and if there isn’t something between the steel parts and your aluminum frame, it will cause you problems in the long run for metallurgical reasons. In case you were wondering, Aluminum cannot be blued or parkerized. However, there’s a lot of other finishes, and there are options intended for hobbyists with a minimum of equipment. Or you could have it anodized. Just make sure you put some kind of finish on it. If you intend to shoot your pistol a lot, I would recommend installing a recoil buffer in it. This will add some additional longevity to the life of your frame-not that you need to be overly concerned about it. I just figure it can’t hurt anything so I use one in non-steel framed 1911s.
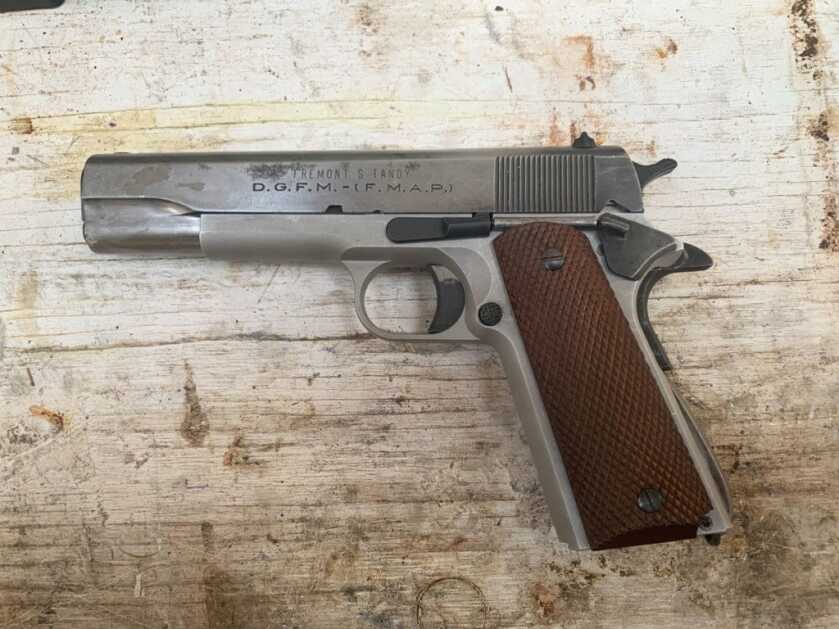
As you can see, you can build a 1911 from an 80% frame without a lot of expensive equipment. The Stealth Arms Phantom Jig opens the door to homebuilding a 1911 to the hobbyist who doesn’t have a machine shop. You may already have the tools you need to take on a build like this. And even if you don’t you can obtain them for a pretty reasonable amount of money. Building your own firearm is a very satisfying experience. I hope by reading this some of you on the fence about homebuilding see how easy it is to get started and decide to give it a try.

what if your frame has the plunger tube as a monolithic part? Will this jig work with it? If not. can you recommend another jig?
It’s fairly obvious that NONE of you here who point fingers at the less enlightened, live in Crapifornia. And so judgmental! “Stepping on toes” here is quite the understatement! Look, if a 1911 is abhorrent, why are you on this link, just so you can crap on someone’s birthday cake? If you’re better than 1911 aficionados, great! Build your Glock 19. Then strut around crowing about how much loftier you are than all the rest of us cretins who like “slow & fat” to get the job done. ATF is working in collaboration with the rest of government to confiscate…especially in Crapifornia. WE are trying to figure ways to survive in this burgeoning lefty utopia. We have not only a Biden – Soros presidency, but also Pelosi – Newsome state government.
Before I go shoot my OLD Springfield 1911, I’d like to point out a couple things:
If you’re in a situation where only a 40 or 10MM is acceptable, you should run away, fast. You probably aren’t going to survive.
If it’s about puncturing body armor, use a 5×7. ….Oh, and run away, fast. You’re in serious trouble.
If it’s about knockdown, a 45ACP is a lot like being run over. Penetrating armor is not required for stoppage(?).
I have a friend who is a fine machinist. He sculpted a Glock 19. Compared to the S.A. 1911 sculpture another friend crafted, I personally liked the feel and action of the 1911. I think the 1911 would last longer, and better withstand the abuse of urban combat. I suppose that remains to be seen, though. But the G-19 felt cheap….Chinese cheap.
If you’re on urban assault, trying to draw enemy antifa & BLM away from your family, YOUR situation is definitely life-threatening. How many times do you want to have to pull the trigger on a bogie? Any of you have these miscreants roll through your neighborhood last summer? WE DID! And I’m in a small town.
You might be looking for ammo. 45ACP is ubiquitous. Reload components (except maybe primers)? Ubiquitous. Looking for repair parts? …..yep, ubiquitous.
Run out of ammo? You better have a 1911 to use as a club. Polymers likely just piss somebody off if you smack ’em with it.
At 850 feet per second, 45ACP is nearly sub-sonic already. Silencer-ready!! I’ve heard a suppressed 9MM. Sorry, not quiet. So, whaddaya think re: a 40? A 10MM? (PLEASE don’t start in on boosters, etc.)
By the way, if you think the only ammo for a 1911 is hardballs, DUDE I refuse to listen to you any more. You should REALLY learn how to use the WorldWideWeb. (Probably can’t do that on your Jitterbug flip-phone.)
AND NO, I’M NOT ADVOCATING DUMPING YOUR FLIP PHONE FOR A SMART PHONE, just so you can Google stuff on your phone. I agree that smart phones are evil, even though I use one. I just gave in. My job requires that I use one, so I have given up that fight. Sorry, I digress……..
About the accuracy complaint, just how far do you think you’ll be from your intended target, anyway? Mine is pretty accurate at 12 yards, and it has 35 years of use under its belt!
Exactly how much more accurate do you suppose you’ll be with any 9MM over a 45ACP with fifteen 20-year-olds shooting at you and/or your family members? At 25 feet?? You’d probably be better served by a flash-suppressed AR. Or, screw the flash hider! Just get a short 12 gauge in 00 9-pellet. then go take care of business. Quit pussy-footin’ around! You probably aren’t going to survive that scenario, anyway.
And man, I like a good hobby. And now that our entire state is shuttered by enemanozzle politicians, drunk with power, we can take up art projects to fill the spare emptiness of our day. It’s particularly cool that the end project is a reminder of our history, before our country was overthrown by the evil scourge of Soros’ minions. 🙂
And as hobbies go, with $3.50 a gallon for gas (and climbing), working on hotrods is becoming unreasonable. Plus, where can you go150MPH nowadays? Also, you can drink whisky while building guns. Not really so feasible with driving hotrods.
In summary, don’t be so persnickety! Lots of reasons to build an S.A. 1911 tactical! How about this: It’s fun!
Thanks for sharing your build process and giving some ideas for how to tackle the fitment issues and other common problems. I might have to check out that system.
Looks good, what about availability?
I purchased them from JSD supply. You can also get them from Stealth Arms.
Excellent build and instructions with using those jigs with a 80% forging and turning it into a working piece. It’s funny how you stepped on a few toes here and these so called 1911 Gurus gotten offended. But as time goes on it seems that the emotions only get stronger along with the estrogen levels increase in some genes and certain families.
I agree with the first statement about the gun being nothing more than an over powered up close and yet under capacity pistol. I’m the age of double stacks, who wants to choose a low capacity single stack pistol? In a true real deal fire fight I promise you’ll eat up every bit of your ammo and may not even realize you pulled the trigger more than once or even at all! Carry a good .40 caliber GLOCK and that’s all you need for ANY self defense situation unless we’re talking about animals that don’t walk in two feet in which case you probably need a rifle. Or a 10mm that can usually handle most all four legged creatures and no doubt the two legged kind! The 1911 has been around for over a hundred years and it’s had its day and it’s long gone for the logical people who think of their lives and not wanting to be cool and carry the out dated pistol their father used or they used if their still alive… No offense to anyone… It’s just that old! And the 1911 is way over engineered since it was made over a hundred years ago and clearly they didn’t go with the concept of less parts equals less parts to break, clean, and take apart every time the guns needs proper cleaning. And I do mean proper! Not just pull the slide off and clean your barrel!
I was almost ready to agree until you started talking about .40cal.
UNTIL THE CNC MACHINE, LASERS, AND THE COMPUTER ERA ALONG WITH CUSTOM GUN SHOPS, THE 1911 WAS AN INACCURATE 230GRAIN BALL BULLET GUN FOR CLOSE COMBAT, AND YOU WANT TO SPEND ALOT OF TIME AND MONEY TRYING TO MAKE A 1911 WITH SOME JIGS AND A DRILL PRESS??? GOOD LUCK!
I agree
It was a fun project! Don’t you have a drill press? Cheap at Harbor Freight. I’d also suggest a STEEL plunger tube, and the $32 pin-spreader at Midway. Also, Challis Grips’ grip bushings & screws. Oh, and an 1″ wide flat file.
Your completed 1911 bears an uncanny resemblance to a Navy Colt. I think you cut too much away.