It wasn’t until the 1920s that telescopic instruments used as aiming devices began to be widely accepted in the United States, but since then scopes have become the primary means of aiming rifles. In fact, they have become so popular and there are so many choices, it is difficult to decide which to buy. And after the purchase, how do you know that it’s really working as it should? A scope is a highly complex precision instrument and many users don’t really understand them.
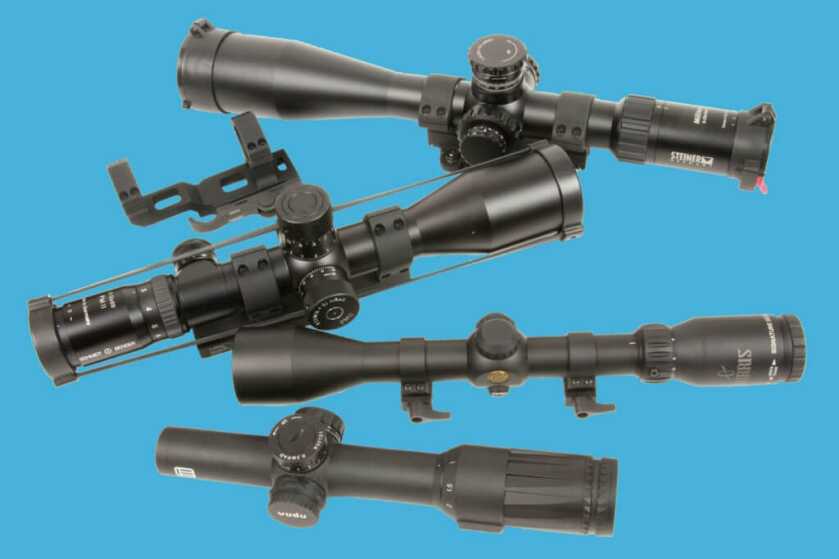
The late Pat Rogers, one of the all-time greatest firearms instructors in the world who has been there and done that and retired from the United States Marine Corps and the New York City Police Department said, “The mission drives the gear train, and you need to determine what works best for you.” So, to decide what scope you need, first, determine to what use you are going to put it.
Scopes are now used for many forms of shooting including tactical engagements, hunting and competition, and from short to extremely long range. And they are installed on every type of rifle – and handgun – from air guns to bolt action and semi-automatic rifles chambered in small bores to .50 BMG. But if they don’t work correctly, they are of limited value.
A surprise to many, some scopes that are tough enough to survive the recoil generated by firearms chambered in cartridges like the .50 BMG will break quickly if installed on a spring-powered air gun. The recoil forces act in different directions, so make sure the scope you select is rated for the type of gun you are shooting.
If you are shooting at long distances, you will probably want a scope with a higher magnification – often referred to as power – than you would want if the scope were to be used for fast engagement of close targets. While a scope with no magnification, i.e. 1X, is desirable for close, fast shooting, long-range shooters often like scopes with magnification as great as 25X or even more.
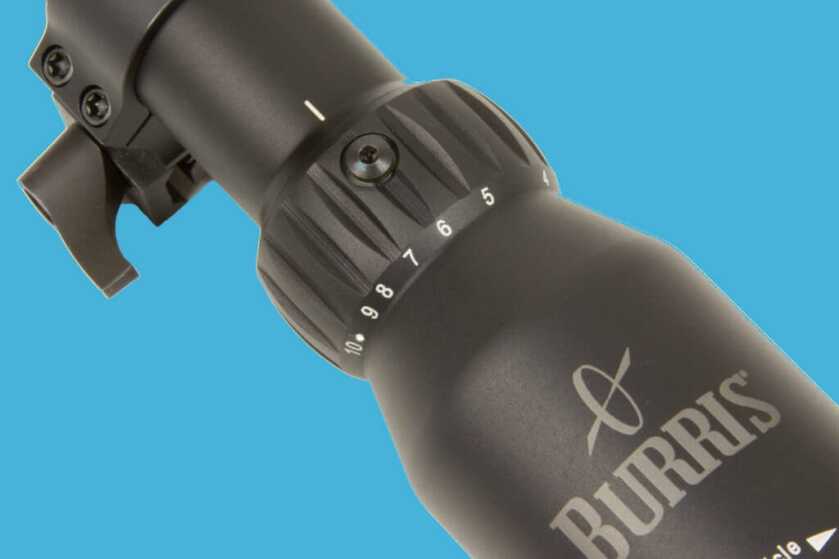
While fixed power scopes are usually less expensive and are still common, variable power scopes are very popular and can have a wide range of power settings. A lower power of say 3X can be useful for quickly locating a target because the field of view (FOV) is greater, but a higher power may be necessary for the shooter to even see a target that is very small or located a great distance away. At that higher power though, the FOV becomes smaller making target acquisition – locating the target – much more difficult. It seems there are pros and cons to every scope feature and often compromise is the only way a final decision on what scope to purchase can be made.
Scopes are of two general categories, first focal plane (FFP) and second focal plane (SFP). While these are technical terms referring to the internal construction of the scope, the important point is that with FFP scopes, the reticle – crosshairs or other aiming point inside the scope – increases in size proportionately with the target as magnification increases, while the reticle in SFP scopes stays the same size regardless of the power setting. Both variable and fixed power scopes can have an SFP reticle, but generally, SFP scopes are less expensive than FFP scopes.
Besides cost, why does FFP or SFP matter? If the scope is used for judging range, the FFP scope can be used at any magnification because the distance between stadia, or hash marks, as measured against the target remains the same at any power. The SFP scope can be used for range measurements though only at one power which is found in the scope’s manual or sometimes denoted on the power ring with a dot. Most of the time it is at the highest power setting. But at high power, the reticle of the FFP scope may be so thick or course that it obscures a portion of the target making precision shots impossible. That is not a problem though with an SFP scope because the crosshairs are fine enough to permit a precise aim at any power.
Many shooters now have the opinion that range finding with a scope is a waste of time because laser rangefinders are plentiful and accurate. But consider that every mechanical or electronic device can fail, and to measure distance, the laser rangefinder emits a laser beam that can be seen with the right detector. And that can reveal the user’s position, so if you want to be absolutely certain that you don’t give away your location by using the rangefinder, being able to determine range with a scope is a good alternative.
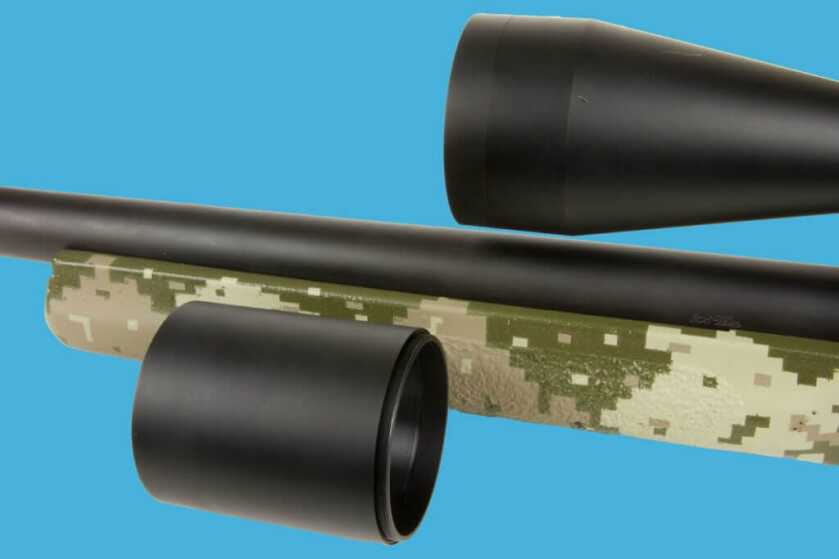
If stealth is important to the shooter – think military snipers – another consideration is preventing a position revealing flash or reflection off the objective lens of the scope. This can be accomplished in several ways and some scopes or optics come with an anti-reflective device often called a kill flash. It’s a fine grid that fits over the objective lens, but it may dim the image seen through the scope. Another alternative is a shroud that extends beyond the front of the scope, but to be useful it is generally agreed that it must be a minimum length of four times the diameter of the scope’s objective bell.
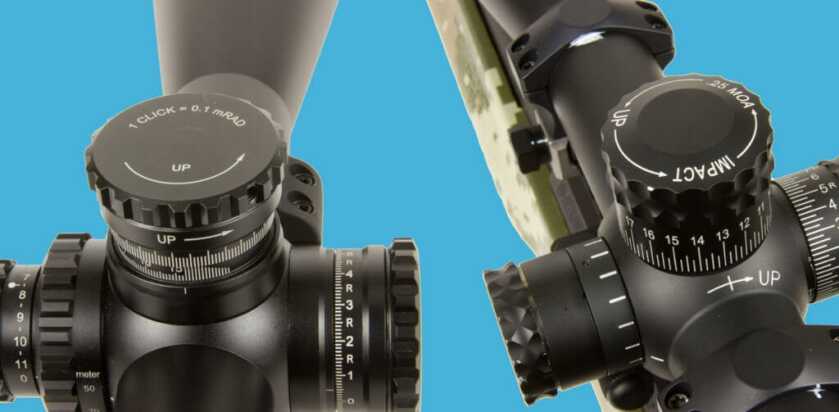
Another consideration for the buyer is the units of measurement the scope uses for windage and elevation adjustments. Minutes of angle (MOA) are convenient if the shooter uses English measurements where distances are measured in inches, feet, and yards. If the shooter uses the metric scale in meters, then milliradians (mils) are probably better. For practical purposes, an MOA is one inch at 100 yards distance which makes adjustments pretty simple. At 200 yards, one MOA is two inches. An MOA at 100 yards is actually 1.047 inch, but for simplicity and because no one can shoot that precisely, one inch is used.
A mil is about 3.6 inches at 100 yards, so you can see that making a conversion between metric and English on the fly can be confusing. But if you use the metric system for range, one mil equals 1 meter at 1,000 meters distance and .1 mil equals 1 centimeter at 100 meters. No matter what system you choose, make sure the stadia measurements on the reticle are the same as those on the windage and elevation turrets.
You may or may not care about parallax adjustment. Some scopes have one and others don’t. Parallax might be important for precision shots because if the eye is not directly behind the exit pupil or spot where the image leaves the scope on the ocular or rear lens, the aiming point seen may not be where the rifle is actually aimed. A parallax adjustment fixes this problem by eliminating it altogether. It simply appears to put the reticle on the same plane as the target which has the added benefit of providing a sharp target focus. Then when the eye moves off center slightly, the reticle appears to stay at the same place on the target. Without the correct parallax adjustment, the reticle appears to move slightly in relation to the target when the eye is moved off-center.
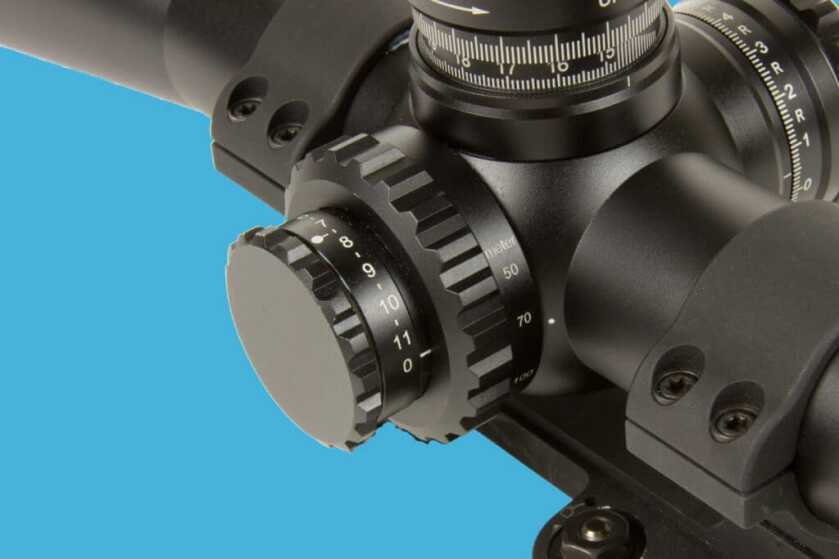
Another consideration is the range of elevation adjustment. For extreme long-range shooting, depending on the cartridge used, many adjustments may be needed. How much is dependent on the range and cartridge, so check a ballistic table for your cartridge to determine the amount of drop at the greatest range you intend to shoot. Generally, the larger the scope tube diameter, the greater the range of adjustment will be.
To take full advantage of the range of elevation adjustment – so that the shooter can shoot further – some rifles have what is called a bias or cant built into the scope mounting surface. It may be ten or 20 degrees. With the cant, the scope when zeroed at say 100 yards, is near the lower range of its elevation adjustment, so when a target is a long way downrange and a great deal of elevation must be dialed into the scope in order to hit the target, that amount of adjustment is available. If the scope were mounted parallel to the rifle’s bore and the scope’s zero setting was in the middle of the range of elevation adjustment, then only about half the adjustment would be available. Some manufacturers make mounts that have a cant and rings built-in that provides the added advantage of allowing the scope and mount to be removed and replaced as a unit without shifting the zero.
If you plan on using the turrets to dial in elevation changes rather than just estimating the holdover for longer shots, you might want to consider a scope with a zero stop. Once the scope and rifle are zeroed at whatever range you choose, a zero stop helps to return the turret to that zero mark. It limits the movement of the turret to the zero mark or just below it when dialing back to zero. This makes it possible to return to zero when it is too dark to see the turret marks.
Think twice before buying a scope with a bullet drop compensating reticle. While such scopes can be useful, they must be tested with the rifle and cartridge combination actually being used to make sure the holdover marks correspond to the actual drops generated by that rifle and cartridge. They can and do vary.
A lighted or illuminated reticle can be useful if the scope is to be used in conditions that make the reticle hard to see, especially in very dim light. But to be most useful, it should be possible to set the illumination extremely low so that the glow or bloom will not obscure the target when there is very little light.
Other considerations are the size of the scope which includes length, diameter of the objective or front lens, and weight. Keep in mind that the larger the objective lens, the higher the scope must be mounted which can make obtaining a good cheek weld, which is important to accurate shooting, more difficult.
Obviously, the buyer’s budget is a big consideration. Generally speaking, the more you spend on a scope, the better the scope in terms of toughness, quality of the image, how well the adjustments work, and how dark it can get before the scope becomes useless.
All of these features can be measured and tested by the user without a great deal of difficulty, except for toughness, or how well the scope holds up to hard and repeated use. That can only be determined by using the scope over a long period of time and under different conditions. Generally the more money you pay though, the tougher the scope is going to be. If the scope has been selected for use by the military and the price is in the area of $2,000 or more, it’s probably a tough scope.
Tough scopes that work correctly under harsh conditions, are made both here in the United States and overseas. So look for the features you need, keeping Roger’s advice about the mission in mind. Then spend as much money as you can afford. And don’t skimp on rings and mounts. There are many fine manufacturers including GG&G, LaRue Tactical, Leupold, Steiner, and Burris. Follow the manufacturer’s directions for mounting or get a qualified gunsmith to mount it for you. Many problems can be traced to the mounts and are not the fault of the scope.
Scopes offer advantages over iron sights. So while iron sights can and still are useful for many shooters – they are also fun to use – the scope may be better for precision shooting and can improve visibility in dim light when iron sights or the target may not be visible. A magnified scope may also be necessary when the target is too far away and too small for the naked eye to see.
Even very expensive scopes can sometimes have deficiencies, so once you have bought a scope and mounted it, you can make certain that it works properly by performing some simple tests. Actually, some of these tests can be done even before you mount the scope.
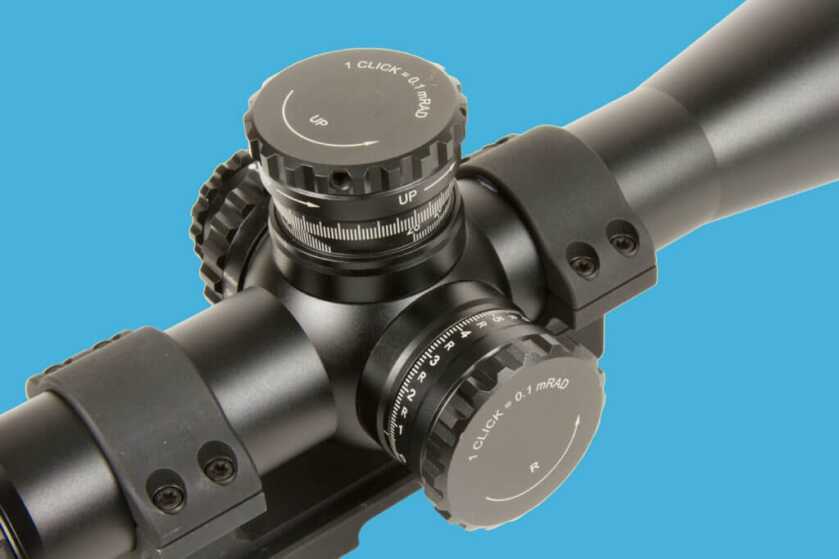
First, simply rotate the turrets to see that the clicks are distinct and positive. When the turret is dialed to where you want, it should stay there until you move it. You can also turn on a lighted reticle to make sure it works. Do this in a dim room so you can get an idea of how low the illumination can be set.
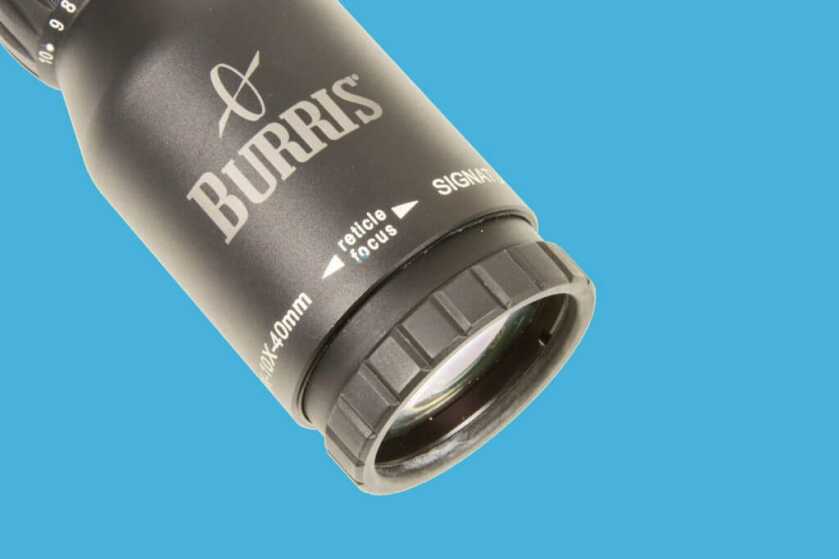
You can also focus the reticle once the scope is mounted and before going to the range if the scope is equipped with a diopter setting, usually located at the ocular, or rear, lens. Make darn sure though that the gun is unloaded and not pointing at anything you are not willing to destroy. Look through the scope at a plain white surface or at the sky, then rotate the diopter focus ring until the reticle is clear and sharp. If the scope does not have a parallax adjustment feature, opt for the reticle being in focus, not the target. That will reduce eye fatigue.
While testing or using the scope in the field, keep in mind the safety rules for gun handling. Do not point the gun at anything you are not willing to shoot. So, for scanning, you should be using binoculars or a spotting scope, because you are pointing a gun at anything you look at through the rifle scope. Hunters, pay special attention to this. You are not hunting in a war zone. And besides, you will have less eye strain and be more comfortable using binoculars for scanning.
Back to testing, another test that can be done before taking the gun to the range is for resolution and brightness. In other words, to see how well the scope works in low light and how clearly and in how much detail objects can be seen. This is largely a subjective test because some people just see better than others and their perception of things viewed through the same scope may be different. Many people just skip this test and accept that the optical clarity and brightness is what it is.
Generally, the more money paid for the scope, the better the optical clarity and the more light the scope will transmit. If you must test these things for you own satisfaction, an optical chart can be used. You can make one yourself that has lines of various thickness and then using different amounts of light, see how clearly the lines appear at different power settings. Unless you expect to spend a lot of time without a break staring through the scope at the target, and as long as the resolution and clarity does not cause you eye strain, I wouldn’t bother. Besides, if you want better resolution or light transmission, you will need a different scope. It’s not something that can be fixed without changing lenses.
Scope brightness is most noticeable in low light conditions just before sunrise or after the sun sets, and contrary to what some people think, the diameter of the objective lens has only limited influence on it. Objective lens size affects the size of the exit pupil, and if the exit pupil is larger than the size of the observer’s pupil, it doesn’t improve scope brightness.
While it varies from person to person, the largest diameter that a human pupil can reach is generally 7mm. And many people’s pupils will not dilate that far. So if the scope’s exit pupil is larger than the person’s pupil, the eye can’t take advantage of it. If the scope’s exit pupil is smaller than the observer’s pupil though, it can limit how bright the object appears to the person.
Scope exit pupil diameter can be found by dividing the objective lens diameter in millimeters by the magnification. So if the scope’s objective lens diameter is 50mm and the power used is 10X, the exit pupil is 5mm. If you want a brighter appearing image then, use less magnification which increases the size of the exit pupil allowing more light through it. If your pupil will dilate greater than 5mm in the example, this will help.
Far more important to brightness, and therefore the scope’s usefulness in dim light, is the quality of the lens glass and the coatings applied to them. This is a very technical field, so just be aware that the more money you spend, the higher the quality of the optical glass and coatings. Again, around $2,000 will get you pretty good quality.
After getting the gun zeroed, or sighted in, some other tests can be performed at the range. To check the parallax adjustment, you need to know the exact range to the target. Then set the parallax dial to that range and see if the target moves in relation to the reticle when you slightly move your eye. Don’t be surprised if it does, because it is not uncommon for the marks on the dial to be slightly out of sync with the actual parallax adjustment. If you have good eyes when the target is in sharp focus, the parallax should be eliminated and that point on the dial, wherever it is, is the actual setting for parallax-free viewing at the given range. Just make a note of it and use it for parallax adjustment at that range.
If the reticle is graduated – has stadia or hash marks for measuring the size of objects – check to make sure they are correct. Set up a target at 100 yards or 100 meters depending if the scale on your reticle is metric or English – mils or MOA – and then with the scope power set for the right magnification of an SFP reticle, see if the marks on the reticle correspond to the actual distances marked on the target. If, for example, your reticle is MOA, use inch marks on your target and set the target at 100 yards. An MOA on the reticle should measure one inch on the target. If the scope has a FFP reticle, the reading should be the same at any magnification.
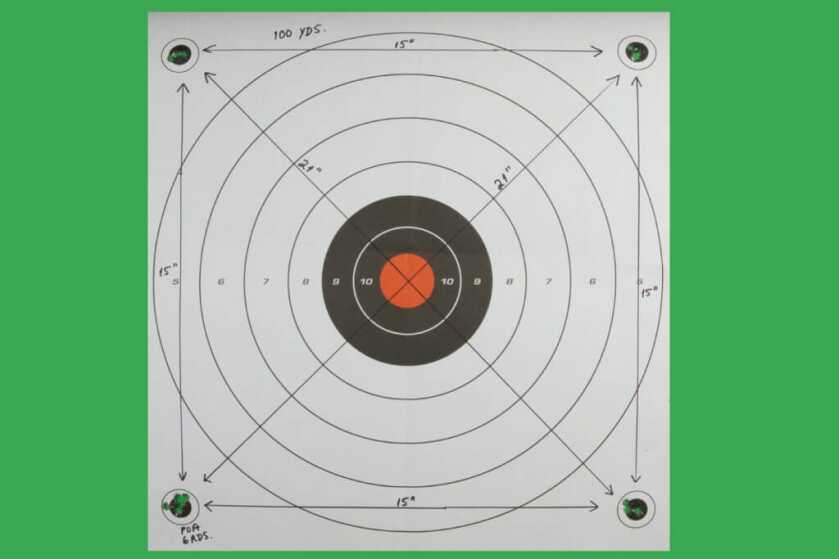
The last test is to determine if the adjustments for windage and elevation are correct and repeatable. When you dial a certain amount of elevation or windage, you want it to be accurate and be the same every time you make it. To test, you’ll need a large target because you will start at an aiming point you mark in the vicinity of the lower-left corner. Always aim at that spot, and change windage and elevation settings in between firing groups. The following is called a box test.
With the gun and scope zeroed, usually at 100 yards or 100 meters, fire the first three or five-round group at the aiming point you put near the lower-left corner of the target. Then dial an elevation change large enough to move the point of impact (POI) to a spot near the upper left corner of the paper above the first group. It should be several inches above so that you test the scope’s adjustments adequately. An inch or two at 100 yards is not much of a test, but 10 or 20 inches is. Next fire another group while using the original point of aim (POA). Next dial a windage adjustment to move the POI to the right near the upper right corner of the paper and fire another group, again using the original POA. Then dial the elevation turret back to where you started and fire another group, still using the original POA. Finally, return the windage turret to where you started and fire another group using the original POA.
Examine the target. The last group should be superimposed on top of the first group indicating the turret adjustments return to the same place. There should be three other groups forming a square or rectangle with 90-degree corners indicating that the scope is mounted square and level with the rifle and that the adjustments move the POA in straight lines horizontally and vertically. Additionally, measure the distances between groups to confirm that whatever distance was dialed on the turrets correspond to the distance the POA moved. If any of these measurements are off, as range increases, the greater will be the error in POI. It will be harder to hit your target.
A scope that does not pass the box test will be trouble on the range or in the field and it should be returned to the manufacturer. The scope maker does not want a bad scope in your hands where others will see it, any more than you want it.

Excellent. Way deeper than anticipated. Hopefully this isn’t too much for the rookie but if you have a basic knowledge of optics this will open some doors.
Great article for an intro to scopes!
This should be corrected to read 10 to 20 MOA or remove the second sentence.
“… some rifles have what is called a bias or cant built into the scope mounting surface. It may be ten or 20 degrees.”
Good catch! Thanks.
And the technically correct term is neither bias or cant. It’s pitch.