SERIES
Part 1: Want to Reload Your Own Ammo? Basic Questions to Consider
Part 2: The Reloading Process
Part 3: The Gear You’ll Need and What It’ll Cost You
Part 4: Brass Cleaning and Preparation to Load
Part 5: Brass Resizing
Part 6: Trimming Cartridge Cases
Part 7: Repriming the Cartridge Case
Part 8: Powder, Propellants, and Pressure
Part 9: All About Primers
Part 10: Projectiles: Materials, Weights, and Styles
Part 11: Seating and Crimping Bullets
So, let’s discuss the topic of seating and crimping in the reloading process. Stated simply, the seating step simply means jamming a new bullet into a cleaned, resized, primed, and powder-charged cartridge case. Crimping “generally” refers to the act of bringing the neck of the cartridge case back to proper dimension after that bullet is stuffed in. There’s a lot more to both actions, especially if you want to be safe, so let’s take a closer look at both steps.
What is seating?
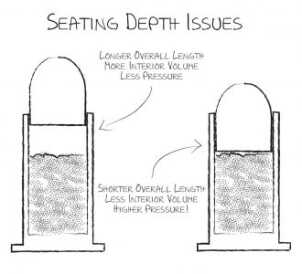
Seating the bullet simply means pressing it into the cartridge case to the proper depth. Precise seating depth is important for a number of reasons.
1. The cartridge has to fit properly in the chamber and/or magazine, so it can’t be too long.
2. The bullet is designed to be a certain distance from the start of the rifling in the barrel. If it presses too far into the grooves of the rifling, dangerously high-pressure conditions can result.
3. Pressing the bullet too far into the case can also create dangerously high pressures.
You’ll notice that every load recipe in a reputable reloading manual also specifies a bullet weight, bullet type (shape) and cartridge overall length. It’s important to use the exact weight material, and shape of bullet specified for a given load because the powder charge has been developed to push that weight of projectile to the desired velocity with the proper pressure. The overall length is also specific to length and shape, so a bullet in a given caliber that’s short and stubby will have a different overall length and specified powder charge range than a long, skinny one. Think of all the different types of bullets available for a common caliber like .308 Winchester, and you will get the idea.
The Cartridge Overall Length (C.O.A.L. or C.O.L.) is specified for each type and weight bullet combination as a way to control the interior volume of the cartridge case. Any given published load recipe is carefully developed making an assumption about the volume in the cartridge case. If a bullet is pushed farther into the case, there is less interior volume. If the same amount of powder ignites in a smaller volume, pressure will have to be higher. Likewise, if a bullet is not pressed in deep enough, there will be more available volume in the case, and pressure will be lower. Always use the exact type of bullet specified in a published load recipe and pay attention to the overall length figures.
What is crimping?
Crimping can be a bit of a misnomer. It sounds like it’s the process of squeezing the bullet into place in the cartridge case, but it’s really not. With the exception of a roll crimp, it’s just the act of restoring the flared case mouth, required for bullet seating, back to proper dimension. Here, we’re going to stick to the basics of crimping.
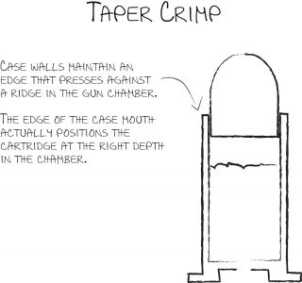
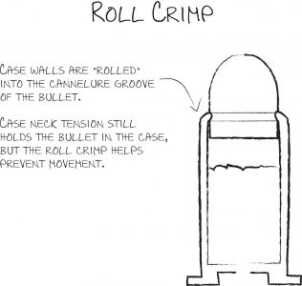
Most semi-automatic cartridges use taper crimping. That’s the process we just defined of restoring the case mouth to the proper diameter. With a taper crimp, nothing is done to try to force the brass into the bullet. Some cartridges, like many revolver calibers, use a roll crimp. Roll crimping also restores the “flare” but also presses the edge of the case into a groove in the bullet called a cannelure. This helps prevent bullets in big recoiling calibers like .357 Magnum and .44 Magnum from moving backward or forward in the case.
The process
We briefly covered how to prepare the cartridge case for bullet seating in the Brass Resizing segment, but since it’s so important to proper bullet seating and crimping, we’ll go into a bit more detail here.
If you’re reloading a bottleneck cartridge, I’ve got good news for you. You’re done with this step! That’s because resizing dies for bottleneck cartridges include a “ball” on the decapping spindle that opens the case mouth to the proper dimension. So when you resize the cartridge, you’re also opening the case mouth.
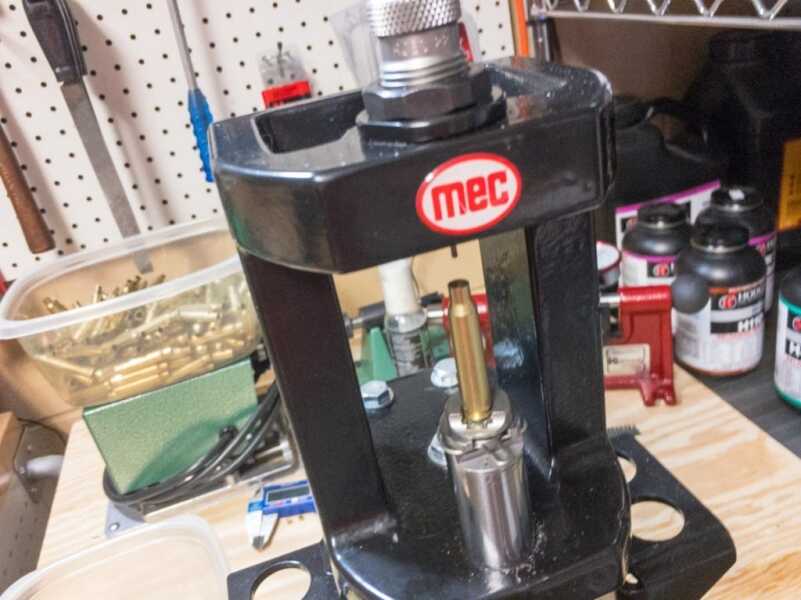
If you’re reloading straight wall cartridges, then you do need to use a case mouth expander die. Expander dies have an insert that opens the mouth of a cartridge case just a tiny bit so that you can easily seat a bullet. The secret to proper case mouth expansion is to be gentle and minimalistic. You only want to expand the case mouth just barely enough for a bullet to start its way into the case without shaving or deformation. You want force to be required to seat the bullet fully; that’s what creates good case neck tension.
Seating the bullet
Most seating dies are capable of both seating and crimping in the same step. I normally like to separate these actions by running a batch through the seating step only and then doing a crimping batch. If I’m using a progressive press, I’ll use two dies, one for seating and one for crimping. Why? It’s far more forgiving to do these operations separately. If your cartridge cases vary just a hair in dimension or if your die setup is not perfect, you can get weird results like bulged or crushed cases. Think about it, when you do both at the same time, you’re trying to jam a bullet in the hole at the exact same time that you’re closing that hole. You can do it, it’s just less forgiving then doing those steps separately.
Here’s how I do the seating step:
1. First, make sure your seating die insert is right for the bullet type you are loading — rounded nose or flat point.
2. Loosen the seating insert in your die way, way out. We don’t want it screwed in far enough to reach a bullet yet.
3. Insert the shell holder in the piston of your press.
4. Put an empty case in the shell holder and raise the piston of your press all the way up.
5. Now, screw the die into the press until you feel the die just touch the cartridge case that is raised into the die area. Loosen the whole die about a full turn to make sure that the die body does not touch the cartridge case. The die body is shaped on the inside to provide the crimp, so if it’s screwed in too far, it will be crimping your case. When you’re sure the die is not touching your cartridge case, use the die locking ring to fasten the die body in place.
6. Lower the piston and remove the empty brass.
7. Take a cartridge case, with its powder charge, and place it in the shell holder.
8. Place a bullet in the mouth of the case.
9. Raise the press all the way.
10. Now tighten the seating die insert until you feel it touch the bullet.
11. Lower the press piston.
12. Tighten the seating die insert a couple of turns and raise the press again. This should start to press your bullet into the case. Lower the piston and check the length of your cartridge with your calipers. Keep adjusting the seating stem and measuring the cartridge until you have got it set for the overall length you want. Many dies have a locking ring for the seating stem also to make sure it stays at the desired setting.
13. Proceed with seating the remainder of the bullets in your batch. Check the length of one every now and then to make sure your settings are correct.
Crimping
Since the bullets are already seated when you perform the steps separately, I’ll remove the seating stem from my seating and crimping die so there is one less variable to worry about. A taper crimp is easy. The biggest problem that new taper-crimpers face is applying too much crimp. All that’s really necessary is to apply just enough crimp to remove the belling from the cartridge case after a bullet is seated. Think of a proper taper crimp as just making the walls of the case straight and parallel again.
We’ll get to crimping problems in that upcoming article, but for now, go with the “less is more” strategy. Don’t try to over crimp. Heavy crimping sounds logical but actually leads to bad things.
The basic process is simple.
1. Make sure you have the right shell holder in your reloading press.
2. Insert a cartridge with a seated bullet in place.
3. Raise the piston of your press all the way up.
4. Now, screw the seating die body into the press until you feel it contact the mouth of the case.
5. Check your particular die instructions as those will give you some guidance on how much to tighten the die once you feel it hit the cartridge case mouth. Usually, you will only tighten it an additional ¼ of a turn to achieve the desired crimp.
Remove and visually inspect your crimped cartridge to make sure it’s what you wanted. You can also use your calipers to double check the diameter of the case mouth area to make sure it’s correct for the caliber you are reloading. Your reloading manual will provide that dimension.
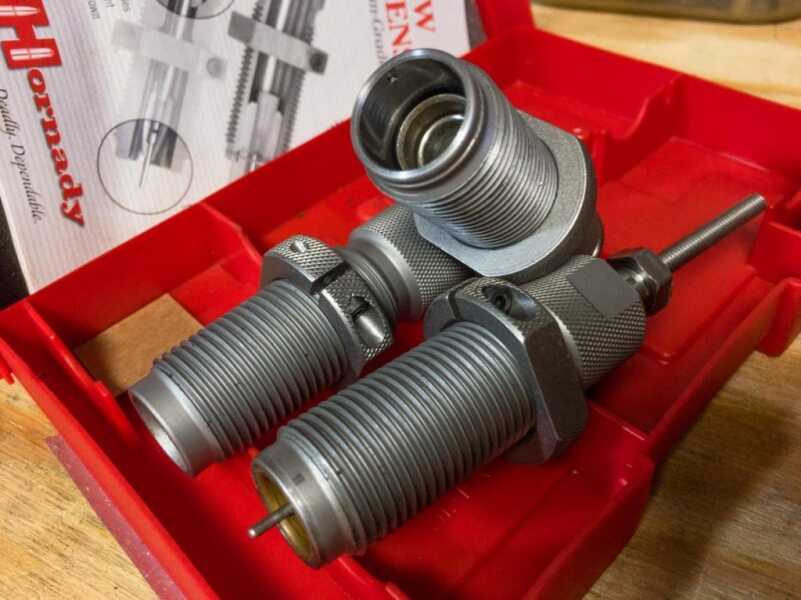
This .45 ACP seating and crimping die produces a taper crimp. The inside of the die body reshapes the case mouth back to proper size.
The steps to roll crimp are the same as those for taper crimping, but the result is different. Instead of just trying to remove the flare in the cartridge case mouth, we actually want to drive the edges of the case mouth into the cannelure grooves of the bullet. You’ll see, and use, roll crimping a lot on rimmed cartridges like .357 Magnum or .44 Magnum. We want the bullets in those cartridges to stay put and not move farther into the case or start to creep out of the case. The roll crimp helps prevent that.
The logic of crimping, or not crimping, gets a little wonky when it comes to bottleneck rifle cartridges.
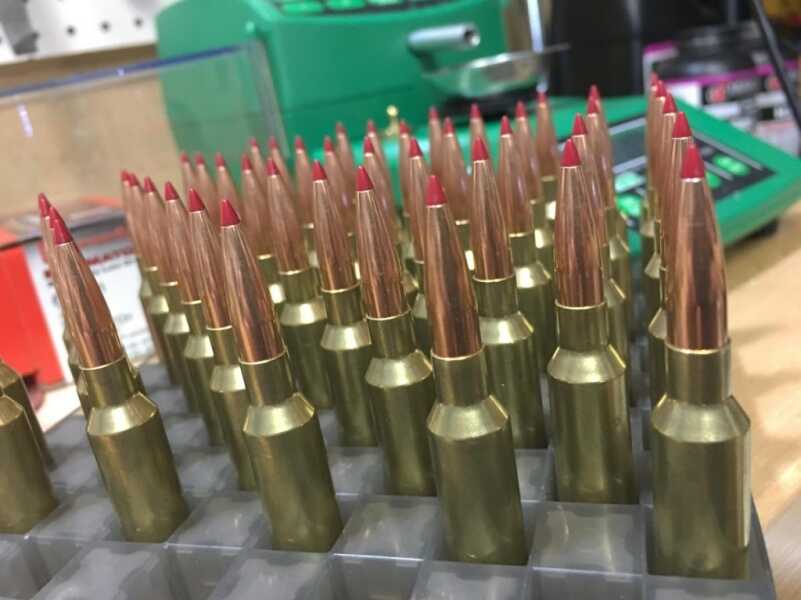
Here’s why. When a bottleneck rifle cartridge is resized, the inside of the case mouth is expanded at the same time that the exterior of the case is resized. There is not a separate belling step that flares out the mouth of the case as there is with a straight walled cartridge. The resizing opens up the entire cylindrical shaped area of the case neck evenly. Since there’s not a flare at the very end, there is no need to close the flare. So, normally, there is no need to perform a separate crimping step with a bottleneck rifle cartridge.
If the projectile (bullet) you are using has a cannelure band, you can apply a crimp to help secure it in place, but you don’t have to. Since you’re working with a bottleneck cartridge, you can use either a taper or roll crimp. Remember with bottleneck cartridges, the shoulder of the case is used for headspace, not the case mouth, so a roll crimp will not hurt anything. If your bullet does not have a cannelure groove, then do not use a crimp. If you do, accuracy will suffer as you’re pressing the case into the sides of the bullet and likely deforming it.
[one_half]
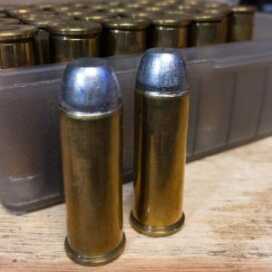
These .44 Magnum reloads headspace on the rim so they can use a roll crimp. Note how the case mouth “rolls” into the bullet groove (cannelure).
[/one_half]
[one_half_last]
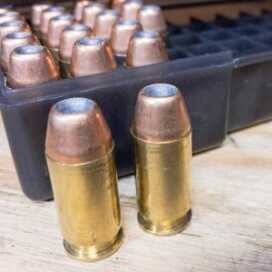
These .45 ACP loads have to use a taper crimp because the ledge of the case mouth is what sets the cartridge in position in the chamber.
[/one_half_last]
You’ll notice that most ammunition for military-type cartridges like 7.62×51 and 5.56mm uses aggressive crimps. That’s to hold the bullets securely in place during recoil — especially when the ammo is used in fully automatic weapons. The takeaway for you is fairly simple. When loading bottleneck rifle cartridges, crimp away to your heart’s content if your bullets have a cannelure groove. If they don’t, just adjust your seating die according to the manufacturer’s instructions and leave it at that.
There are a few important takeaways in the seating and crimping steps:
Pay close attention to bullet weight, type, and overall length for a given published powder charge. Pressures can be dangerous if you don’t pay attention to seating depth.
Don’t over-expand case mouths. Less is more and if you do too much your bullets won’t stay seated correctly because there is poor case neck tension. If bullets move too far into the case during recoil, pressure levels can spike.
Don’t over-crimp. With the exception of roll crimps, too much crimping can actually reduce the security of the bullet in the case, not to mention doing lousy things to accuracy.
So, there you have it. Stay tuned for the next and final segment in the Reloading series, “Inspection and Final Tips.”

Are all of the various brands of dies the same threads and size? In other words, will they all fit interchangeably in each other’s press? Can I use Lee dies in RCBS presses, etc?
Very nice and informative article!!
Thanks for the help on crimping again thanks
I’ve reloaded for 50 yrs but for the first time I’m loading fora 6.5 grendal ar15 and having problems with bullets moving forward 10 thousands when releasing bolt I’ve tried 2 to4 thousandth neck tension and taper crimp my next step will be lee factory crimp I bet this is more com
mon than most reloaders realize kinda like a bullet puller when chambering a round so happens I Mike everything and verify
Nicely written article. I wanted to mention that one reason for not loading cartridges to maximum capacity is the fact you can safely change your bullet depth some and not worry about being over pressure. I would suggest that this be tried, experimented with, before loading a ton of cartridges up though and never under estimate the value of a chronograph in working up loads!
Great info on crimping. I have a question. What is “profile” crimping?
When 1st loading .45 ACP, I had failure to detonate due to light hits on primers.
A friend said, “Don’t CRIMP’em!”
Problem solved.
Good Article, though I was surprised a bit that the Lee Factory Crimp die wasn’t mentioned in the article.
A bonus of these dies is that using the LFC die, you really can’t over-crimp.. it just returns a case to factory dimensions.
I’ve replaced most of my RCBS, Hornady, Lyman, & other brand die sets with Lee dies, due to their (IMO) better design.
Unbreakable decapping pin, using a collet, is a better design as well.
Yes you can over crimp on a Lee Progressive Press with Lee dies, as I have done it with 7mm Rem Mag cartridges. I found this happened with the last two shells in the shell plate at the end of a run. The problem is you apply too much pressure “belting” the bullet. Symptom is the bullet will not pass through the compression chamber and will not shoot out of the barrel.
Excellent information. I have been reloading for 40 years. As mentioned, seating and crimping is best done in two separate steps. This one of the few articles that describes crimping properly and accurately describes its purpose whether it be roll or taper!
I have faced the issue of crimping with .45 Colt cartridges. If the bullets are lead, such as my reloads or lead “cowboy action shooting ” loads, a roll crimp keeps the bullet exactly where it is supposed to be. But when I have purchased factory jacketed RNFP, they have no cannelure and are very prone to sliding back in the case (especially because the case is virtually empty when loaded with smokeless powder). The crimping portion of a Lee Loader does nothing. Can I use instead the resizing portion of the kit to tighten them up?
I’ve experienced the same situation. I tried the very affordable Lee Factory Crimp die instead of just the taper crimp portion of my seating die. The LFC die let me control exactly how much crimp and it solved all of my setback issues. As an added bonus it produces some great professional finished looking rounds. I use the die as my final step in my progressive press. Hope this helps!
Agree in spades. My heavy loads for hunting in my .45 LC were causing the bullets to come out in the other chambers, the LFC cured all those issues.
In addition, I use the LFC for my Varmint loads in my 6mm, and shrunk my group a tad.
I now use the LFC in most every caliber I load.
Considering the flak Lee caught when it first came out, his idea bears fruit for me.