THE SERIES
- Part 1: Optics Buying Guide: Iron Sights, Red Dots, and Scopes
- Part 2: Optics Buying Guide: Top Must-Know Terms for Picking the Right Scope
- Part 3: Optics Buying Guide: Scope Mounts
- Part 4: Optics Buying Guide: How To Properly Zero Your Scope
- Part 5: Optics Buying Guide: Finding Your Range with a Scope Reticle
- Part 6: Optics Buying Guide: Hold Off vs. Adjustable Scope Turrets
- Part 7: Optics Buying Guide: Scope Reticles
- Part 8: Optics Buying Guide: Using a Laser Rangefinding Scope
- Part 9: Optics Buying Guide: Holographic and Red Dot Optics
- Part 10: Optics Buying Guide: AR-15 Optics and Scopes
- Part 11: Optics Buying Guide: Big Scopes
- Part 12: Optics Buying Guide: Do You Get What You Pay For?

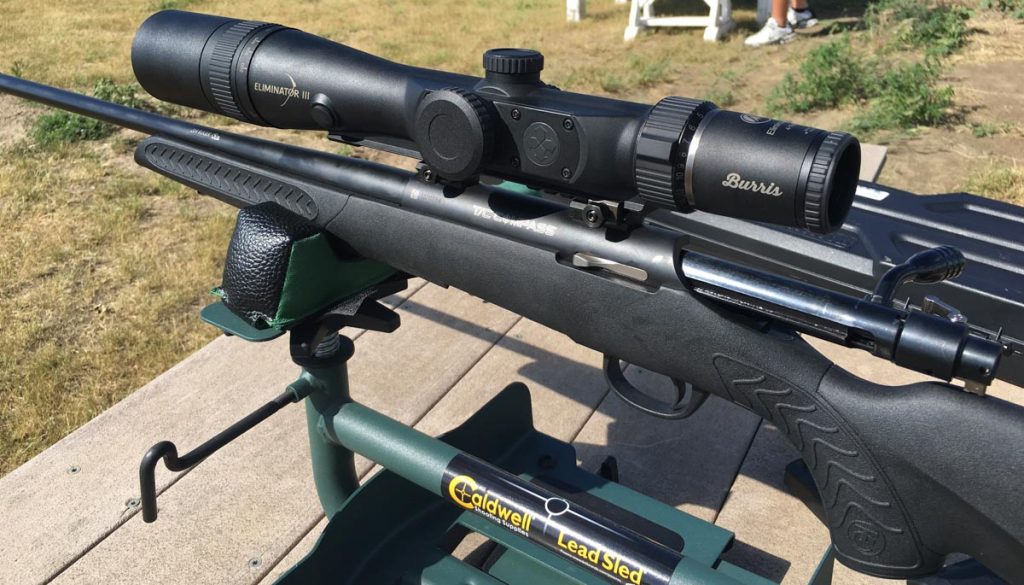
A laser-enabled scope like this Burris Eliminator allows you to place a perfect long-range shot without taking your eye off the target.
If you intend to reliably hit a target at long range, you have to process a number of steps in short order:
- You need to determine the exact range to the target.
- You need to figure out whether you are shooting at an uphill or downhill angle relative to the target.
- You need to calculate the trajectory of the bullet based on the linear range and the angle determined in step two.
- You need to make turret adjustments or identify the correct holdover position on your scope reticle based on your trajectory math.
- You need to estimate the crosswind components everywhere between your shooting position and the target.
- You need to calculate the wind impact on your shot. How much will the bullet drift left or right as it travels to the target?
- You need to adjust your windage or identify the correct windage hold point using your scope reticle.
- Last, but not least, you need to execute a perfect shot at the moment that conditions in all the preceding steps remain constant, or else you have to recalculate again.
There are plenty of tools on the marketing that make those first seven steps a lot easier. You can buy a laser rangefinder. That’ll tell you the exact range to target in seconds. You can tote along a ballistic computer to determine the trajectory. After entering specific data about your projectile type, actual velocity, current atmospheric conditions, and range, that will help you calculate the correct elevation adjustments or reticle hold point. You can get even fancier and use something like a Kestrel device that also helps you with windage calculation. All of these tools help you quickly move through the first seven steps of making a perfect long-range shot.
Or, you can use a scope with many of those tools built in. The end result? You can perform all of these steps without taking your eye off the target.
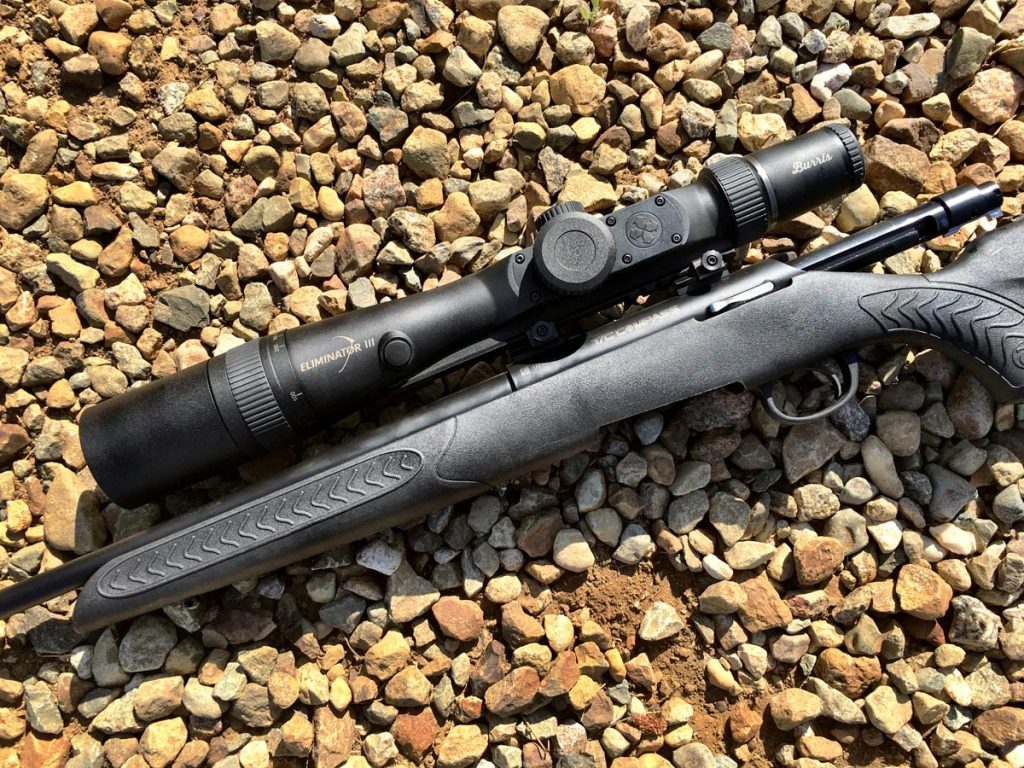
The idea behind optics with integrated laser range finders is to reduce the complexity, time, and gear requirements to perform these steps in the field. To understand how much the process can be simplified, let’s use the Burris Eliminator III Laserscope as an example of how the long-range shot process can be simplified. The model shown here is a 4-16x50mm version. If you prefer a little less magnification, you can also choose a 3-12x44mm model.

I tested the Burris Eliminator with this brand new Thompson Center Compass rifle chambered in .204 Ruger. Even with the tiny little .20 caliber bullet, I was able to nail targets out to 600 yards.
To understand what a scope with an integrated laser does, it’s helpful first to walk through the setup process. As you’ll see by the setup inputs, a laser-enabled scope can do far more than just identify the range to your target. After all, if you’re including electronics to calculate distance, why not add a ballistic computer as well? Then you can determine exactly what to do with the distance information measured by the laser.
Before heading to the field or range, you’ve got to calibrate the scope’s onboard ballistics computer with your specific ammunition. For a ballistic computer to yield accurate calculations, it has to understand details about the projectile in use. It not only needs to know actual velocity out of your rifle, but it also needs to understand the aerodynamic qualities of the bullet. That way, it can accurately determine the effect of gravity and the wind on the flight path.

Burris includes an extensive table of cartridges that provides all the data you need to configure the scope to your specific cartridge.
When setting up the Burris Eliminator III, you’ll need to enter the following bits of information:
- Ballistic Coefficient
- 750-yard Drop Number
Using some fancy reverse math, these two numbers provide enough information about the flight characteristics of the bullet to enable the scope’s computer to estimate the correct holdover and wind adjustment at varying distances.
The Ballistic Coefficient is simply a measurement of how aerodynamic a bullet is. Or, you might think of it as a measurement of how much wind resistance a particular bullet has. The ballistic coefficient number operates in reverse, so the higher the number, the more spiffy and slippery the bullet is. A brick would have a very low ballistic coefficient number, while a 6.5mm Creedmoor Sierra Matchking bullet would have a much higher one. In practical terms, a bullet with a high ballistic coefficient will travel farther with less drop at a given distance and be moved around by the wind less than one with a high coefficient. Gravity works the same on everything, so there’re no anti-matter games here. A slippery bullet simply travels farther in a given amount of time than a non-slippery one and is, therefore, subject to less time-fighting gravity.
For purposes of the Burris Eliminator, the ballistic coefficient number tells the scope’s computer part of the information it needs to know to calculate bullet drop and movement due to crosswinds.
The other piece of information that the computer needs is the drop number. Think of this as the number of inches the bullet drops after traveling 750 yards at sea level. Again, using some reverse math, this provides the computer some indication of the actual velocity of the projectile. The same bullet, fired at lower velocity, will have more drop over a given distance as it’s subject to gravity for a longer period of time while it moseys on down to the target.
Finding these two numbers is fairly easy. With the Eliminator, Burris includes a whole booklet listing hundreds of cartridges and projectile types, so you can just find yours and enter the numbers provided. Or, using Google or cartridge packaging, it’s easy to find ballistic coefficient numbers for most commercially available projectiles.
If you’re shooting at less than 1,000 feet above sea level, you can just enter these two numbers into your scope and away you go. If your elevation is higher than that, you need to adjust your ballistic coefficient and drop numbers before entering them into the computer. All else being equal, the higher you go, the thinner the air is, so the less bullets drop and the less they’re impacted by the wind. Burris also includes adjustment figures for each cartridge in the table. For each increase of 1,000 feet in elevation, you’ll increase your ballistic coefficient entry by a certain amount (bullets act more slippery in thinner air) and decrease the drop number (they drop less at any given distance.)
Once you enter the two numbers into your scope’s computer, you’re ready to shoot. Almost.
The last step, although you can do this first if you like, is to zero the scope for 100 yards. Using the windage and elevation dials, fire three shot groups until the center of the reticle matches the center of your 100-yard group. If you want extreme precision, and have a long range target available, fire a group at 500 to 750 yards to determine if you need to fudge your drop number a bit. The manual tells you exactly how to do that. After zeroing, you’re done with ever using the turret adjustments again, at least until you change rifles.
Now you’re really ready to shoot long range targets.
In the field after the setup and verification is done, you simply view your target and press one of the range buttons on the side of the scope. A laser beams out to wherever the crosshairs are pointed, bounces back, and the computer does its thing. In the top of the viewing area, you’ll see the distance in yards or meters depending on your setup preference. You’ll also see a number that represents windage adjustment for that specific range.
Since the scope has a built-in computer, there’s no need for you to do any elevation calculations. The scope will light up the proper elevation hold point in your scope reticle. Just place the illuminated dot on your target and the drop compensation is complete.
The only other thing you have to do is factor in the wind. Remember, the reticle shows you a number, measured in milliradians up top. The reticle has a series of dots extending to either side, so if the readout specifies something like 1.4, then hold 1.4 dots to the side. I should note that this number assumes a 10mph crosswind, so you’ll have to estimate the wind velocity yourself. If you estimate a 5mph crosswind, just hold .7 dots to the side.

Not only does the X96 reticle show you range and windage information, it lights up the correct hold point for your target.
To put these concepts into practice, I brought a Burris Eliminator on a recent prairie dog shoot in South Dakota. Using Thompson Center’s new Compass rifle, chambered in .204 Ruger, I set up the scope for the specific conditions and took it to the field. In practice, using the scope to hit reliably distant targets was as easy as it sounds. After finding a target, I hit the laser ranging button, found the elevation light, put it on the varmint, and estimated my wind. The results? Dead on. While .204 Ruger is not a cartridge ideally suited to 600-yard shooting, the elevation adjustments were dead at that range and everything closer. I found myself estimating wind looking through the reticle too by watching grass and tree movements, so I never had to take my eye off target to find, range, and hit a distant target.
The concept is pretty impressive. While all the tools to do this exist separately, the ability to build all that functionality into the scope already mounted on your rifle is handy. What I liked most was that the automation addresses the mundane parts of the shot – it’s still up to you the shooter to do the hard part of reading the wind and executing perfect shot mechanics. While I’m a ballistic math geek, I didn’t miss having to do all that slide-rule work in the field.


Impressive! Thanks for the review! My step brother suggested this to me. I am interested in ballistics, but unlike you, am NOT a math geek. This looks like something right up my alley.
Sure I’ll be able to afford a couple of these just as soon as I hit the lottery.