
THE SERIES
- Part 1: Optics Buying Guide: Iron Sights, Red Dots, and Scopes
- Part 2: Optics Buying Guide: Top Must-Know Terms for Picking the Right Scope
- Part 3: Optics Buying Guide: Scope Mounts
- Part 4: Optics Buying Guide: How To Properly Zero Your Scope
- Part 5: Optics Buying Guide: Finding Your Range with a Scope Reticle
- Part 6: Optics Buying Guide: Hold Off vs. Adjustable Scope Turrets
- Part 7: Optics Buying Guide: Scope Reticles
- Part 8: Optics Buying Guide: Using a Laser Rangefinding Scope
- Part 9: Optics Buying Guide: Holographic and Red Dot Optics
- Part 10: Optics Buying Guide: AR-15 Optics and Scopes
- Part 11: Optics Buying Guide: Big Scopes
- Part 12: Optics Buying Guide: Do You Get What You Pay For?
So why would you want or need a very high magnification scope? There are two related reasons. You might need to see and hit a reasonably-sized target at very long range, or you might need to be able to see and hit a much smaller target at shorter ranges. For example, if your job calls for spotting and engaging a man-sized target at 1,200 yards, then a zero magnification red dot or low power scope is going to greatly reduce your odds of a successful first round hit. Similarly, if you’re on a prairie dog expedition, your target is only a few inches wide, so even at ranges of 200 to 500 yards you’ll want some extra magnification to spot your target and place your shot.
Understanding exit pupil
We’re going to get into a bit of math here, but I promise that it’s really, really simple and understanding the concept will take a whole lot of mystery out of features and function of magnified optics.
First, it’s important to understand that your eye can only deal with so much light, no matter how big the lenses on the scope are. Larger lenses and tubes can have a positive effect, but it’s not so simple as “bigger allows more light to your eye, so that’s a good thing.” Your eye is limited by the size of the intake valve, otherwise known as the pupil. Think of the pupil as a hole through which light has to travel. Well, actually, that’s exactly what it is. The larger the hole, the more can go through. However, your pupil is only in the 4mm to 7mm diameter range depending on light conditions. In lower light, or if you’re on mind-altering drugs, the pupil gets bigger, maybe to 6 or 7mm. In daylight, it shrinks because all that brightness is too much for your eye to deal with. The point of all this discussion about your eyeball is to illustrate the fact that no matter how big a “tube” of light your scope spits out the back, your eye can only deal with a light beam smaller than about 7mm in diameter, again depending on ambient light conditions. The size of the light tube going into your eyeball is called the exit pupil, and understanding how its size changes is a big deal when choosing a scope. It’s also a big deal in the field when you decide how much magnification to use. Let’s talk about that next.
With a variable power scope like the Burris XTR II 2-10x42mm I’m going to use for this example, the exit pupil changes based on two factors: the diameter of the objective lens (the big one up front) and the current magnification level. Here’s where the easy math comes in. Just divide the objective lens size (in millimeters) by the magnification level and you get the size of the exit pupil, also in millimeters. This particular scope has a 42mm objective lens, so when I am using it at 2x power, then the exit pupil is 21mm – far more than I need. That’s what makes the picture so clear and forgiving. If my eye moves around a bit relative to the eyepiece, I can still see a clear picture. If I crank the power up to 10x, then the exit pupil is 4.2mm. In daylight conditions, that’s pretty good, and the tube of light will pretty much fill up the size of my eye pupil. If I look through it in the dark, then my pupil will expand to 6 or 7mm, so I have less light coming into my eye than I can use. I might be better off lowering the magnification to a lower level to get a larger tube of light hitting my eye in that situation. For example, if I reduce magnification to 6x, then the exit pupil will be 7mm (42mm / 6).
So, technically speaking, a larger objective lens can (sort of) transmit more light, but it’s not quite that simple. The real purpose is to transmit more light at higher magnification levels. At lower magnification, a huge objective lens doesn’t really help you because it outputs a larger cone of light than your eye can see. I have another scope on my desk, a Burris Veracity 4-20x50mm. As the name implies, the objective lens is bigger, 50mm, so at a magnification of 10x, I see a 5mm exit pupil (50mm / 10). At 20x magnification, the exit pupil is only 2.5mm, so I want to be using that power setting only in bright daylight conditions when my eyeball pupil is small.
The net-net of all this optics gobbledygook is that you can start to evaluate the type of optic you’ll need for your shooting requirements. If you’re going to be shooting in low light, say at dawn and dusk in a hunting application, make sure that you buy a scope where the objective lens size and magnification levels you’ll be using offer an exit pupil in the 6mm range. If you do that, you’ll have the clearest possible picture through your scope. If your shooting is mostly in bright daylight, then you can go to higher magnification levels, because it will be OK to have an exit pupil in the 4mm range. Above all else, remember, that what’s most important is that, assuming good lens quality, the objective lens and magnification are well matched. Bigger isn’t necessarily better.
With that said, also remember that the exit pupil math is only one factor of evaluation. We talked about it at length here to illustrate the importance of matching the scope features to the capability of your eye in various conditions. But you can’t just select a scope based on good exit pupil math. If the lenses aren’t high quality, then nothing else really matters. We’ll get to that more later in the article.

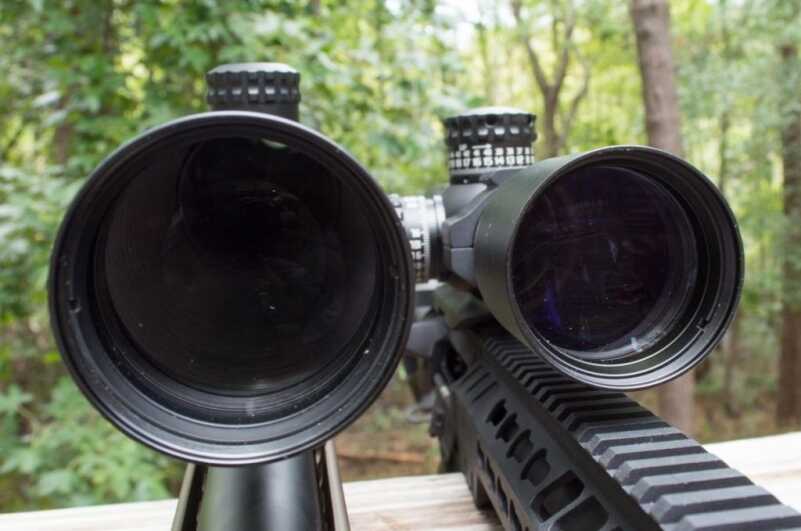
This Burris Veracity 4-20x50mm has a larger objective lens to help offset the exit pupil effects of higher magnification.
Tradeoffs
As with most things in life, there’s no free lunch when it comes to choosing between different optics features and specifications. You’ll need to make deliberate tradeoffs to ensure that your scope choice is right for your specific needs. Let’s talk about a few of those tradeoffs in more detail, so you can better decide which ones are important for you.
Field of view
Field of view simply defines how “wide” a picture you can see through your scope. The more you magnify, the less the field of view at any given distance. Let’s look at the specs on the Burris Veracity 4-20x50mm for an example. At 100 yards distance, the lowest 4x magnification lets you see an area 26 feet wide. At the 20x power level, that field of view shrinks to 5.5 feet. But that’s the whole point of variable magnification scopes. You can scan using lower power levels, and when you zero in on your target, you can increase magnification to gain shot precision. Once you find your target, a narrow field of view isn’t a big drawback.
Mirage
The more you magnify, the more you’ll see a mirage effect through the lens. It’s that shimmery distortion that arises from heat thermals coming off the ground between you and your target and from the barrel of your rifle. At lower magnification levels, it’s not a big deal, but once you zoom in to 10-12x power, mirage will start to be a factor.
Exit pupil
Earlier we talked about how, all else being the same, the size of the exit pupil shrinks as you increase the magnification level. That’s OK too, provided you’re not trying to exceed the design parameters by shooting in lower light at higher magnification levels. Generally speaking, your perceived “brightness” and clarity of vision will be much better at lower levels of magnification.
Why are big scopes so expensive?
Glass quality
You can grind a lens with your Dremel tool or you can make one under carefully controlled clean room conditions that rival the most impressive NASA labs. While the comparison is extreme, it’s valid. Quality and care in the lens manufacturing process doesn’t come cheap, nor is it a sexy feature outlined on the box. Simply put, you get what you pay for. No $79 gun show scope is going to compare to one made from a reputable maker under tightly controlled conditions. Don’t skimp on quality. Generally speaking, you’re better off buying a well-made scope with lower magnification and fewer features than a cheaper one with all the bells and whistles.
Lens coating quality
One feature of quality optics that’s totally counter-intuitive is lens coatings. You’ll hear scope makers talk about things like “94 layers of lens coating!” So how can adding stuff like coatings actually improve light transmission? Isn’t that like tinting windows on your car? It works like this. Uncoated glass reflects a lot of light in random directions, so rather than light passing right through it, a sizeable percentage bounces away. If light has to pass through multiple glass lenses, as inside a scope, then each lens bounces off more of the original light. By the time it gets to your eyeball, much of the light that was gathered up front is gone.
Lens coatings help light pass through without reflecting off into space. So while coating may appear to reduce light transmission, it actually improves it. With big scopes and high magnification levels, the quality of coatings gets to be a big deal. It’s one of those features that isn’t really sexy but makes a huge difference in the quality of your sight picture, especially in low light.
Turrets and gears
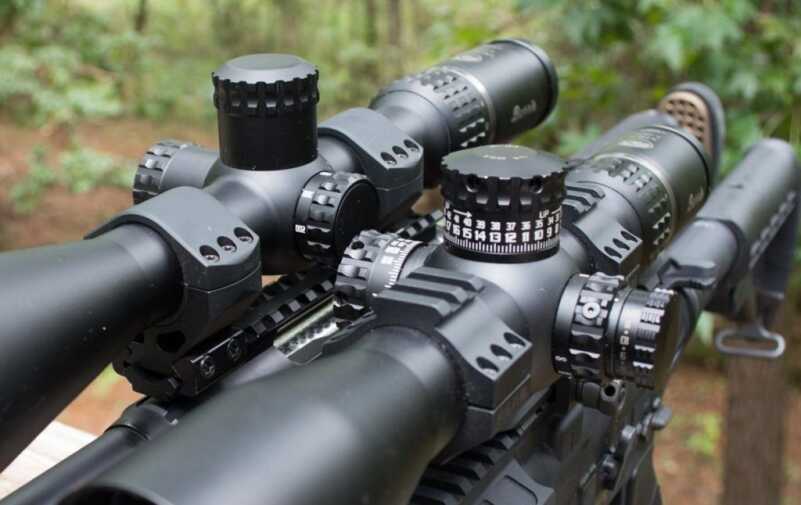
Especially with big, high-power scopes, the quality of the adjustment mechanisms are critical. When you adjust mils or minutes of angle for a long range shot, you need to know that each click of the dials moves precisely the same amount. You also need to know that when you return to your previous setting, that the point of impact will be exactly the same. Less expensive scopes that use plastic gears and components will suffer from wandering zeros. If you make 19 adjustments for different shots, then return the turret settings to your 100-yard zero, you need to be absolutely sure that nothing has changed with all that adjustment.

One of the things you pay for with a quality scope is the precision and repeatability of turret adjustments.
Summing it up
The good thing about evaluating scopes is that you can literally “see” when one is better than another. When heading off to the gun store to purchase a high-powered optic, convince the sales person to hold your license so you can take a couple of demo scopes out into the parking lot. Crank them up to their highest magnification levels and then evaluate the picture. Is there perfect clarity along the edges of the circle? Can you make out fine details from a distance? Is the optic sensitive to shadowing with small eye movements? How bright is the image at higher magnification levels?
The best way to get a feel for these differences is to compare multiple optics side by side; you’ll be amazed at the difference between a quality scope and a lesser model with the exact same specifications.


Scope Coatings. Glass is ground to shape. The grinding leaves scratches, which are polished out. Well, almost. To the naked eye, you cannot see any scratches, but they are there. When light hits the scratches, it refracts in different directions, making the image not only darker but not as clear. Coatings fill the microscopic scratches, making the surface smooth, allowing the Image and light to pass through to give you a better sight picture. Better scopes have better polished lens and better coatings.
I can’t tell much between a $30 Tasco variable, and a $400 “Budget” scope.