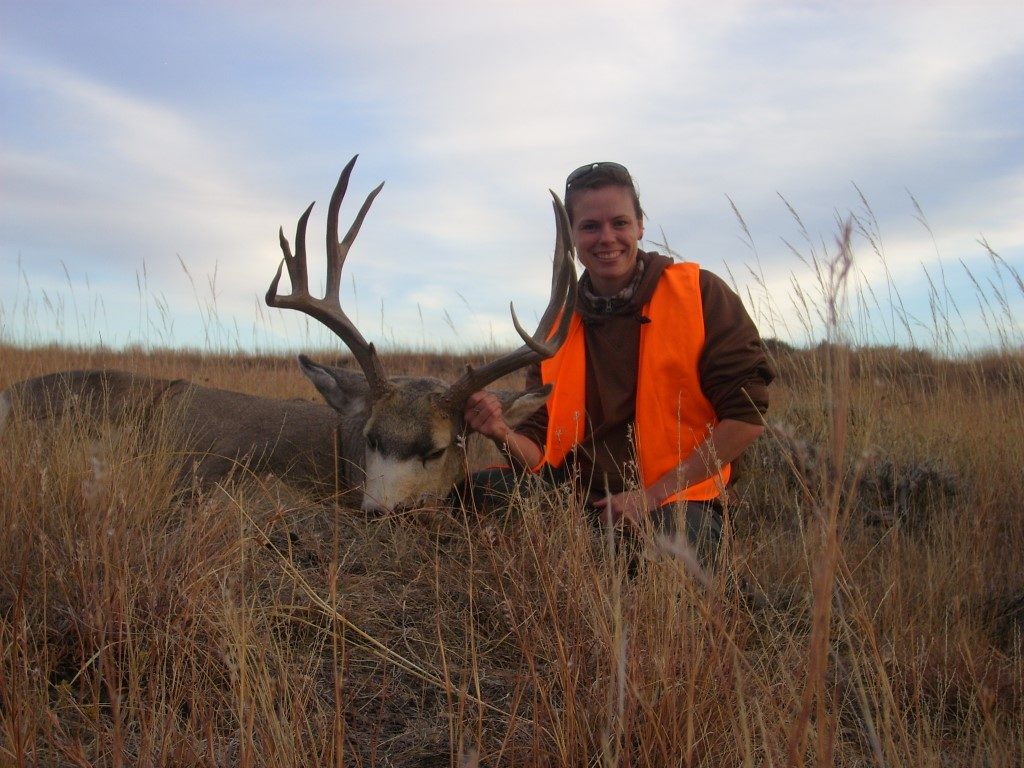
The author’s wife harvested this mature mule deer from a prone position, practicing in the offseason helped to develop familiarity for just such a situation.
Several weeks ago I wrote an article about finding rests in the field. I covered everything from fence posts to tree trunks and using gear in a pinch. This article will address when a hunter doesn’t have the opportunity or resources to use any of those options. There is any number of variations so experiment and get some trigger time with one or more of these time-tested favorites and enjoy some hard earned success when the opportunity arises this year.
One of the main traits that separate a good hunter from a great hunter is the ability to think on the fly and adapt to an ever-changing situation. In my experience, mostly hunting pressured game on public land, a person rarely gets a second chance on mature animals so it’s vitally important to make the first shot count. Taking the extra time to get into a more steady shooting position pays off more often than not when that buck or bull you’ve worked so hard for is finally in range.
A good rule of thumb for unaided (no bipod or shooting sticks) field positions is: the closer you are to the ground, the steadier you are. Using gravity to your advantage, you take out more variables that could adversely affect the shot outcome like wind gusts, a rapidly beating heart, or muscle fatigue. This means, when at all possible, get prone. Unfortunately, this is the least forgiving position in a hunting scenario because of the elevation of the rifle muzzle. What makes it stable also hinders your ability to see over grass, brush or a slight roll in the topography.
If the situation won’t allow for prone, a hunter’s next best bet is a sitting shot. Remember, the closer your mass is to the ground, the less you have to fight gravity. Keeping the weight of your pelvis and hips on the ground is still a very solid position to be shooting from. This will also give the hunter valuable inches of muzzle clearance that he wouldn’t have lying down. While there are many slight variations, the most important part of this position is to keep “bone on bone”, meaning elbows go on the inside or outside of the knees depending on the angle required for the shot. Using your skeletal system for support in lieu of big, blood-filled muscles, prevents the pulsing blood from moving the crosshairs of the hunter’s rifle and allows for a much steadier shot.
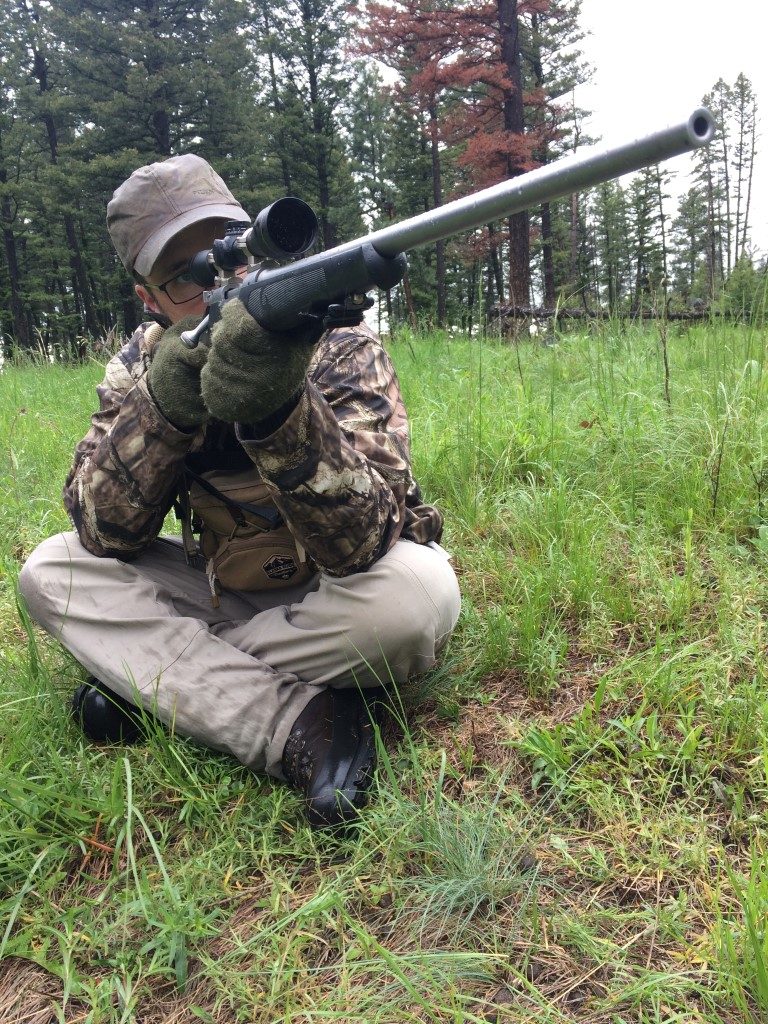
The author demonstrates a sitting position, notice the elbows on the knees for bone on bone contact.
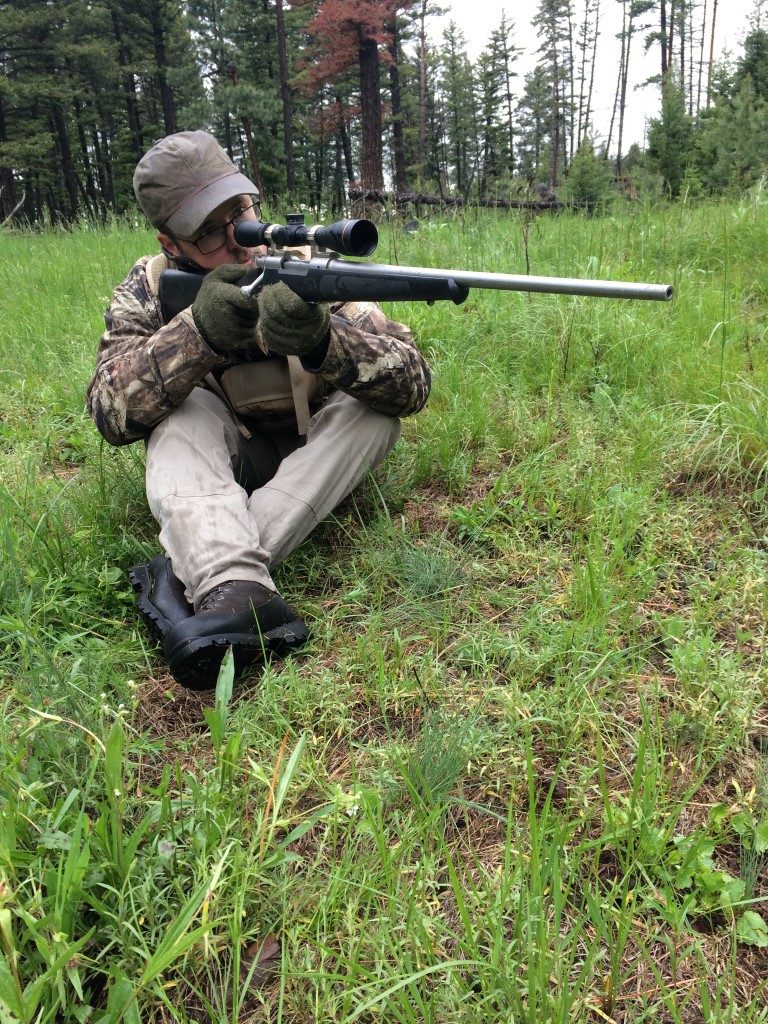
If the angle of the shot prevents elbows inside of the knees, try resting them outside of the knees to add some stability.
Still not high enough? Don’t stand up just yet. Roll your front hip off of the ground and put that knee up, resting your front elbow on the now raised knee. When possible, keep your body weight on the hip still on the ground. If you still need more elevation you can adjust your body weight forward, rising up until you are sitting on your back leg, then putting your body weight back down on it. If this position doesn’t give the height required, lean forward and kneel on your back leg, your front leg should still be bent with the forward knee off of the ground with the support arm resting on it. This is the highest kneeling position one can achieve but sacrifices support because of it. If you are curious which rest is most stable for your body type, grab your rifle, practice each position and have a buddy slowly push on your upper body from different angles to give an idea of the weak points of each.
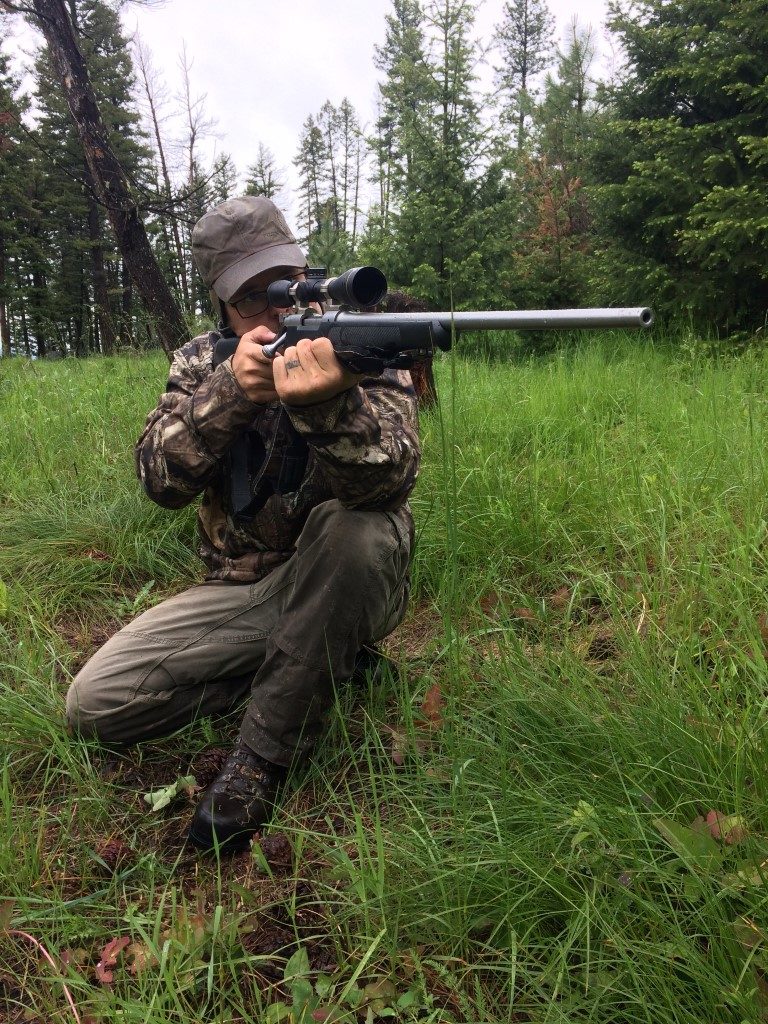
The author demonstrates a higher shooting position, this is a fairly steady mid-elevation option. Notice the rear hip is down.
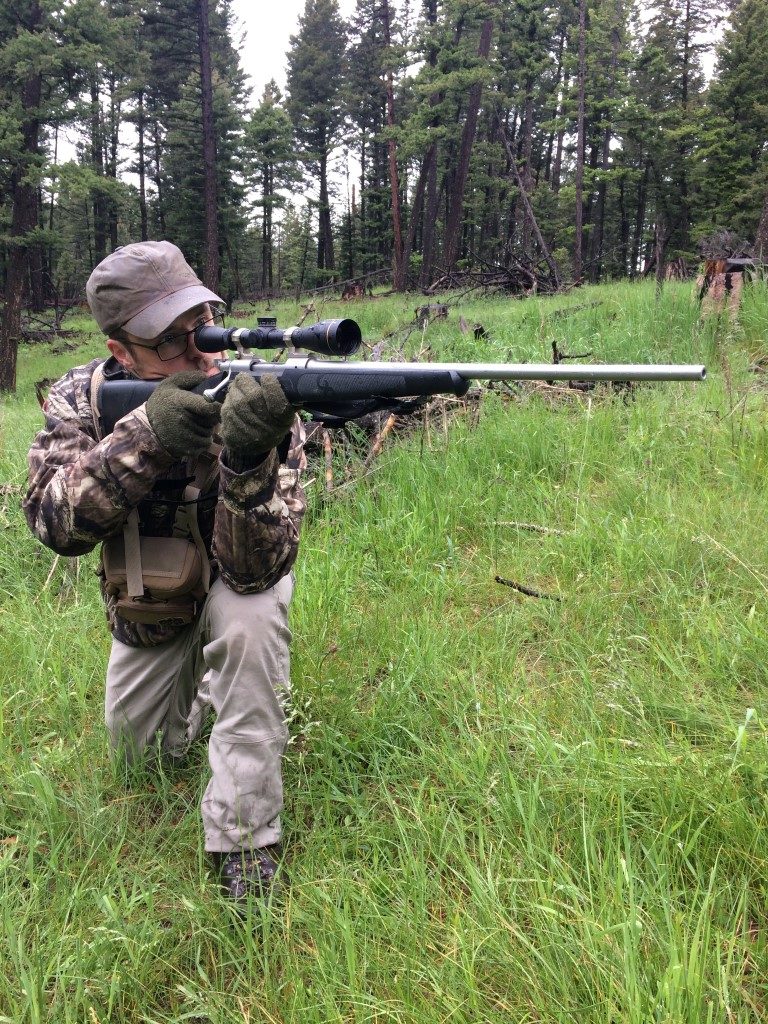
Slightly higher than the previous position, this isn’t as stable because the rear hip is now off of the ground to gain muzzle elevation.
If none of these give the appropriate elevation, it’s time to stand up. As anyone who has shot much can attest to, this is the least steady position to shoot from. Taking into account all of the variables of breathing heavy, weather and tired muscles, the hunter has a lot to overcome to make a successful shot. This shouldn’t be attempted at game unless, like the other shooting scenarios, you are 100% confident when the trigger breaks that it will result in a fatal hit. If possible, tuck your front elbow into your rib cage to add some “bone on bone” support to the position. This will keep the fore end of the rifle from wanting to dip down during the shot and prevent the forward arm from fatiguing too quickly. Everyone is built slightly different so experiment with your rifle, trying slight variations and pick what works best for you.
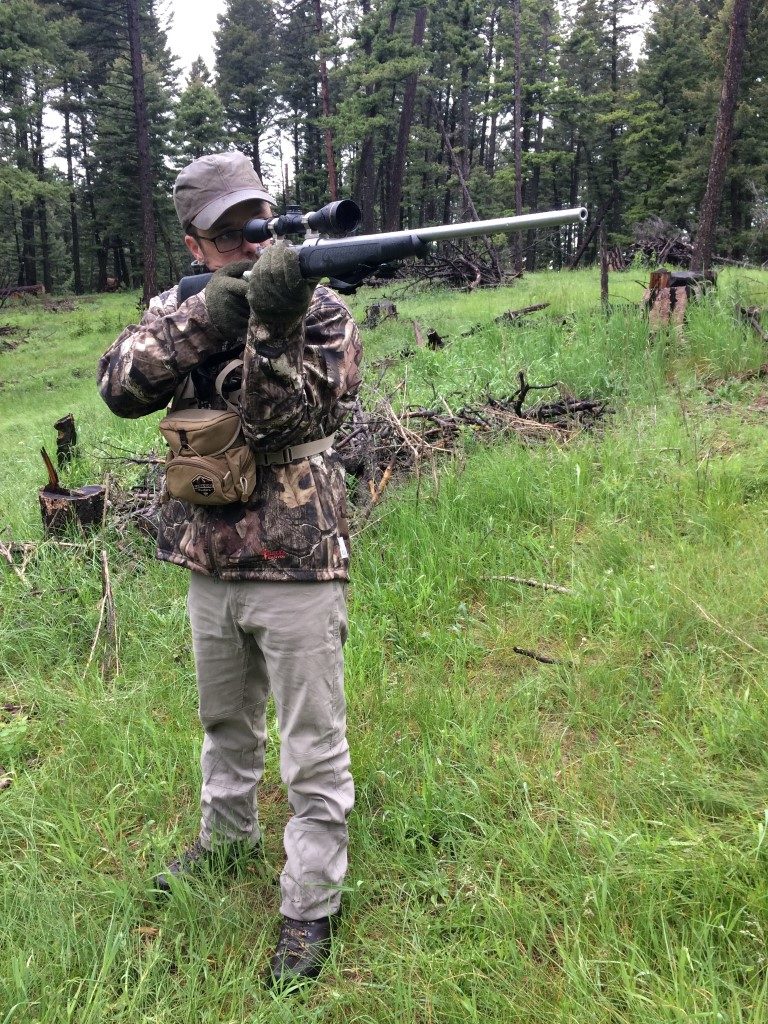
The least stable of all the positions discussed, standing can be made more steady by tucking the forward elbow into the rib cage.
While this is a general guideline for field positions for hunting, it is not intended to portray all of the positions for all shooting scenarios. If you can find two or three that work well and you are comfortable with, you will be that much more prepared when a shot opportunity presents itself this fall.

Not so much gravity as all the joints you have loosely connecting you to the ground when standing, the lower you get, you either tighten up or eliminate some of those joints.
There is a perfectly good sling on that rifle, USE it.
Lt. Col. Jeff Cooper wrote a book titled “The Art of the Rifle” that is a wonderful addition to anyone’s library. He gave some good examples of shooting positions and why they work.
Kudos to the previous comments on sling use! There’s no faster way to stabilize an “off-hand” shot than a simple pass-through the sling with the support hand, so that the sling is taut against the outside of the elbow when the support hand grips the forearm. This can be the only choice when seconds count, as when the game is moving.
I agree with Chuckie about Appleseed. It’s a very cost effective way to learn or reinforce basic rifle marksmanship.
I really like the Rhodesian sling for a hunting rifle; it’s very solid and a lot faster than a loop sling.
Good article, Josh! I’ve done a lot of hunting and taken a lot of big game in places like Maine, Alaska, and now New Mexico. And with 55 years of hunting, I’m still learning how to shoot better. I noticed you have a sling on your rifle but failed to mention the sling as an excellent brace to use for improved accuracy. I just learned how to use a sling at a Project Appleseed event. The Loop sling being most stable, if you have the time to adjust. But the Hasty sling is fastest but least stable, but better than free standing. Take a look at Project Appleseed. Wish I had attended years ago. Thank you for the valid points!