Estimated reading time: 9 minutes
Red Dot Sights (RDS) are commonly used as the primary sights by professionals and self-defense shooters. Modern dot sights are reliable and rugged, but not infallible. What do you do when they fail?
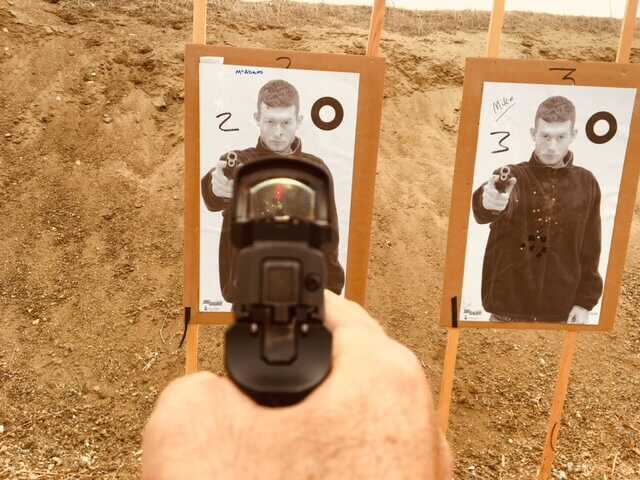
Table of contents
Back-Up Iron Sights
The internet says that BUIS are critical because that is how you must aim when the red dot fails. The reality is a little more nuanced. BUIS are only useful under some minimal circumstances:
- If you lose your dot…
- And your lens is not obscured or broken…
- And you are more than ten yards from the target (your distance may vary).
I have used and taught others to use RDS for over ten years. In that time, we have evolved, and best practices have changed. I remember practicing dot acquisition in an RDS transition class at three yards. If I didn’t see the dot, I instinctively shot anyway and hit. At first, I felt like I was cheating the drill, (I was). After a little thought, I realized that I needed to dry fire more presentations and more importantly, if I can use an alternative aiming technique, dot failure drills don’t require iron sights.
Finding the Dot In Your RDS
Some instructors still teach using iron sights to find your dot. This technique makes sense to old iron sight shooters, but it negates the key advantage of the RDS, target focus. The solution to finding the dot is perfecting your presentation so that the dot is consistently placed between the eye and the target.
Available on GunsAmerica Now
Dots are fast and accurate. This makes low-light engagements and moving targets child’s play. They compensate for a number of vision issues and focus eyes on the target for more natural threat identification. Iron sights are primitive alignment tools to index your bore with your target.
If you are attacked, excessive marksmanship can cause bleeding if the bad guy gets the first hit. RDS makes things easier, but you still must index the barrel on the target and press the trigger without moving the barrel. Time spent looking for your dot is time wasted.
Excessive Marksmanship
If you need to shoot, speed is life. You need a fast way to point the gun. Marksmanship is a continuum. Small or distant targets require precision, and large or close targets require only rough alignment. Mike Ox (Red Dot Mastery) teaches a useful framework of four aiming speeds:
- Kinesthetic- Point the gun without seeing the sights (retention or contact shooting)
- Frame on Target- Very rough alignment using the back plate and housing of the RDS
- Sight on Target- The dot is seen in the window on an acceptable area of the target
- Spot on Target- The dot is precisely placed on a spot on the target
If you have a working RDS, you have options. If you can see the dot anywhere in the window anywhere on the target, you can take the shot, but what if you don’t see a dot?
What Could Go Wrong
Let me start by saying that I have had more iron sights fail (front sight came off) than RDS failures. Most of the dot failures I have seen in class were caused by shooter errors and improper maintenance. What goes wrong?
- Dot is not turned on, battery dead, brightness set too low, improper presentation. (These are the most common failures. All completely preventable.)
- Front window obscured- ie. mud on the front glass, you can still see the dot with one eye and the target with the other. You should be able to hit the target. You can simulate this with blue painter’s tape covering the front of the RDS
- Rear window blocked or broken- This obscures the dot and renders BUIS useless. You can simulate this with blue painter’s tape covering the back of the RDS
- Condensation or water droplets- This obscures the dot and renders BUIS useless for the first shot, it clears itself. You can simulate this by spraying water in a mist on the optic.
- RDS falls off- The RDS is slammed around with thousands of G’s. Proper installation is critical to keeping your RDS attached and zeroed.
Preventative Maintenance On RDS
If you want to enjoy the many advantages of RDS (speed, accuracy, low-light, target-focused shooting, etc.), the first step is to keep the dot shiny so you can always see it. You must commit to training and maintenance. This is not hard or extremely time-consuming.
- Make sure that your RDS is properly installed with the correct torque, quality screws, and thread locker
- Every time you put on your holster, check your sights and lights.
- A clean RDS is a happy RDS- Use canned air or Optic cleaning tools to clean.
- Antifog Treatments like Rain-X or Cat Crap avoid problems and protect optics.
- Check your zero regularly!
- Change your Batteries- no matter what your battery life is, change once a year on your birthday.
Solving Problems
Despite your conscientious preparation, you will one day present your RDS-equipped handgun only to find the dot missing. With a little thought and training, you can press on through the challenge and engage the threat.
To carry a dot for self-defense, you need to put in the repetitions to refine your presentation to consistently put the dot between your eye and the target. That said, under the stress of an actual threat, if for any reason you don’t see the dot, you need an instant plan B that you have practiced. Searching for the dot in a fight is not the right answer.
We listed the possible reasons for dot failure, but in a fight, diagnosis of the cause wastes critical time. You need an immediate action drill that puts rounds on target no matter what the cause. You can figure that out later.
Closer than 3 yards, proprioception (pointing) can point the gun just fine without even looking. We have taught retention and contact shooting for years. Out to 10 yards, you don’t need iron sights — you need an alternative sighting method.
RDS Failure Techniques
These methods are effective, but you may hate some and love others. Pick a couple you like and train with them. Dry fire goes a long way here, but you should confirm with live fire.
Man on TV- This is similar to Guillotine. You look through the body of the optic to line up the front and rear windows of the RDS. barrel. This works best with closed RDS.
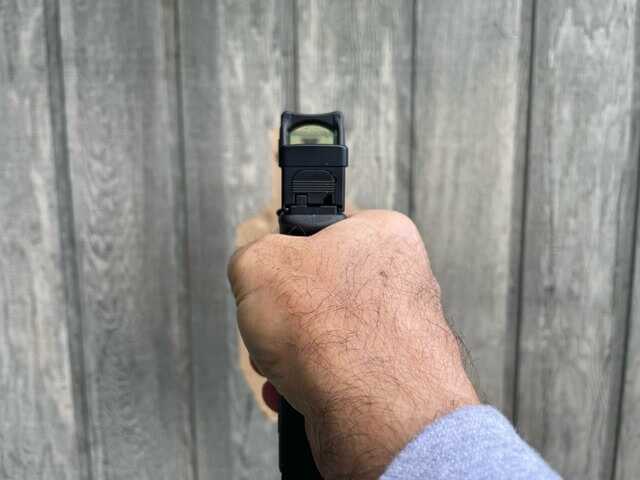
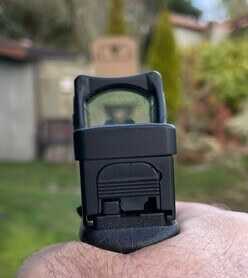
The Crown- Used for headshots, the top of the optic sits on the target’s head like a crown. It is a little hard to see in this picture, the optic covers the target’s head and the top of the optic forms a crown (or owl’s horns with the Trijicon RMR) on top of the target’s head. If the window is obscured, you may have to hold a little lower to see the top of the target.
Some Extra Pictures
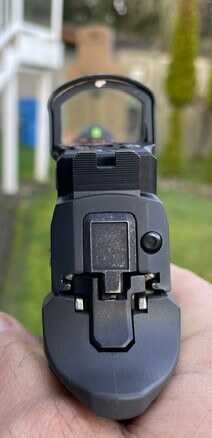
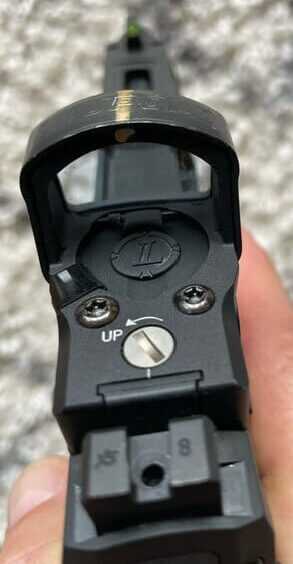
Stripe and Dot- Use a paint pen to put a stripe on top of the optic and a dot on the back. This is almost as effective as BUIS for lining up the pistol and target.
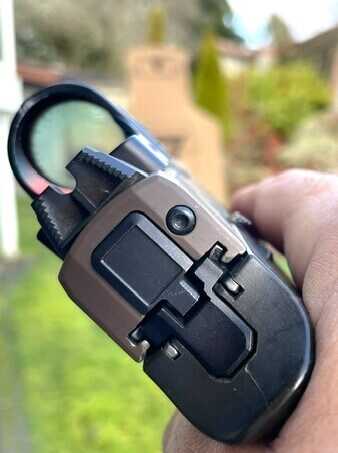
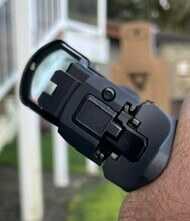
For most shooters, these techniques will work out to 10 yards. You may have different results. Try this on the range before you expect to use it on the street.
READ MORE: SIG Sauer ECHO SV50 LRF : A Game-Changer in Thermal Optics
Past 10 yards is where the BUIS are worth the cost. If they are zeroed, and you can see through the optic, they should take care of business. If you are that far away, you have options.
Conclusion
Using any sighting method requires a good zero and practice to work under stress. Spend some time in dry practice with your RDS, BUIS and alternative aiming methods, then go to the range and see where the holes are in the paper. You should work in a few RDS failure drills in each range session. The confidence that you can handle the worst-case scenario is priceless.
*** Buy and Sell on GunsAmerica! ***







This is a great article, especially for cops. A lot, a very lot of cops, now use optical sights on their service pistols. The ones I have talked with are very much aware of the possibility of sight failures at the worst possible moments. I thought that just simply adding suppressor height sights was the solution. I had not considered fogged-up lenses, reflected glare on the lens or even broken lenses as possible occurrences. These must be considered and trained for. Thanks for the article. We need more of just such. Stay safe. jerry
Thanks Jerry. While there are all kinds of bad things out there, a little training can get you through most of them.
Thank you Mr Miller for your service and your time as a teacher. As I know little about RDS/BUIS this was very helpful for me. Perhaps you would have other resources to share later on for another article.
Thank you KS. I have a lot of pending content on Red Dot Sights. It seems like we learn something new everyday.