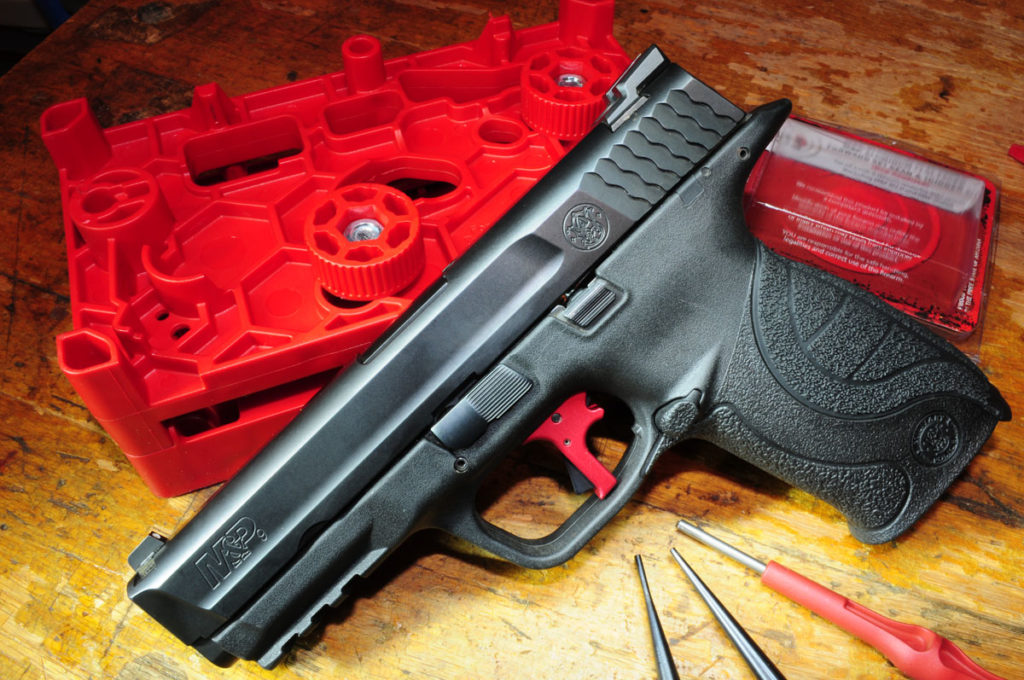
 I’ve always been a 1911 kinda guy. Still am. But I’ve also grown rather fond of high-capacity polymer-framed handguns, in particular, Smith & Wesson’s M&P series. But they have one significant handicap when compared with the 1911: Their triggers suck. Employing a striker-fired system (with merits of its own), the M&P trigger must first depress the striker block, then complete the striker cocking cycle (which was initiated by cycling the action), and finally disengage the sear, firing the weapon. It’s a process that renders a crisp, single-action-type trigger break as elusive as Peter Pan. But wait:
Enter Apex Tactical Specialties – Arizona-based manufacturer and purveyor of premium upgrade kits for high-performance handguns. World-class competitive shooters themselves, the folks at Apex know how to make things better.
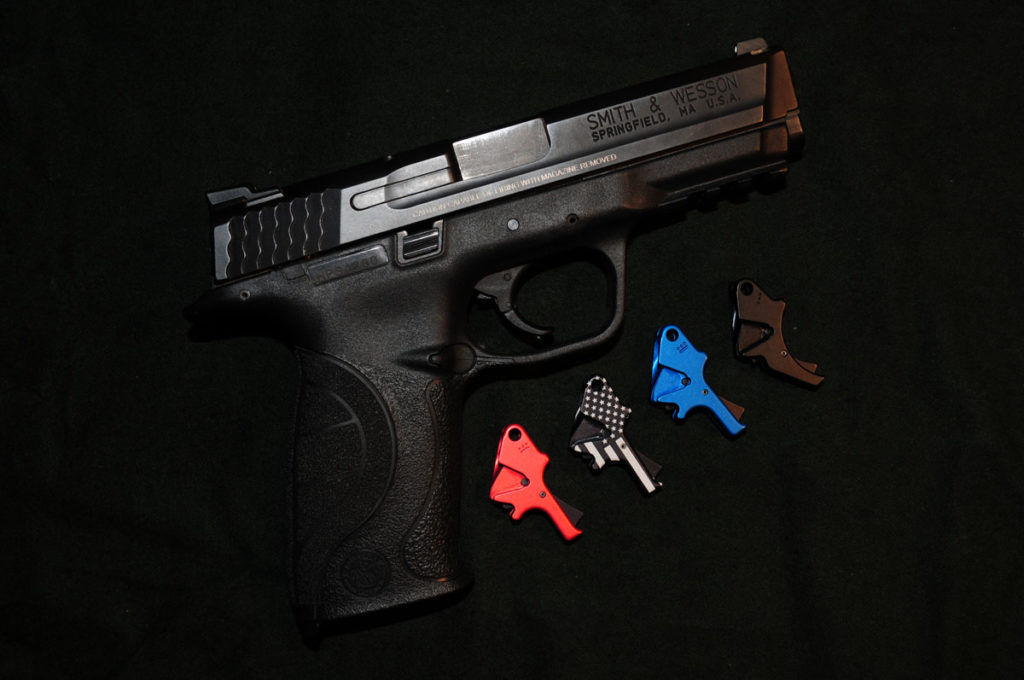
I had heard great things about what an Apex action enhancement kit and trigger would do for my M&P. So, in the spirit of investigative journalism, I decided to, ah, well, investigate. And yes, the prospect of giving my pistol a performance makeover was enchanting. I spoke with the folks at ATS and simply told them to send me whatever parts I needed to make my S&W M&P9 as good as it could be. They obliged. Here’s what came in the mail two days later:
Apex Flat Faced Forward Set Sear & Trigger Kit.
This kit included the new trigger and springs, sear replacement kit, and striker block replacement kit. More on those later.
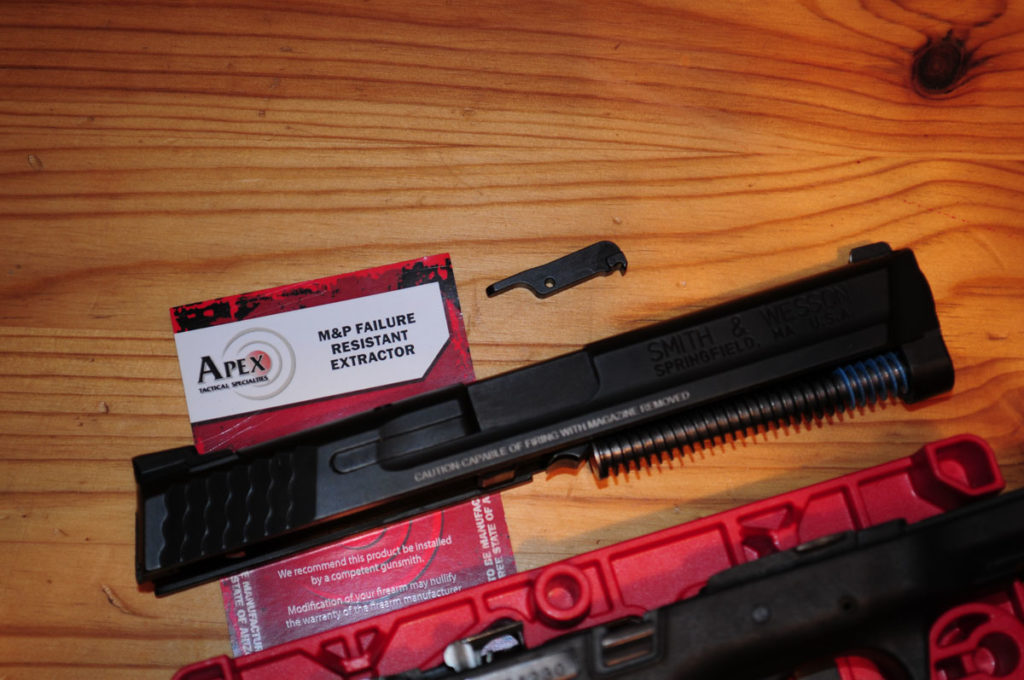
Apex Failure Resistant Extractor.
This was just that: a machined extractor redesigned with better hook geometry, better performance, and less prone to failure.
Apex M&P Reset Assist Mechanism (RAM).
Unfortunately, I was unable to utilize this upgrade due to the iteration of my handgun. Its function is to create a more tactile, noticeable trigger reset for enhanced feel and shootability.
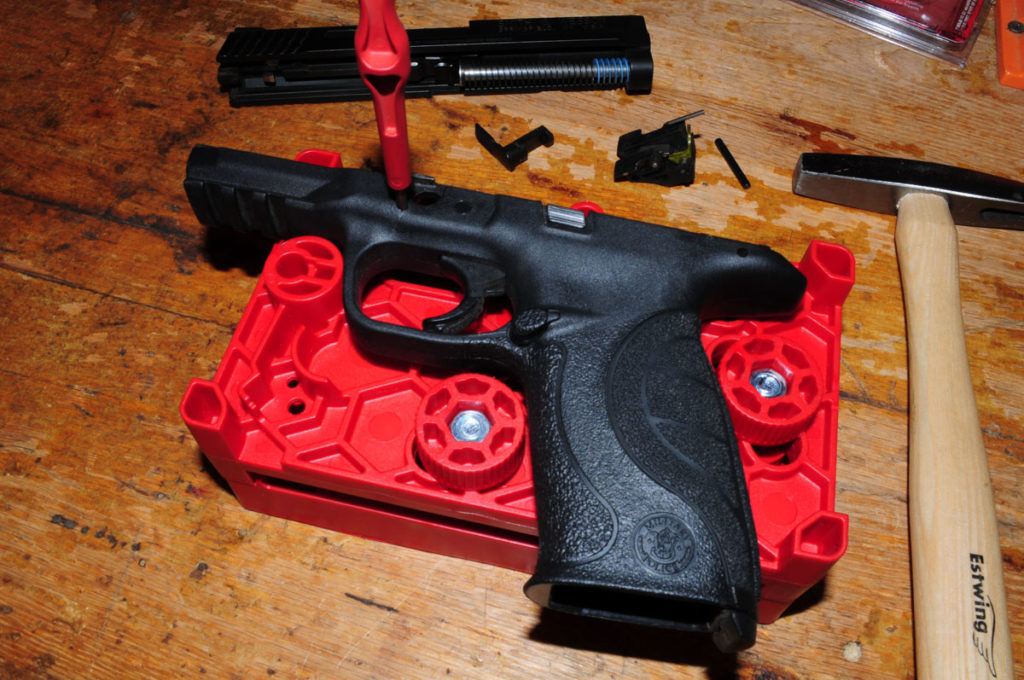
Apex Armorer’s Block and Armorer’s Tray.
Made for gunsmithing on semi-auto polymer-framed handguns, the Block is adjustable to securely hold a pistol in a mar-free, workable position. The Tray sits securely atop your workbench, includes an on-board 1/8-inch roll-pin punch and 1/16th hex wrench, and features a below-deck magnet to grab and hold those tiny parts. (You know the ones: they have a tendency to reduce us to cursing idiots groveling about the dark corners of the floor searching for them.) The Block and Tray work together in stack format if desired.
GETTING STARTED
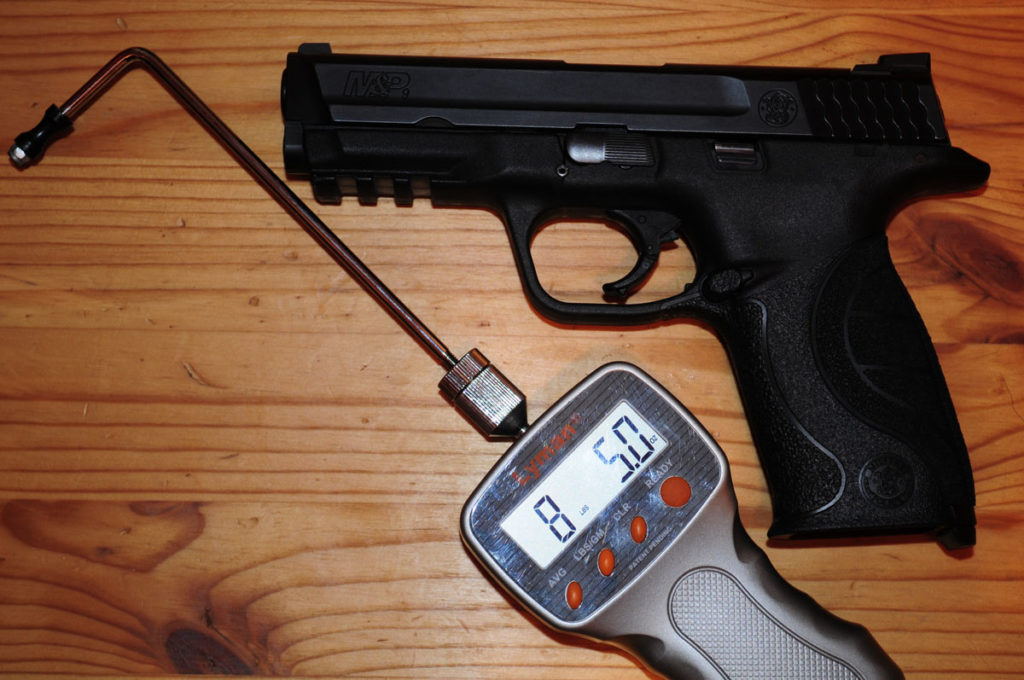
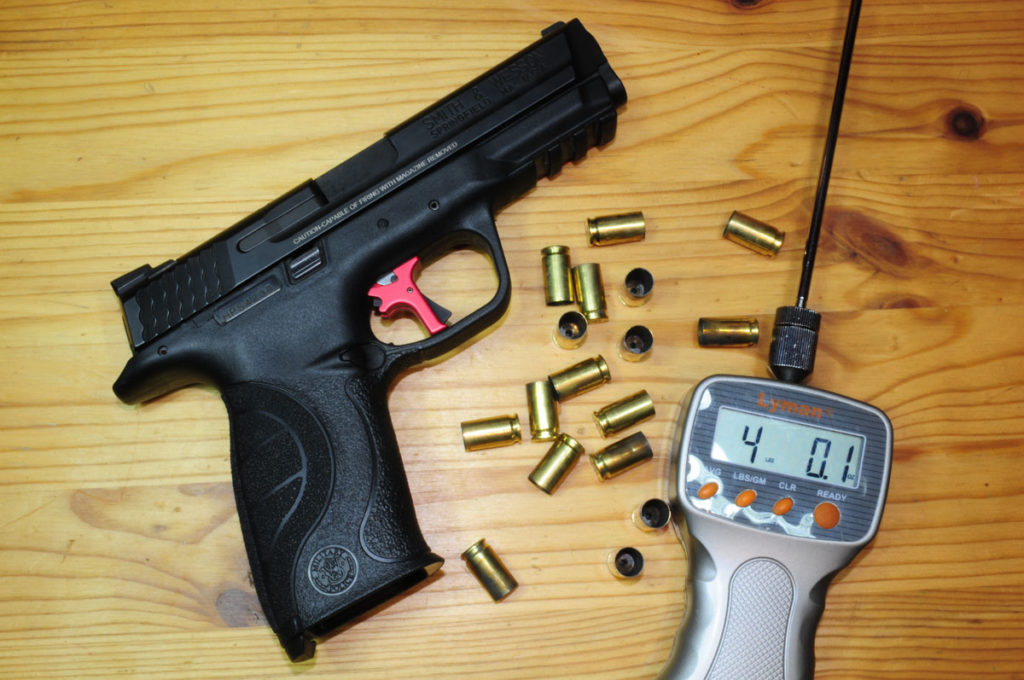
Before beginning work I took a half-dozen trigger-pull readings with a Lyman trigger gauge, arriving at an average of 8-pounds 5-ounces. Assessing the trigger by feel was more subjective. A long, even grind is the best I can describe it, and while that sounds bad, it was at least consistent. That much said, it resembled a 1911 trigger as a Volkswagen resembles a Lamborghini. Finished with my assessment, I readied for work.
I’m just a neophyte gunsmith when it comes to modern firearms, so I proceeded with caution. First I watched the “How-to” videos found on Apex’s website. The new extractor seemed simple to replace, so I used that for practice before tackling the more complex tasks. The video instructions were good, the process was simple and easy (mostly thanks to the Armorer’s Block) and in no time my pistol sported an upgraded extractor. Halleluiah! Now for the big stuff.
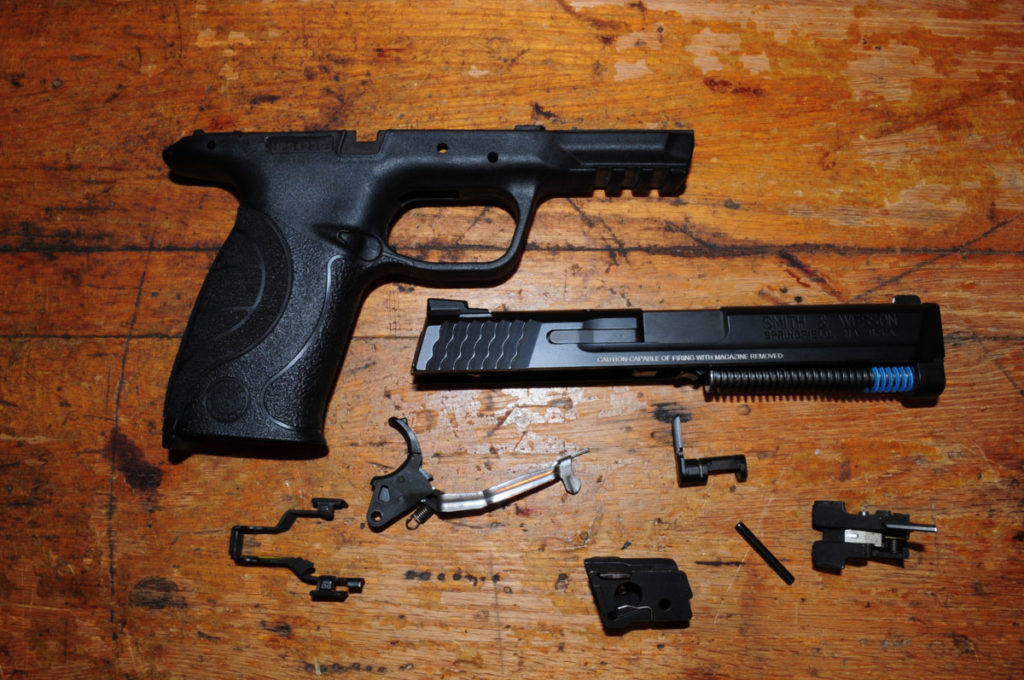
The Trigger came next, but first I had to dismantle the firearm, removing the sear housing block, the take-down lever, the locking block, and the trigger with slide-lock levers, leaving the frame almost completely stripped. Apex’s video instructions are thorough, and by following them carefully I experienced no trouble.
ATS includes two alternate trigger return springs: the green one will produce the heaviest trigger pull, followed by the silver spring. For the lightest trigger pull use the manufacturer’s spring, which is what I did. Mounting the new trigger was simple; the trigger, spring, trigger bar, and slide-lock lever all held temporarily together by the included slave pin. I carefully installed them in the frame, followed by the locking block, all secured by installing the trigger pivot pin followed by the front roll pin. Note: removing and installing roll pins in polymer frames can be challenging. Using the Apex Armorers Block and roll-pin punch made it easy.
Progressing on to the sear I replaced the spring and sear without trouble and re-installed the sear housing block back into the frame. Getting the trigger bar and everything else aligned was a bit tricky, but with care and a small helping of patience it went in smoothly, secured with the rear roll pin. Performing a function check as recommended in the instructions proved I had it right. The trigger and sear installation were complete.
FINISHING UP
All that was left was to change out the striker block. My eyebrows performed a small aerial as I watched the smith in the video drive the rear sight sideways almost out of its dovetail. I had no idea anything was hiding under there. But indeed there was: the striker safety plunger, complete with spring and spring-top washer. It was a simple matter to index the rear sight with a pencil line so I could return it to zero, remove the tiny setscrew with a 1/16th hex wrench, and carefully drift the rear sight leftward, exposing the striker block assembly without necessitating full removal of the sight.
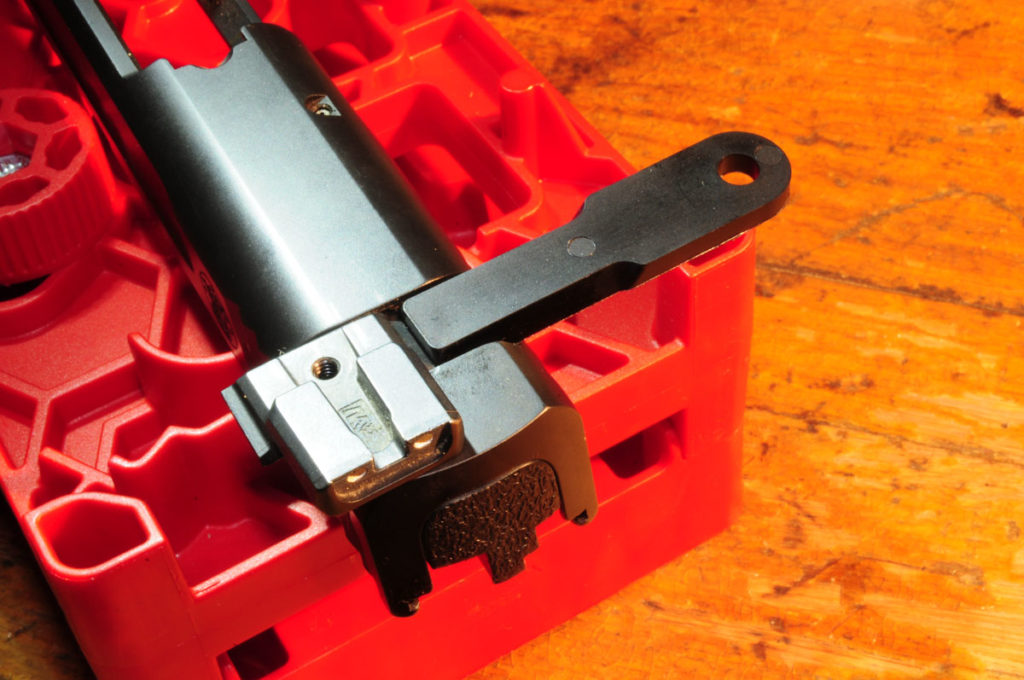
Apex includes a handy little “slave” dovetail tool to hold the striker stop assembly captive while you drift the sight back into place.
At this point, curiosity got the best of me. I called Apex and asked, “Why?” I wanted to know how changing specific parts would make my handgun better. The technician who answered my call was knowledgeable, generous with his time, and able to answer all my questions. He told me to look at the factory striker safety plunger, and I would see that it had slightly beveled corners, and was flat on top. True. Then he had me look at the Apex striker safety plunger. It was perfectly rounded and gleamed smooth as a mirror.
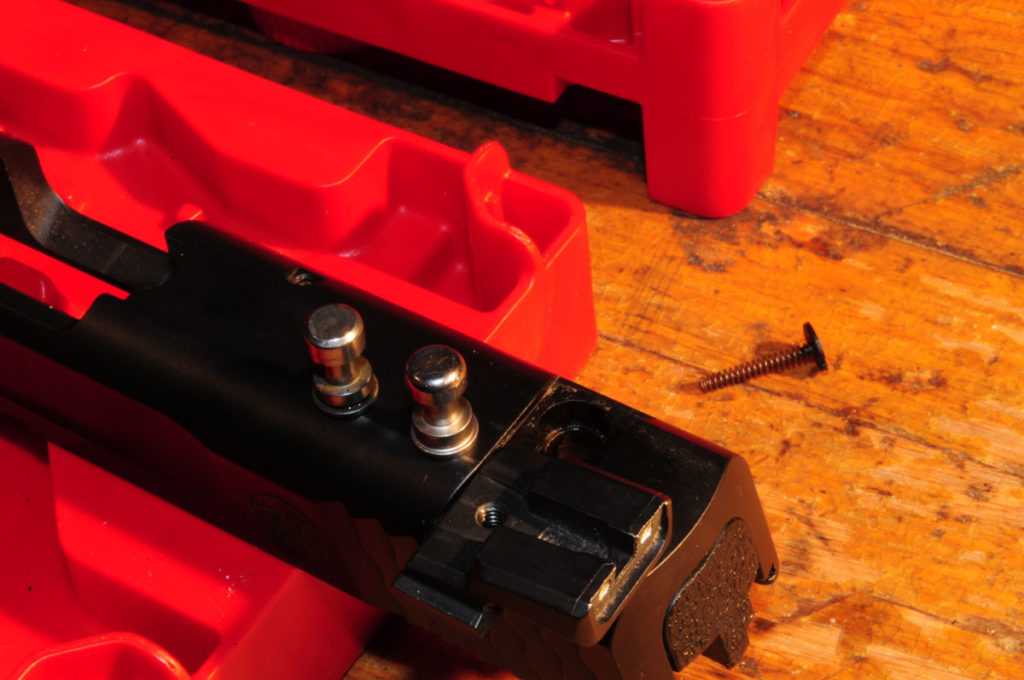
Note the visible difference in shape and polish between the factory striker safety plunger (left) and the Apex plunger (right).
Then the Tech told me how one of the chief complaints about the M&Ps trigger pull was “grittiness,” or “roughness”. The rounded, polished Apex plunger would help rectify that issue. It also helps minimizes drag on the trigger bar and aids in tactile trigger reset. I thanked the man, hung up the phone, and gleefully installed my shiny new striker safety plunger and spring.
CONCLUSION
With trepidation, I reassembled my handgun. Everything seemed okay, so I cycled the action. So far so good. I performed the recommended safety checks from the videos, stuffed a handful of cartridges into a magazine, and walked outside. My woodpile serves as a good impromptu testing range in a pinch, so I cycled the action, held center-mass on a large stump, and touched off a round.
Ahhh…
Three more rounds. Then five, rapid fire. Seventeen smoking empties later the gun had cycled and fired perfectly. And the trigger..!
While it’s not a perfect, crisp as a Pringle 1911 trigger, it’s close. Very close. For a striker-fired pistol, it’s extraordinarily good. The flat face took me a few rounds to get used to, but when I allowed my finger to rest naturally on the trigger, migrating toward the lower end of the shoe as intended with the resulting increase in leverage, I grew to like it. For the final analysis, I applied the Lyman trigger gauge once more. A half dozen checks taken two thirds down the trigger shoe averaged right at 4.0 lbs. That’s a reduction of four and a half pounds of trigger grind and pull. The entire upgrade took around five hours – but I’ll bet I could do the next in under two.
Where’s my ammo? I think I’ll go do some more testing…
Visit Apex by clicking here

Bought the kit foe the 9mm Shield. What a disappointment. Absolutely would not fit. Cannot think of a single good thing to say about it. Nothing fit. Put the old parts back in. Avoid this like the plague. Other models seem to work ok but not this one.
I started down this path, bought the Apex for the mod2, but opted to return it. Too involved for me without also purchasing the armored block. I ran across a close out on the FNS-9 tactical LE, and like it much right out of the box! Anybody in the market for an M&P 9 mod.2?😎
The Apex performance for your S & W M & P9 is very attractive, a gorgeous gun.
I replaced the sear in my M&P C.O.R.E. 5″ with an Apex hard sear. Made it good enough to believe it would be a decent Bullseye pistol.
I see a lot of well deserved complaints about factory triggers and about how the great the Walther Q5’s are (and they are good) but no one mentions the Ruger American. The American .45’s come out of the box near 4 lbs which is amazing. The 9’s are probably closer to 6 or 7.
The .45 American may have the best factory trigger of all the striker fires out there, and I own or have fired them all.
I know manufacturers can make their firearms triggers better at the factory and this wouldn’t be a necessary “upgrade” for most out there who do indeed shoot their firearms! Am I the only one who would pay a little extra for one I could buy out of the box and not have to mess with it myself? I sure am getting quite a few extra parts lying around and no practical use for them!
Overall, this was a fairly nice, informative article. However; rudimentary journalism says (if there are pictures) you have at least one pic taken with ALL of the items discussed in the article, labeled, and/or lined up in such a way that they are easily referred to by the reader. Icing on the cake would be to also show all of the tools used as well, again, displayed in such a way that confusion in identification is minimized.
I may be slow, but I am still trying to figure out exactly what they sent you, what you used, and what you didn’t.
Maybe I’m wrong. It just seems like this to me…
Thank you for showing us a fix to this fly in an otherwise sweet ointment.
did anybody ever had a extractor failure on sw mp pistols?
1. If questioned about installing Apex parts in my M&P’s; my response would be that the changes were made to make the gun as “shootable” (accurate) for me as possible. The more accurately one can shoot, the less chance there is in hiting anything other than the intended target. That makes the pistol “safer.”
2. I don’t believe that Dr. Burwell, has done any pistol work in some time, and is no longer doing any M&P work.
It’s a shame I would have to spend this much to make my M&P trigger not suck. I think I’ll live with it at that price. I was able to do the 50 cent trigger job on my Glock and it feels amazing, and honestly it wasn’t that bad before doing it. I’m not even really a gun snob and the trigger feels like crap to me on the Smith. Then they have the infamous Sigma trigger, I’m seeing a pattern here.
Any thoughts on modifying factory trigger mechanisms on guns one carries and is most likely to use in a defense situation. Prosecution lawyers and some sheriffs are going to use anything they can get their hands on to fry the gun owner who shot someone, no matter how justified. Having a good trigger can make the difference in a split second encounter-he who shoots first lives to be old.
Regarding modification and lawyers, specifically for the Apex stuff: pretty much all parts are interchangeable with the stock S&W parts. If you want to keep the actual trigger the stick looking one (instead of Apex’s flat faced one) and charge everything else with the upgraded parts. The gun will look completely stock but still feel a ton better. Nobody needs to know it was modified.
If you guys have two left hands and are mechanically inept as I am, there is a guy out there by the name of Dan Burwell
he is on line. He is capable of doing a tremendous trigger job on S&W M&P pistols. He also has a do it yourself
trigger job for M&P pistols if you are so inclined. He walks you through the whole job.