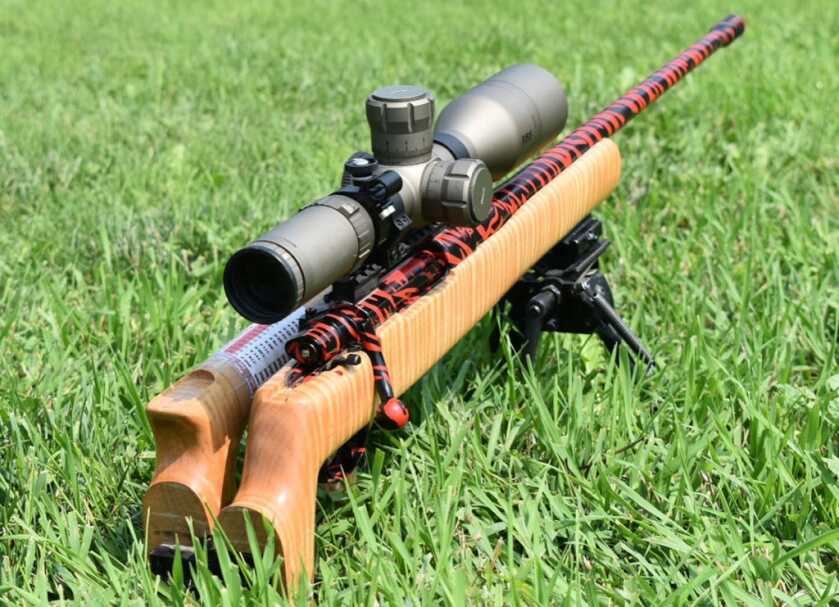
 These days it is popular to buy a bunch of pieces and assemble a “custom rifle,” so much so that it almost isn’t even cool unless you can ramble off the dozen or so manufacturers that your particular gun is comprised of. I am a victim of this trend along with the many others. However, like most people, my budget is pretty limited but I have discovered an easy way to drop $500 from the final build price: the rifle stock.
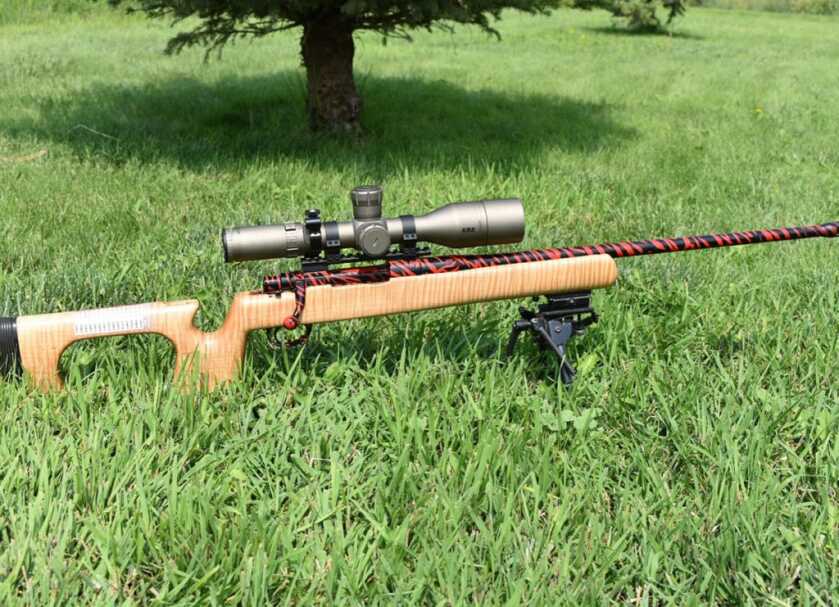
I have built over a dozen rifle stocks now for many different types of guns including Weatherby, Remington, Mauser, Savage and many others. Each and every time someone sees one of these finished gunstocks while in use, no matter the persons involved, there is a repeat of the same dialogue:
Guy at the range: “Who makes that?”
Me: “Well, I did.”
Guy at the range: “Oh that’s sweet, I’ve always wanted to build my own stock.”
I always feel the urge to then explain that building a gun stock is not hard; it only takes time and some basic woodworking skills. Whether it be for your granddad’s worn down hunting rifle or for your custom precision rifle, this article is going to be a walkthrough of how you, the “average joe”, can build your own rifle stock like you have always wanted to.
Step 1: Choose an Attractive Design
This can mean a couple things, you are looking for something that looks “cool” so it will turn heads at the range. Or, alternatively, you have particular functions that you want this rifle to perform that you must incorporate in the design; like a bubble level, folding stock, raised cheek rest, thumbhole, pistol grip, or even a bag hook. The possibilities are endless, but for the first one, I recommend keeping the design simple. I find that the best way to get inspiration is to google gunstock designs, then take aspects that you like from each of your favorites and blend them all into the stock that you are building.
Also included in this step is choosing the material that you will be making the gunstock out of. I am not aware of any composite material blanks that are out there being sold for the purpose of making gunstocks, but if that is what you want and something you can find, go for it. I recommend a type of hardwood. You can order pretty much anything off of the internet, but I would order a slab of wood that is about 2” thick and about an inch wider and longer than your design requires. My favorite wood to use is dyed birch laminate, which is what I went with on the build that is illustrated in this article. This is a good choice because it is attractive, easy to shape, and is very strong due to its construction.
Step 2: Measure for your Action
This might be the most daunting part of building a stock because it may seem that if you screw up, your gunstock will be a failure. But this isn’t really true… I have found that there is a bit of wiggle room in your measurements. In deciding on the depth of your stock, assemble your action with the magazine box and bottom metal installed sans the stock. Now, take a pair of calipers (or tape measure if that is all you have) and measure from the point on the action where you want the stock to meet the action and the point of the bottom metal that you want flush with your stock. Make sure that you are measuring perpendicular to the action for the most accurate results. Do this at the back action screw as well as the front action screw.
At this point, you should be sketching, or already have a rough sketch of the side profile of your rifle stock drawn on the gunstock blank. Keep the top of the gunstock (where the action sits) parallel to the long edge of your blank. Now, you will decide how far forward you want the action to sit in the stock based off of where the trigger feels the most comfortable. You may have to use your imagination for this part, but I usually pretend to hold the rifle by the grip and then draw the trigger in where I want it. I then lay the rifle over the sketch so the trigger lines up, and transfer the back action screw hole to the gun blank and strike a line with a square onto my blank. Now, I measure from the back action screw line to the position where the front action screw is, being a measurement that you will have to take, and strike another line with my square. Using the measurements that you took earlier for the depth of the stock, transfer these markings to the points that you have marked for the back and front action screws on the blank. This gives you the proper angle to fit your action and bottom metal precisely. Before you move on, transfer the action screw marks from the face of the rifle stock to the top edge (where the action will eventually sit), so that these are not lost in the sanding process.
Step 3: Cut out the Side Profile with a Band Saw.
To recap, you have already found the design you want and have sketched this onto your gunstock blank with the top of the stock (where the action goes) parallel with the long edge of the blank. You have already also drawn the position of the action screws and utilized the proper angle for the bottom metal. Now, you are ready to cut the profile of the stock on a band saw. I am going to skim the use of the saw lightly because I am explaining how to build a gunstock, not use power tools. But, it is important that you select the right type of blade for the shape of your stock. If you don’t have any tight curves, then I recommend a ripping blade because they cut smoother and straighter. If you have tight curves, then use a narrower blade that these can be cut with. ****important**** When cutting, leave about 1/16 of an inch extra so that you can sand down to this point. Band saws do not always cut at perfect right angles, and this will allow you to achieve those in the end regardless.
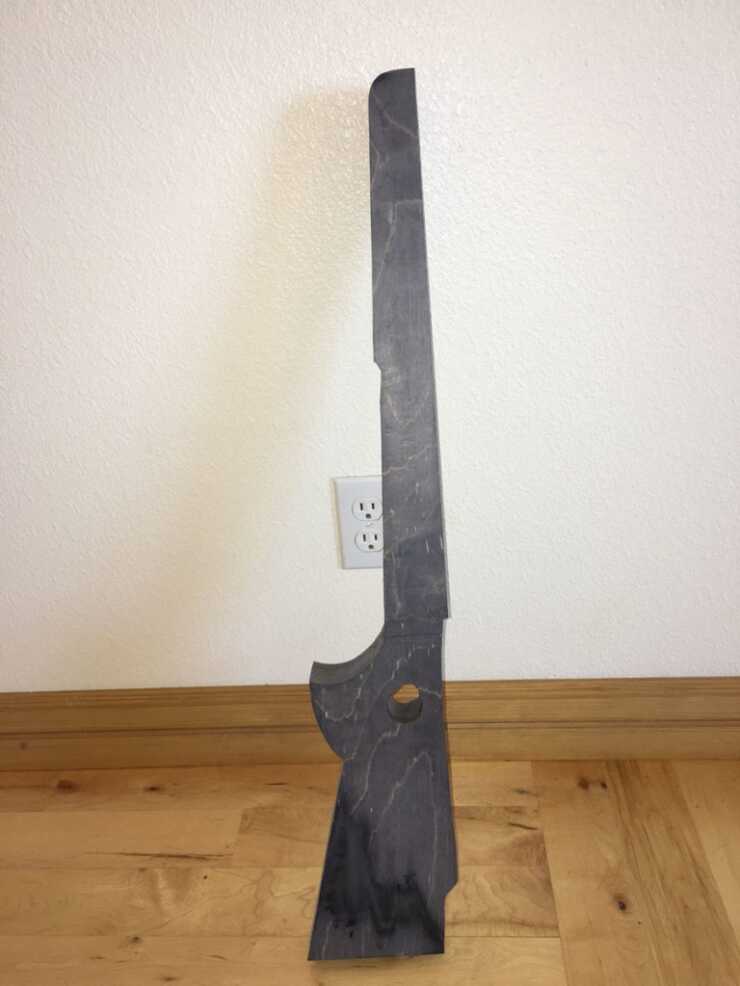
A cut-out gunstock blank. Once you cut out the desired shape of your gunstock on the bandsaw, you are left with this silhouette.
Step 4: Sand Down to Your Lines
Use a belt sander to bring the side profile down to your straight lines that you sketched. Then, run over to the disk sander and use this to bring the convex parts down the lines followed by the oscillating drum sander for the convex portions. Now that everything is square you will use either a planer, large jointer or a wide belt sander to bring the thickness of your stock down to the thickest part, whether it be 1.75” or 1.5”, now is the time to bring it there. Take precautions to keep everything square during the process.
Step 5: Inlet for the Action and Bottom Metal.
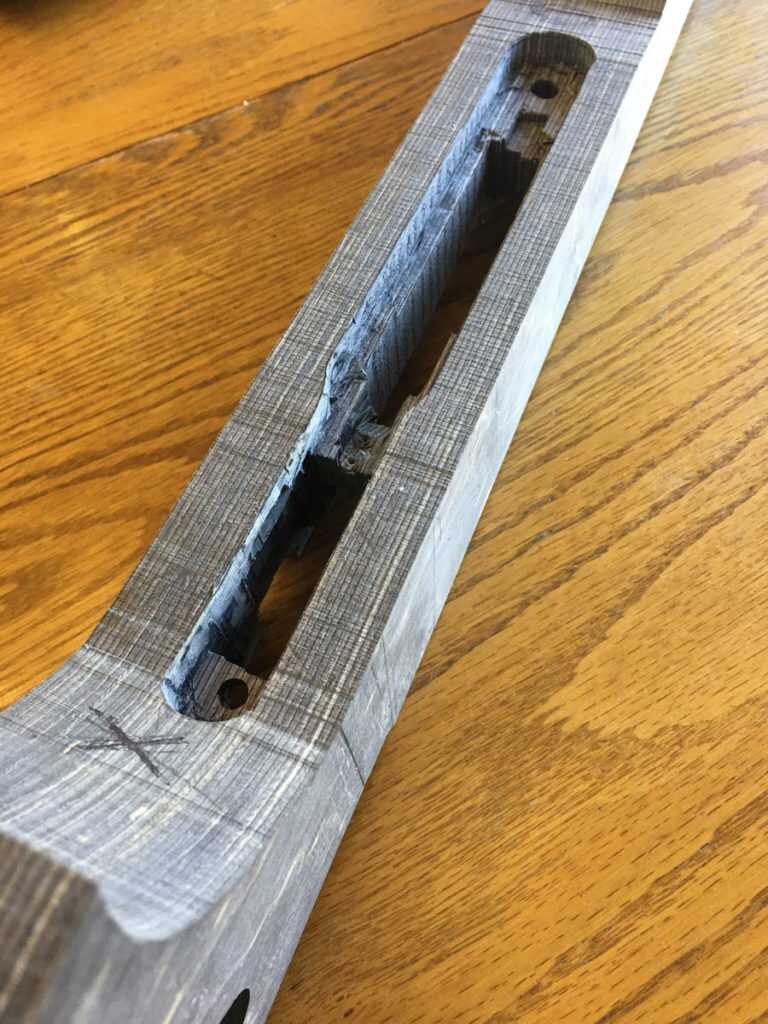
Now, you will need the action screw holes drilled into your stock. Mark the center of the thickness of the stock, then use a drill press to drill the same diameter holes into your stock as the action screws. These holes will be perpendicular to the top edge of the gunstock (where the action sits). Now, grab a pair of 2.5-3” long bolts that can replace your action screws, cut the heads off of them and install them into your action. This allows you to slide the bolts into the action screw holes on the stock and slowly use chisels and hand carving tools to whittle out the concavity where the action will sit. This will probably be the slowest step because it is where you need to be the most precise.
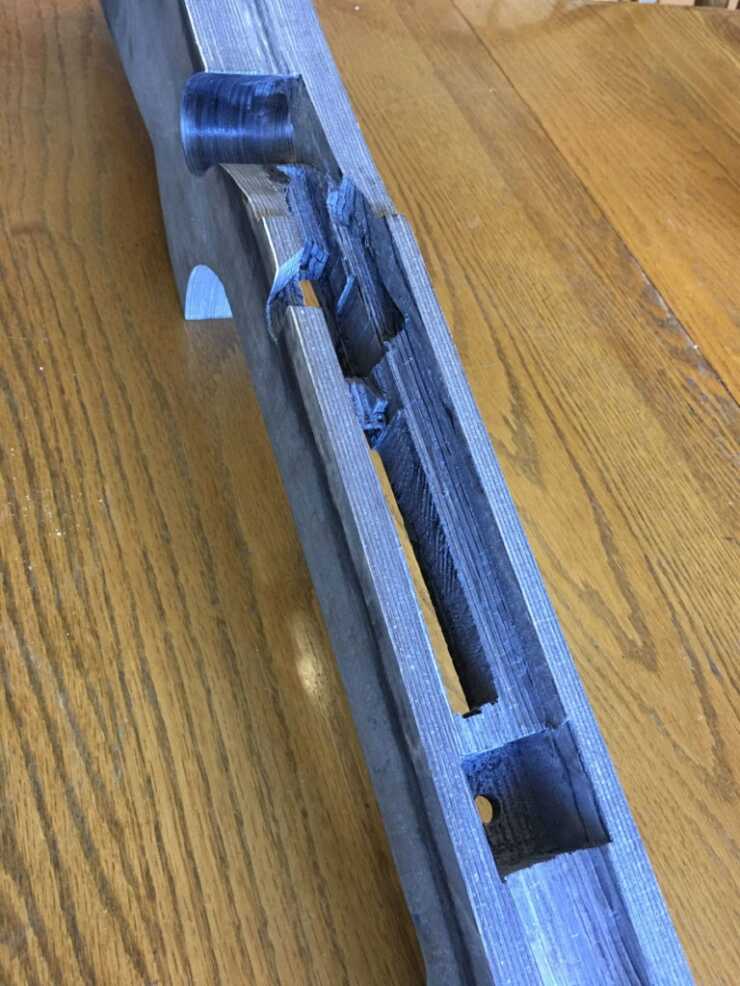
Completed inletting of the action and bottom metal. At this point, the gunstock is still in its most rough form, but is able to accept the action and bottom metal so that the rifle can function as designed. This step takes patience.
Repeat this same process for the bottom metal, but slide it over the pseudo-action screws that you made while the action is still sitting in the stock. At this point, also open up the mag well so the magazine box can fit in and everything functions alright. Finally, cut your ejection port if needed and bolt handle recess.
Read Part 2 of Gunstock Building For the Average Joe


Why do people have to hate and put people down for doing things they’re proud of?
I’m just guessing but it’s probably those people that simply have nothing to offer the world….not even building a wooden stick! This is why they buy and spend to be tacticool , loud mouths at the range we’ve all seen you ….you know who you are Lol….
nice work keep on enjoying making your stocks ! Anyone that has made a stock knows how hard it can be, but also know the feeling of shooting that handmade one off!
Non ya – You don’t need an x/y vise, nor do you need a lathe. You can make a perfectly professional-looking stock with nothing more than a hand saw, common wood chisels, sand paper, and a rasp (to speed things along). You really don’t even need all that if you’re not in a rush. You could do it with a saw and a knife if you’re really patient.
But it’s no use telling you this. You’ve already judged the finished product of the black stock before it’s even finished. You’d never have the patience to do this yourself, and you’ll justify that by saying you would never want to do it. Yes, you should always buy your stocks. Instant gratification is more your style, it seems.
Non ya should check the section ABOUT THE AUTHOR after the article.
“Going around fat, dumb, and stupid is no way to go through life, Son” – Dean Wormer in Animal House
Non ya, some of us have skills we enjoy putting to use. Sorry you don’t.
Good idea, waiting for part 2….
Interesting article, u build ur own stock because there is not another one around and because u can.
Jeez, non ya,….beauty is in the eye…..I think it looks great, especially if you can do it with basic tools! I don’t like paying someone else to do something I can do myself. If it doesn’t work, try again and use the bad one as wood stove supply. Might have to try this myself, maybe even try laminating my own wood to build from.
Why bother? Your still buying a stock any way you choose to look at it! And not to be rude, but the wooden version showed first a few times is super ugly and I’d be embarrassed to be seen holding it let alone shooting it. And not sure how clean the black one will be cleaned up since like the narrator said it was in its roughest state. But I can’t see that finished out like you’d really want it which is 100% smooth and professional looking along with perfect fimemt of the actual rifle. Now a days cheap sticks like your building are super super cheap and guarantee can find better for less than you’ll pay on bits, lathes or even X/Y vise, and then the countless things you’ll need to make it smooth and finished. And in the end you will never be as happy with your home made version over a company that has precise molds and the correct tools from A-Z to finish it properly. If you can afford the rifle… Then you should be able to afford a cheap stock! My two thoughts….
I really hope that you weren’t eating when you saw the finished stock in Part 2…. it’d be a shame if you choked.
In all jest. I get it, build a $1500 rifle and add a homemade stock… Money is a partial morivator, but the biggest reason DIY is attractive to me is because nobody makes a stock with the exact features I want & It adds a personal touch that I can show off to people unlike yourself it seems, that like how it turned out.
Can’t mold wood.