Being a combat veteran, a lot of my gun building involves recreating weapons I dealt with while I was overseas. I always found it interesting to see different firearms (especially because there were lots of types that aren’t exactly available in the US), whether they were in use with our allies, local security elements, or even the opposition. Unfortunately, this day in age you can’t bring home “war trophies” anymore. And so since I couldn’t bring them home, I build clones of them.
And that brings us to this build. The first time I was deployed, I went to Afghanistan in 2002 with the 82nd Airborne Division. While I was there I met a Romanian soldier, who became a friend of mine. We were both Paratroopers, both 19 years old, and both a long way from home. His issued rifle was the Romanian AIMS-74. It was the first time I had seen a 5.45×39 AK up close. And as soldiers do, we compared notes on our respective weapons. Unfortunately, I lost contact with my friend. I thought about building a “clone” of his rifle, but parts were not very common and expensive when they could be found. Because the Romanians had a slightly different idea of what they wanted with their model AK-74, there was not a good way to substitute other parts either. I basically gave up on the idea.
The model itself has a little bit of a story. In 1974 the then Soviet Union began issuing the AK-74 rifle, chambered in the 5.45x39mm round. Shortly afterward, the rest of the Warsaw Pact began coming up with (or were directed to come up with) their own ideas of the AK-74, much as they did with the AKM some years prior. This time around, some of the various nations went a bit further in coming up with their own models then they had the last time around. Unlike the various AKMs, some of the parts on these new rifles had more than cosmetic differences and did not interchange with the Soviet model. This seems to have reflected the desire by these nations to be more independent from the Soviets, as well as being less dependent on the Soviets for technical assistance producing their own weapons. Romania was one of these. Their new 5.45×39 rifle, the AIMS-74 is a rather unique model. It has a “wire” side-folding stock, a muzzle brake similar in appearance to the typical AK-74 (but not interchangeable), a handguard with a vertical grip, an “upturned” bolt handle (which allows easier access when the stock is folded), and some other small differences.
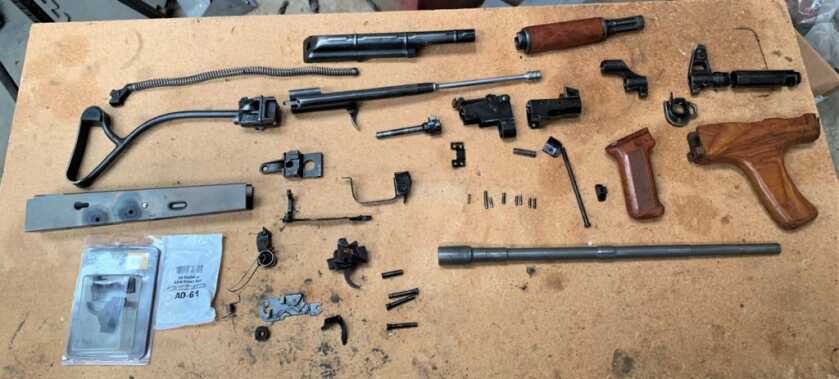
Obviously, these differences greatly complicated building an AIMS-74 clone. Then recently, AIMS-74 parts kits became available. I bought mine from Arms of America. I opted for a grade with some wear, since my buddy’s rifle wasn’t exactly brand new and that’s what I wanted to clone. I was very happy with the kit I received, as it was exactly what I had in mind.
From a builder’s perspective, the unique parts some models use can present a challenge, particularly since they can’t import barrels with these part kits anymore. Fortunately, there are some good sources for the parts not included in your parts kits, such as the barrel and receiver. The barrel for the AIMS-74 is different than the standard AK-74 barrel. Fortunately, AK-Builder has the correct barrels available. Before you order one, measure your kit’s front trunnion because some are oversized and require a barrel with an oversized journal. Fortunately, unlike the Polish wz.88 Tantal rifles, the AIMS-74 uses a typical AK-74 fixed stock receiver, which can be obtained from a variety of sources. I found a completed receiver at a local gun shop, and the price was reasonable. So I bought it for this build.
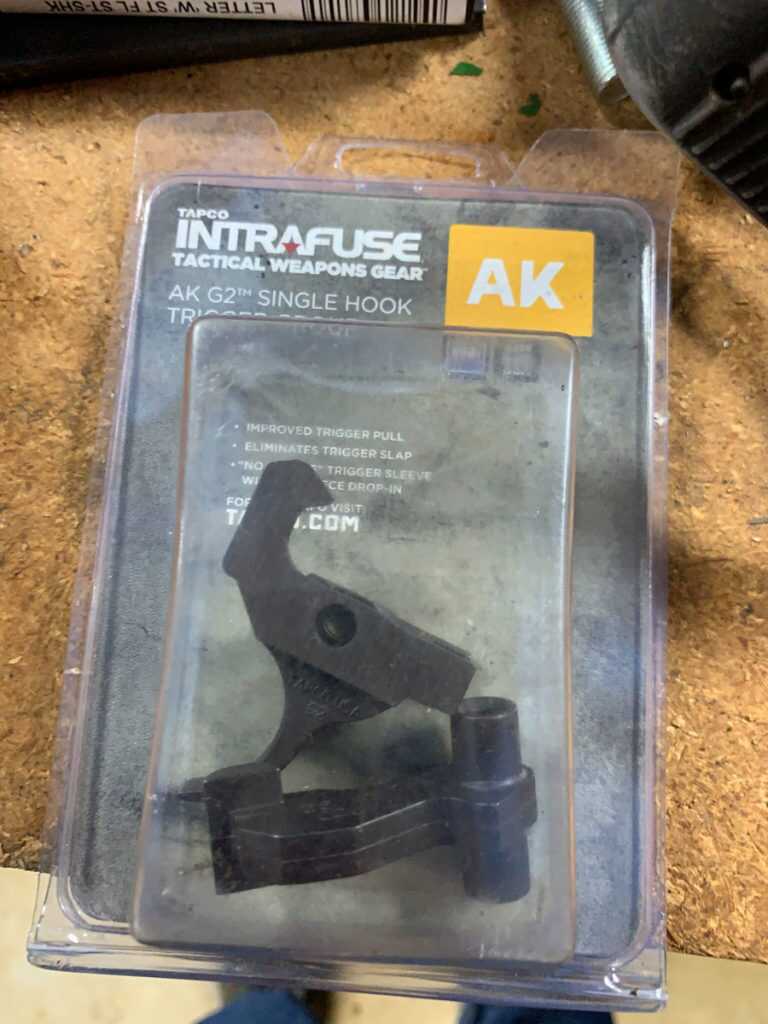
I would be remiss if I did not make at least a brief mention of the legalities of assembling a rifle like this one. First, it is necessary to comply with all NFA rules and regulations. If you are not familiar with these, I would strongly suggest that you do some research before even considering building any firearm. Also, so-called “non-sporting rifles” must have no more than 10 foreign-made parts off of a specific list of parts, not all of which apply to any particular model. So do some homework, and figure out which apply to the particular rifle and configuration you want to build and which US made parts you want to use. I’m not going to get into the details of this, as there are a lot of different ways to meet this requirement and to encourage you to do your own research on the subject. I’m certainly not willing to risk jail time over a few dollars worth of compliance parts. So I build compliant rifles, and I suggest you do the same.
I would definitely recommend replacing the fire control group, even if you have enough US made parts to be compliant without doing so. Unlike some other AK models, the fire control group on the AIMS-74 is a bit more complex and doesn’t appear to easily lend itself to semi-auto conversion. Obviously building in the select-fire configuration is not compliant with NFA rules for us regular folks. Now that all of the legal issues have been addressed, on with the build!
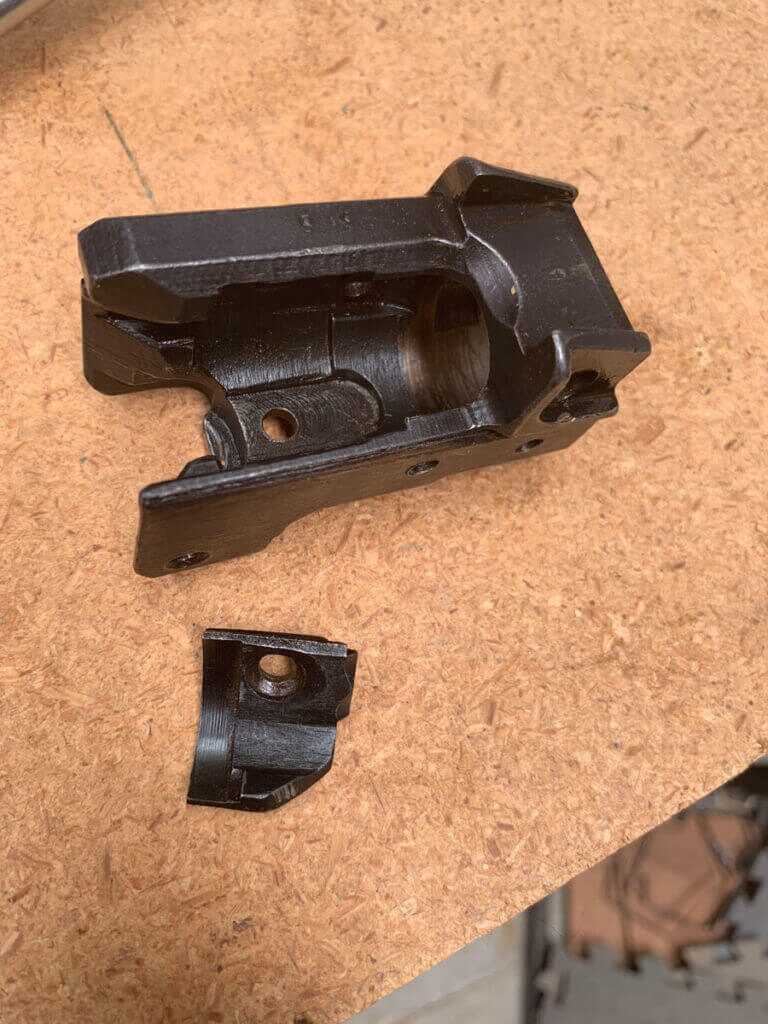
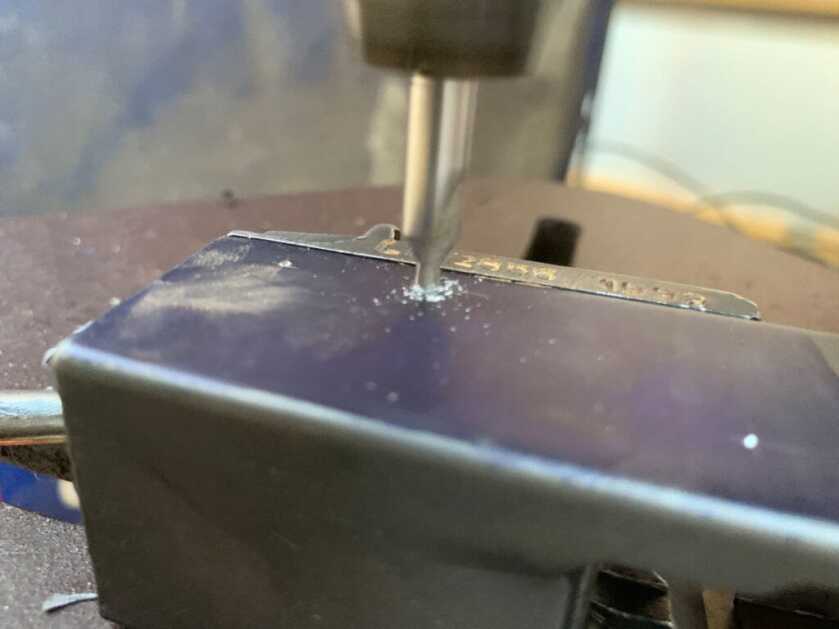
Typically speaking, the first step of the build is removing the old receiver pieces from your parts kit. These Arms of America kits have already had this work performed, which was a pleasant surprise. This kit had the bullet guide removed from the trunnion for some reason, so the first order of business was to re-install it. It’s a pretty simple operation, just one rivet. Then it was time to begin installing components into the receiver. This receiver did not have the rivet holes drilled in it for either trunnion, so drilling these was the first step. The AIMS-74 has an AKM rivet pattern, rather than the AK-74 pattern. I bought the AKM rivet set, rather than the AK-74 set, from AK-Builder. I riveted the front trunnion into the receiver after the holes were drilled. I used the Toth Tool rivet jaws for this task, though there are a number of ways to complete it.
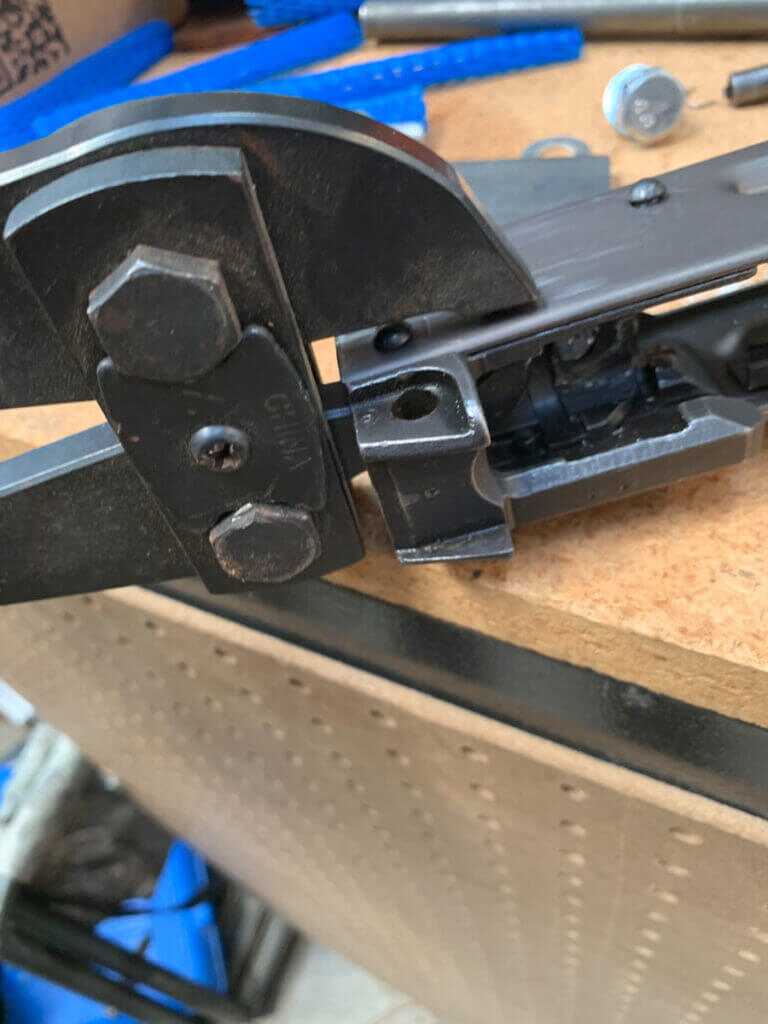
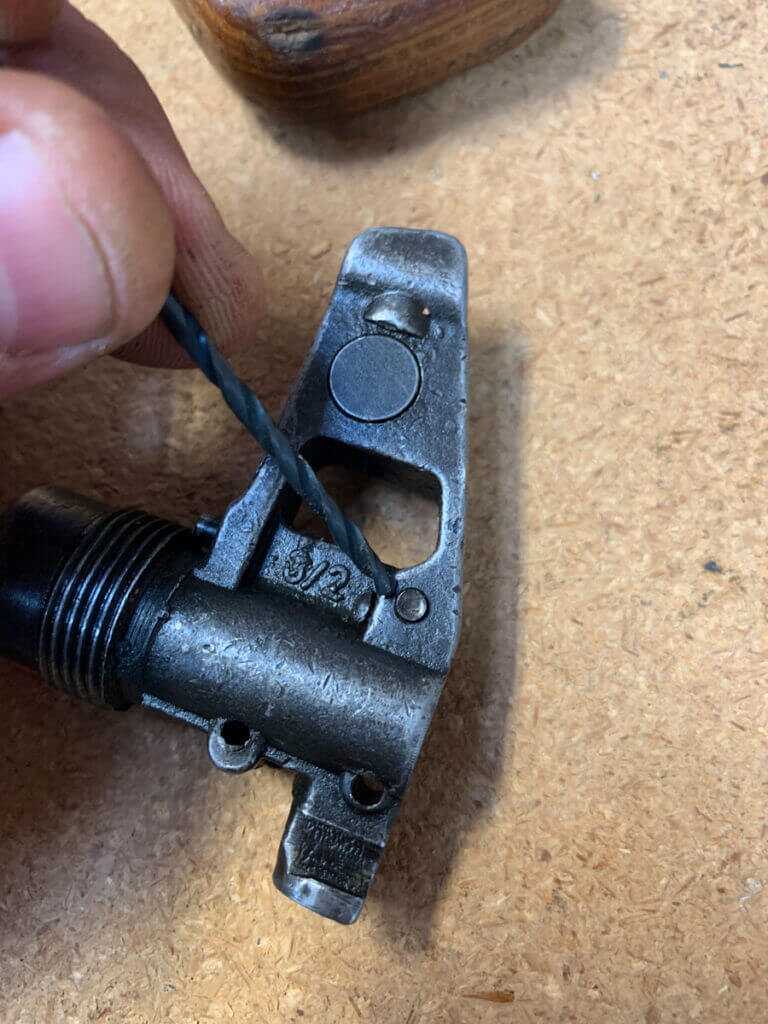
The Front Sight Base on the AIMS-74 is a little different than the typical AKM or AK-74. Typically, the spring-loaded detent pin is held in place by one of the pins holding the FSB to the barrel. On the AIMS-74, this is held in place by a separate third pin. When I saw this, I went ahead and assembled it.
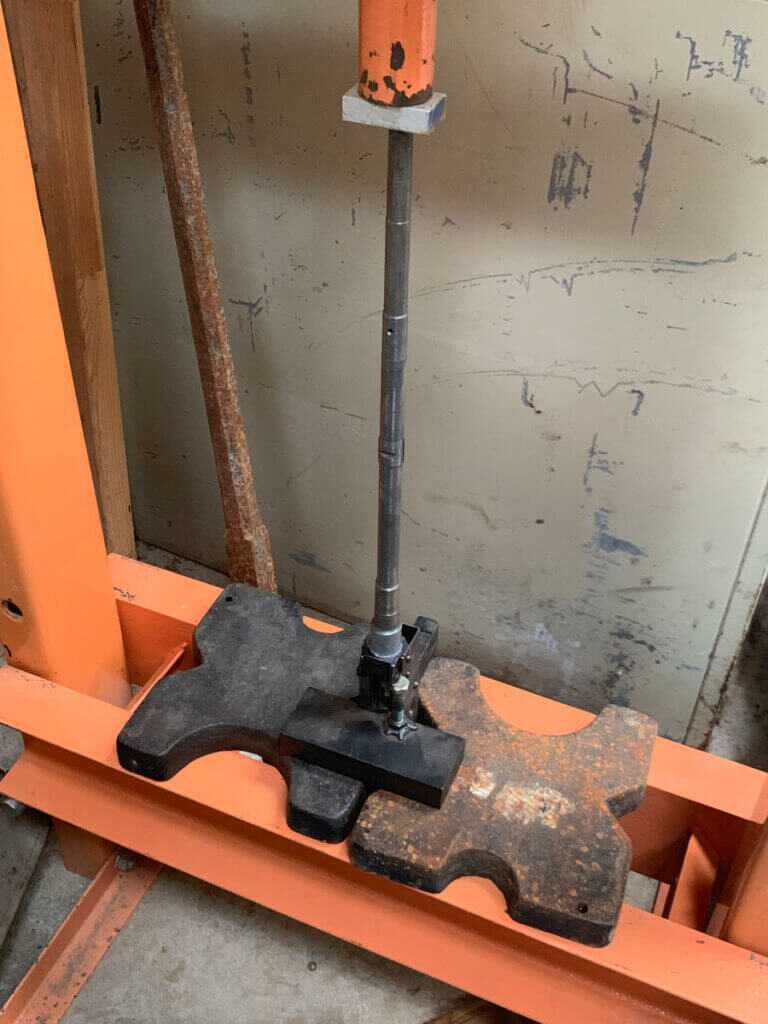
Once that was done, I installed the barrel. I use a 20-ton hydraulic press for this task. If you are using a press to install the barrel, be very careful in setting it up. It is REALLY easy to bend your barrel if you are not being careful. If something doesn’t look right, stop. Use some high-pressure grease on your barrel journal to prevent galling, and to make it easier to press back out again. Setting the proper headspace is part of this procedure. Once you get to where you think you have a little more to go, start using your gauges to check the headspace. There’s only a few .001”s between the GO and NO-GO dimensions. So, you’ll probably have to press it in and out a few times before you get it, hence the previously mentioned grease.
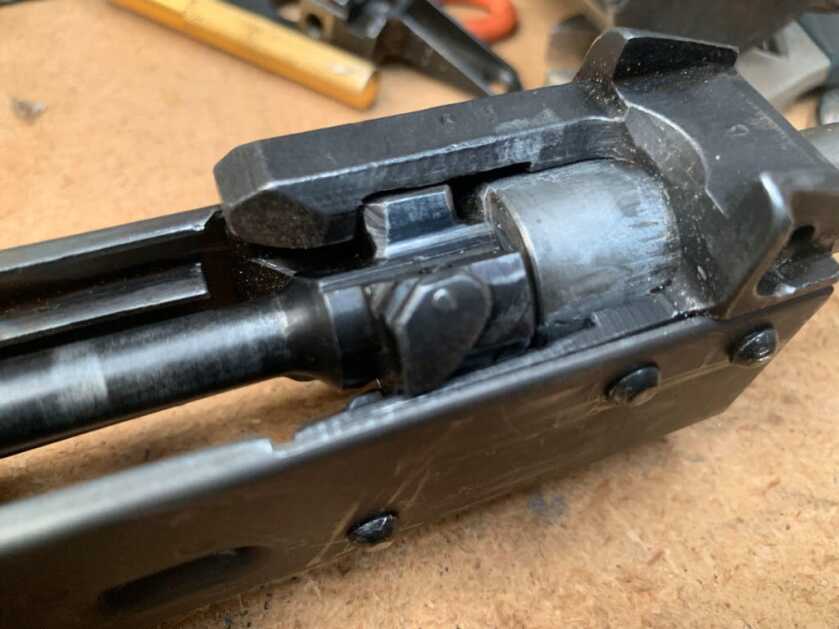
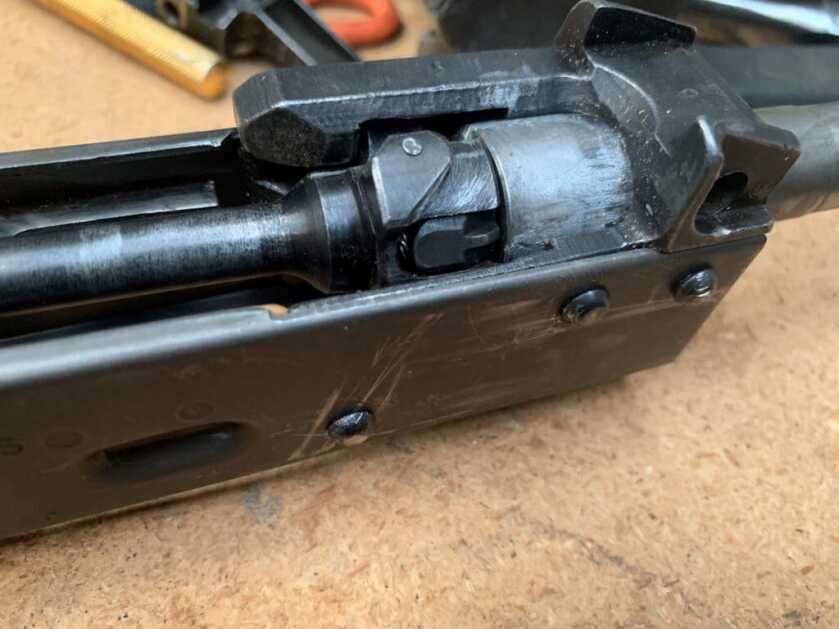
Once I had pressed the barrel into the trunnion, it needed to have the barrel pin installed. Before I could press the pin in, I had to machine the barrel through the hole in the trunnion to create the hole for the barrel pin to pass through. First, I used a ¼” endmill to rough it out. It is important that you do NOT try to use a drill for that part. The drill will walk over into the trunnion, rather than drill the barrel, due to the curvature of the section of the barrel we’re trying to drill. After milling, the drill will follow the hole you just made. So, I then used a drill bit to get the hole close enough to the final dimension to allow for reaming. The last thing is supposed to be reaming the pinhole to size, which should be .001” or so smaller than the barrel pin diameter. Then, you’re supposed to press in your barrel pin.
However, that’s not exactly how this build went. If you build enough rifles you will make some mistakes, which is why I wanted to take a minute and discuss this one. My barrel pin hole ended up oblong. Fortunately, if this happens you haven’t necessarily ruined your trunnion. After some uttering of a few obscenities, I measured my now oblong hole. Fortunately, it was still small enough that I could get an oversized barrel pin to fit. My hole was .310 at the widest part, so I ordered a .315 barrel pin from AK-Builder. Then I very carefully set my action back up and opened up the hole. This time things went off without a hitch. I reamed the hole to .314 and pressed in the barrel pin.
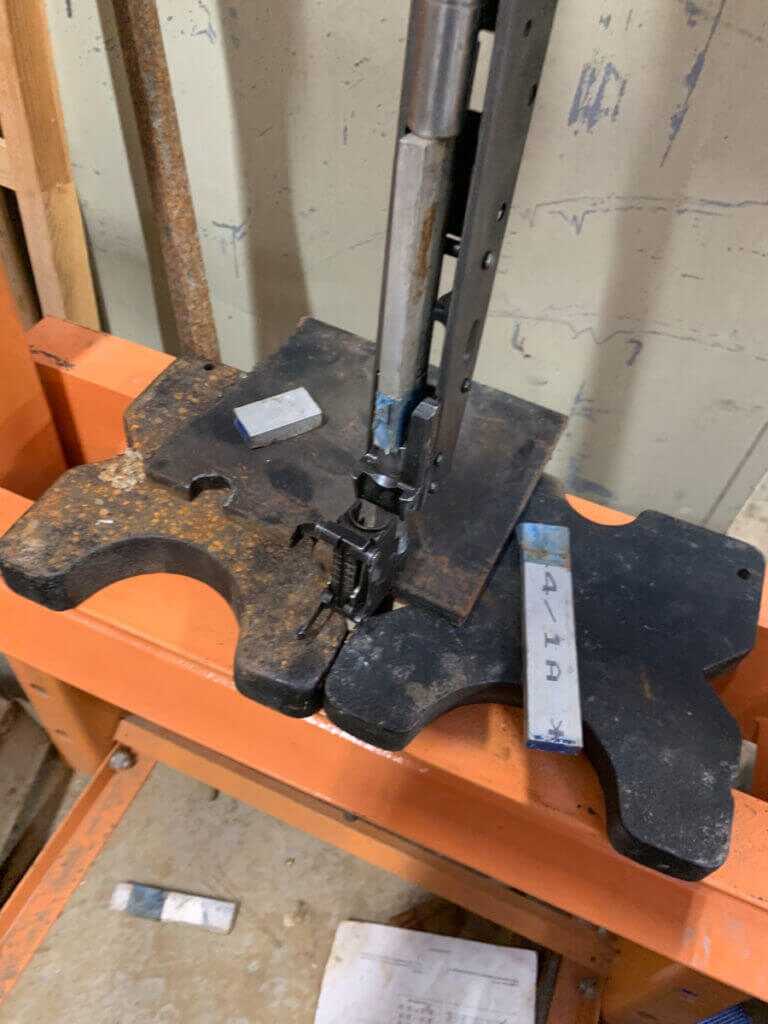
After getting that all sorted out, it was time to press the various components onto the barrel. The same thing as before, use some high-pressure grease on your journals. First is the rear sight base. It needs to be centered where it slides over in the trunnion. There is not a lot of room for it to be misaligned, but it is possible. Then slide the handguard cap on. If you forget, you’ll have to press everything after it back off again. After that, you install the gas block. If you take some care in installing the gas block, the handguard/gas tube should go on without any fitting. Lastly, the front sight base gets installed. Obviously, this needs to be properly aligned to allow you to zero your sights. On this, and most AK-74 variations, the muzzle threads are actually on the front sight base, rather than the barrel itself. As such, the end of the front sight base should be roughly flush with the muzzle of the barrel.
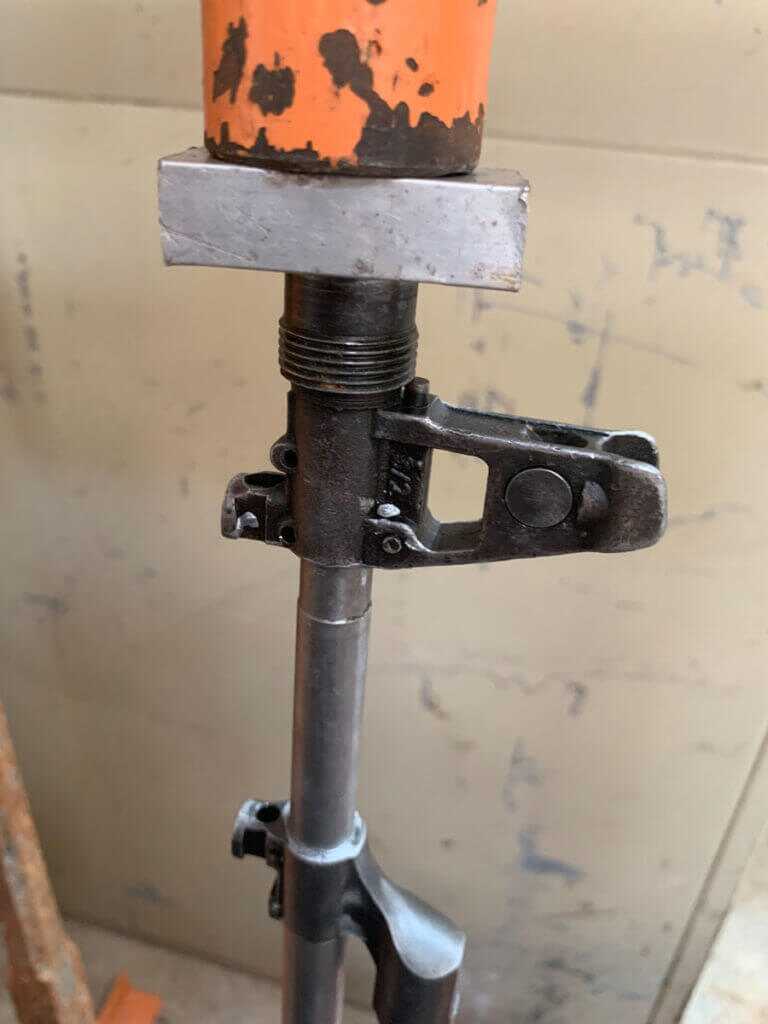
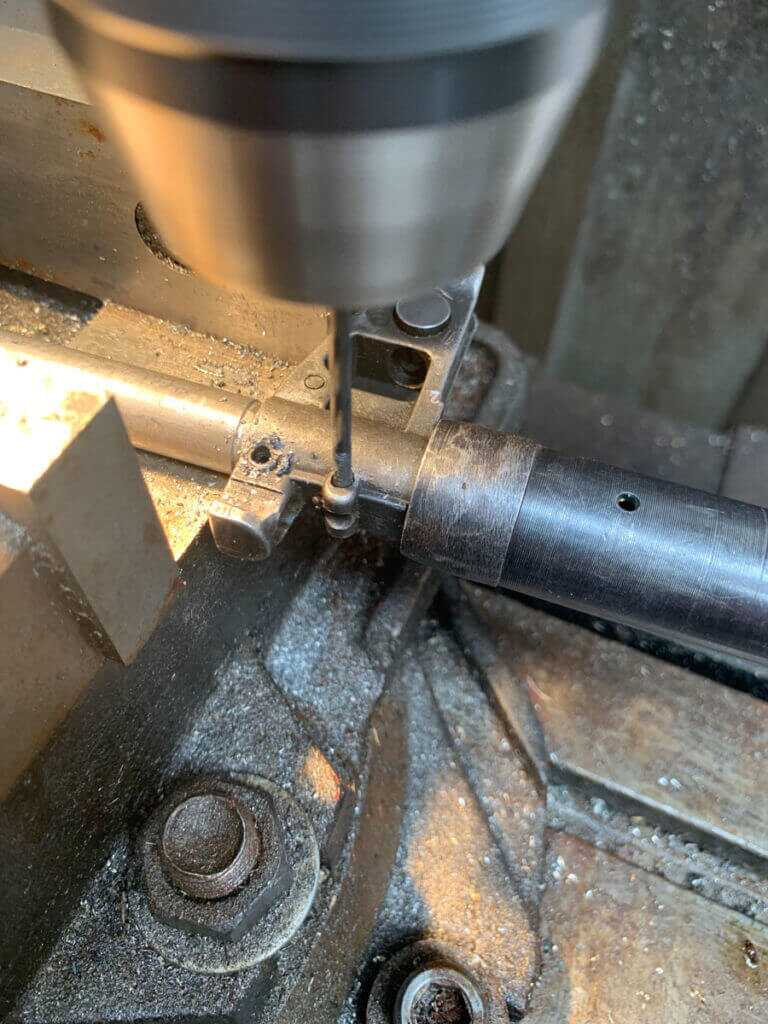
Once I pressed the barrel components on, it was time to pin them in place. Like the barrel pin, you need to cut a slot in the barrel, concentric to the pinhole in the part, so that the pins can be installed. Unlike the barrel pin, you can simply use a drill if enough care is exercised. Go very slow, and watch your drill bit to ensure that it’s not flexing and wandering off target. You want your hole to be .001” or so smaller than your pin diameter, so measure your pins prior to picking a drill bit.
I waited to install the other rivet on components until this point, so as to make it easier to be able to set up the barreled receiver in the press while pressing the barrel components on. Once I had done that, I installed the trigger guard. I use a fixture I made for the task, but there are a number of commercial options available should you be so inclined. Don’t forget to install the selector stop in this process and make sure you have it oriented in the right direction. I always check to make sure a magazine will insert and lock into place properly.
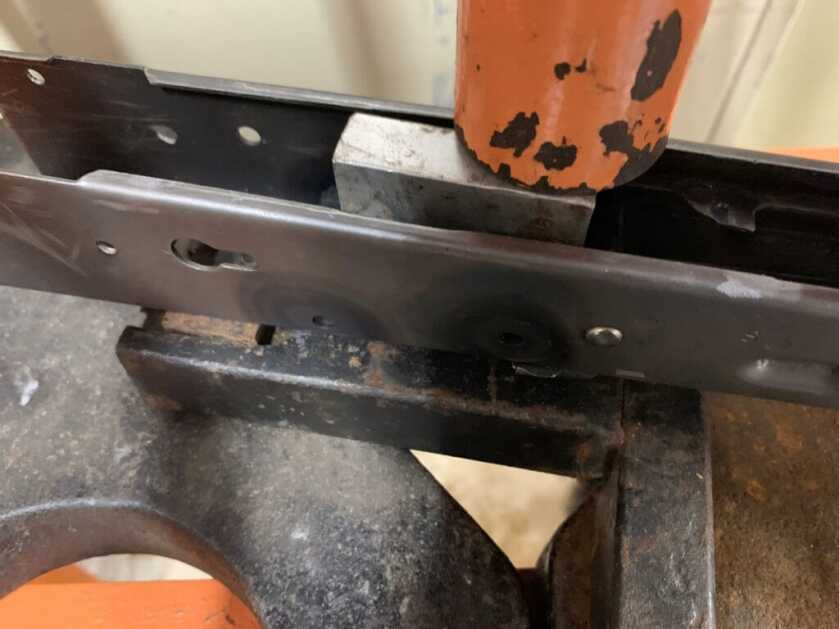
After attaching the trigger guard, I riveted the rear trunnion in place. This is done with the long rivets. So obviously, it requires another tool to set these rivets properly. Again, I have a shop-made tool I use for this purpose, but there are a number of commercially available tools for this as well.
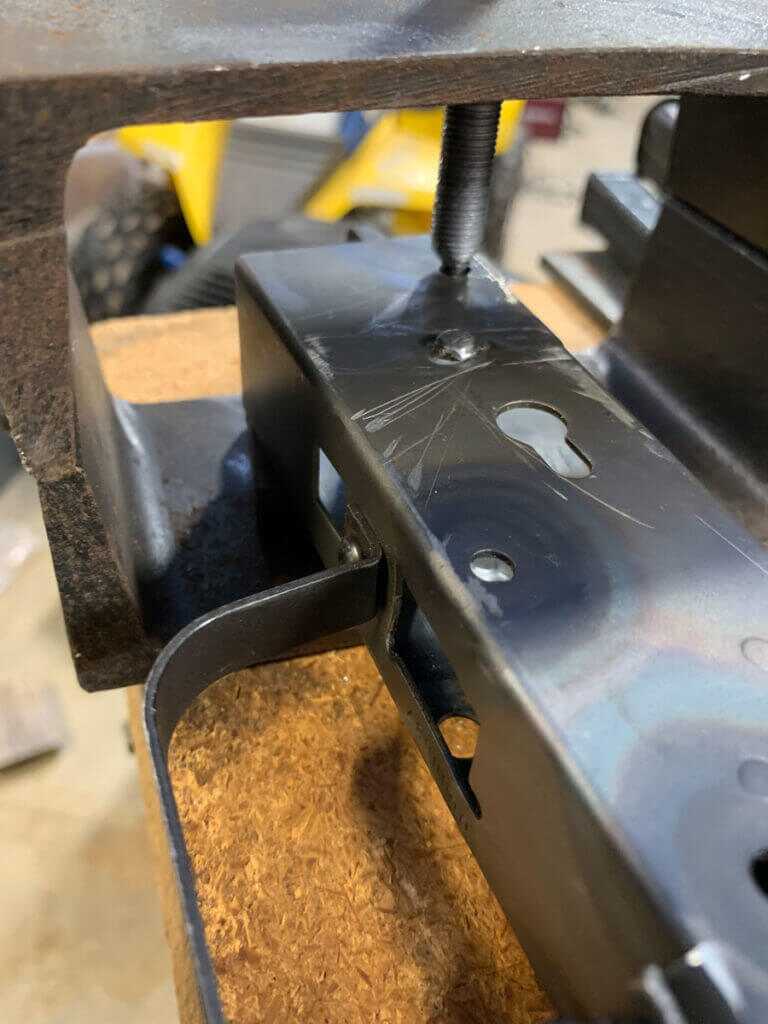
After the pressed on, and riveted components were in place, it was time to install the fire control group or FCG. Before I do this, I take a moment and slide the bolt carrier into the receiver. The idea is that if I had tweaked something prior to this point, it would be easier to correct now. It doesn’t take much of something being off for your bolt carrier to hang up. And it’s much easier to correct this before your FCG is in the way. After performing this quick check, I assembled the FCG in the receiver. Typically, I modify the auto sear spring to be a retainer for the hammer and trigger pins. However, the AIMS-74 does not have the usual sear spring (coincidentally, neither does the Polish wz.88 Tantal) and being that I didn’t have one laying around, I used a Red Star Arms FCG Retaining plate which I bought from AK-Builder. It serves its purpose rather well and saved me the time of tinkering with a spring (if I would’ve had one).
The last assembly task was to install the stock onto the receiver. Basically, it just slides in and two screws hold it in place. Make sure that the front screw is in far enough that it does not interfere with the recoil spring assembly. I chose the original stock, because of the intent I had in the build. But because the AIMS-74 uses an AKM type trunnion, there are a whole lot of options for stocks if you’re not concerned about keeping the original appearance.
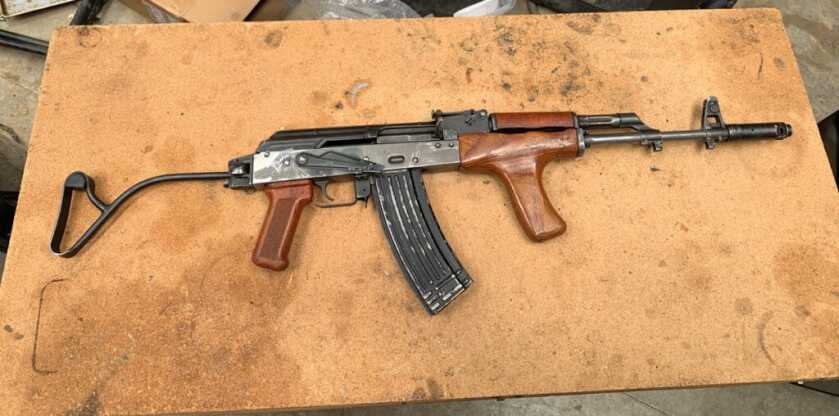
At this point, the rifle was ready for function testing. DO NOT USE LIVE ROUNDS TO PERFORM INITIAL FUNCTION TESTING ON YOUR RIFLE!! Always use dummy rounds first. You do not want to find out you have a problem by having an accidental discharge. I purchased my dummy rounds from AK-Builder a while ago, but they are available from a number of other sources as well. I always function test my builds with dummy rounds to ensure that the FCG works as it should before putting any live rounds into it. I’m also ensuring that the rifle feeds and chambers properly.
After function testing with dummy rounds, I fired some live ammunition. Again, be careful here. Don’t just load up a full magazine and go to town. You want to ensure everything is working properly first. After you fire the first round, check out your spent casing for any obvious signs of trouble. I typically take a close look at all the casings from test firing, just to be sure.
Building an AK is a very fun and satisfying experience. It is often the only way to obtain an example of a particular model. I encountered a lot of interesting variants of Kalashnikov in my time overseas. I have really enjoyed cloning different models that I encountered. This one, in particular, allowed me to recapture some pleasant memories I had lost over time. However, even if you are not a veteran, but you have an interest in Kalashnikovs, you will find the AIMS-74 a very interesting rifle to build, shoot, and have in your collection.
