THE SERIES
- Part 1: Build an AR-15: The Series Introduction
- Part 2: Build an AR-15: AR Calibers
- Part 3: Build an AR-15: Direct Impingement or Piston Operation
- Part 4: Build an AR-15: Tools and Materials
- Part 5: Build an AR-15: The Lowdown on Lowers
- Part 6: Build an AR-15: Intro to Uppers
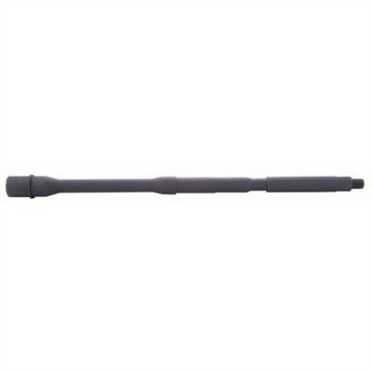
- Part 7: Build an AR-15: Barrels
- Part 8: Build an AR-15: Choose The Right Buttstock
- Part 9: Build an AR-15: Choosing the Right Optic
The beautiful thing about building your own rifle is that you can be really, really picky about what components you choose. It’s your rifle, and you’re building it for your specific purposes so you can optimize each and every part according to your intended use of the finished product.
While numerous components and the assembly and fit thereof, have a big impact on finished rifle performance, it’s the barrel that’s gonna matter – a lot. You can make other decisions for less expensive components that can easily be upgraded later, but you’ll want to start with just the right barrel up front.
Type of Rifling
Choosing a rifling method for your ideal barrel is mostly an issue of personal opinion. People will battle to the death over whether button-rifling is better than cold hammer forged rifling and so on. I won’t go there as I’ve yet to see definitive proof that one method is demonstrably better than another for making AR rifle barrels. With that said, you’ll find that other types of rifles, like super-precise bench rest bolt-action models, will usually have cut or button rifling. Lot’s of folks will argue that when ridiculous accuracy levels are the goal, the button and cut methods excel.
Let’s take a look at various types of barrel construction, then you can make an educated choice as to which type floats your boat. Remember, we’re talking about applicability to AR rifles here, so factors like barrel longevity and heat tolerance might factor higher than pure accuracy in the pros and cons evaluation.
Cold Hammer Forged Rifling
The cold hammer forged method includes a lot of loud noise and violent pounding. As a result, it requires huge capital investments in machinery. It’s not like you can use this method with a hand-held mini-sledge: a giant hydraulic machine hammers the barrel blanks from all sides as the barrel passes through. Generally, companies that make a lot of barrels, like Daniel Defense and Smith & Wesson, will use the cold hammer forging technique as they can afford the capital investment.
A barrel blank with an oversized hole drilled for the bore is filled with a mandrel that is shaped like a mirror image of the inside of the bore. Imagine stuffing Play-Doh into a barrel, and somehow getting it out intact. That’s the idea of a mandrel. The mandrel is inserted into the bore, and as both are slowly pulled through, massive hammers pound the snot out of the outside of the barrel. This hammering forces the barrel blank to cave in and assume the exact shape of the mandrel.
One benefit of cold hammer forging is that it’s possible to create smooth polygonal rifling patterns. Some people like the small velocity advantage and smooth engagement of the more rounded polygonal pattern. This method stresses the steel more than other processes, and post forging heat treatment may be required to de-stress the steel, but that will happen before you ever receive the part.
Button Rifling
Button rifling also relies on brute force, but it’s done from the inside. The barrel blank has a hole that’s ever so slightly smaller than the finished product. A hard steel button is pulled (or sometimes pushed) through the bore with great force while the button is turned to create the spiral rifling pattern. The shape of the button literally compresses the rifling grooves into place. Brute force baby!
Button rifling methods also produce very smooth, hard and polished bores, as steel is pressed into the desired shape rather than tooled or cut.
Broach / Cut Rifling
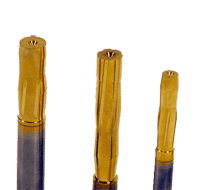
Think of broach cut rifling as carving of the interior shape. A long rod has multiple cutting bits of increasing size spaced at intervals along the rod. The rod is pulled through the bore while being turned. Each bit cuts a little deeper, with the last bit on the rod creating the final groove dimensions.
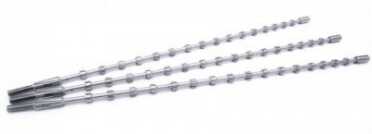
These Kingsford broach cutting tools have multiple cutting blades, each larger than its predecessor.
Barrels can also be cut with a single blade rather than a broach tool. Obviously this method is slower and requires multiple cutting steps, so it’s a more expensive process. Some high-end barrel makers swear by the method, however.
Cutting methods result in sharp rifling with well-defined grooves. Some folks think cut rifling can wear quicker due to the sharp interior surfaces.
Electrolysis Rifling
With this high-tech method, strips of desired shape are placed inside the bore while the whole assembly is submerged in a salt solution. Current is applied and the “wet etching” process eats away metal in the desired areas to produced rifling grooves. I’m not seeing a lot of this yet, but who knows what the future will bring?
Twist Rates
For simplicity, let’s limit this discussion to .223 Remington / 5.56mm NATO calibers. Other AR-type calibers like 300 Blackout or 6.8 Remington SPC will use their own optimized twist rates.
First, what’s a twist rate? Rifling in the barrel digs into the bullet jacket just a hair and causes it to spin to increase stability in flight. Twist rates are expressed with numbers like 1:7, 1:9, or 1:10. That means that the rifling will cause a bullet to make one complete rotation in the barrel in seven, nine, or ten inches of barrel length. A faster twist rate will have a lower number, like 1:7. Generally speaking, you’ll want a faster twist rate to stabilize a longer bullet. The weight of the bullet isn’t the significant factor, but many “heavier” bullets require faster twist rate since, by definition, they have to be longer to be heavier. The diameter is constant in any given caliber, so weight means more length.
For .224 diameter bullets (used in both .223 Remington and 5.56mm NATO), “average” twist current rates are 1:7, 1:8 or 1:9. Back in the day, slower twist rates like 1:10 and 1:12 were common. The M16A2 uses a 1:7 twist. So which one do you choose? That depends on what you plan to shoot.
.224 bullets vary in weight (and therefore length) from 35 grains to 77 grains and higher. AR barrels with 1:9 twist rates will do a fine job of stabilizing bullets at the lighter end of the scale, like in the 35 to 55-grain range. They’ll work with slightly heavier bullets too, but at some point, depending on the specific bullet and barrel in question, that 1:9 barrel may do a less than stellar job of stabilizing the projectile. While there are plenty of “it depends” situations, assume that if you’re going to shoot different bullet weights in the 70+ grain range, you’re better off with a faster twist rate like 1:7. If you’re going to build the ultimate small varmint shooting AR, then a 1:9, 1:10 or 1:12 barrel may be just right for you.
In the middle ground, you’ll find 1:8 twist rate barrels. These are intended to function well with a wide range of bullet lengths and weights. If you’re not sure what you’re going to want to shoot, or you anticipate shooting a variety of ammo types, this is probably your best answer.
While we’re talking twist rates, we should mention the potential of over-stabilization. In theory, using a 1:7 twist rate barrel for lightweight bullets could “over-stabilize” your projectile, or spin it too fast. I’ve never found this to be a problem. I can shoot a 1:8 and 1:7 rifle side by side with multiple types of 55-grain ammo and not see any difference. Whether than becomes an issue at the very light end of the scale, with 35 or 40-grain bullets, I don’t know as I’ve not yet had the opportunity to test rigorously. In the extreme case, again, in theory, using too fast a spin rate for your chosen projectiles could result in faster wear and tear on your bore and the possibility of bullet disintegration. The bottom line is that you’re probably just fine using either a 1:7 or 1:8 twist rate barrel, unless you plan to shoot mostly super-light projectiles.
Barrel Length
Yet another area of personal preference lies with your selection of barrel length. Before we look at pros and cons of different barrel lengths, remember that all rifles must have a barrel length of at least 16-inches to avoid the requirement of a Class III tax stamp from the ATF. If you’re building a true AR pistol, then you can use whatever barrel length you want. If your gun will have a rifle stock, make sure the barrel length is legal. You can build a short-barrel rifle, but you’ll need to file an application, and receive approval from, the ATF first. Don’t mess around with those details you quickly get into federal felony territory.
The most common AR rifle barrel length is 16-inches, but there’s no reason you can’t eke out a little extra velocity by choosing a longer barrel.
More barrel length translates to more velocity with any given load – to a point. Generally, you’ll see big velocity gains when adding length to short barrels, like five to nine inches. When you add an inch of barrel length to these, you can see as much as a 150 to 200 foot per second velocity increase. Once you get to eleven inches or so, the rate of velocity increase with each additional inch of length diminishes, but still increases. Once you get to about twenty inches give or take, you’ve pretty much maximized velocity with average 5.56mm loads.
What Type of Steel?
Like most decisions, there is no set “right answer” for the material of your barrel. It depends on the performance characteristics you want for your particular gun. For example, are you more concerned with corrosion resistance or long barrel life? There are plenty of tradeoff scenarios to consider, so let’s take a look at some attributes of different barrel materials.
4140 Chrome Moly Steel: 4140 and 4150 are also common. A little “harder” than stainless, they’ll hold up just fine too, although it may take a little longer to break in. Like many debates in the gun community, the decision as to whether to go stainless or Chrome Moly isn’t a deal breaker either way.
416 Stainless Steel: Stainless is popular for its obvious corrosion resistance, but there are other benefits too. For the manufacturer, it’s (relatively) easy to machine. It also tends to have a long life and will remain accurate for many thousands of rounds. Stainless barrels tend to withstand the abusive high-heat wear and tear in the throat area a little better.
Barrel Profiles
Who knew there would be so many variable to consider when choosing a barrel for your AR rifle? There are three basic categories of barrel profile or shape: lightweight, government, and heavy.
Lightweight or pencil barrels are great for carrying around as they’re lighter. The downside is that they’ll heat up faster, and may lose a bit of accuracy as they heat. You’ll also get shorter overall barrel life with a pencil barrel. For most recreational shooters, this won’t realistically be a factor anyway – I only mention it in case you’re desire is to shoot tens of thousands of rounds.
The M4 government profile is contoured and medium weight. It’s a great compromise and the most common option you’ll find. The extra steel over the lightweight models make it a bit heavier, but more durable too. Accuracy is good, even as the barrel heats with higher- volume shooting.
If you want maximum accuracy and consistency, take the weight penalty and go with a heavy or bull barrel. Unless you’re going to hump it around on 25 mile hikes, who cares how heavy it is?
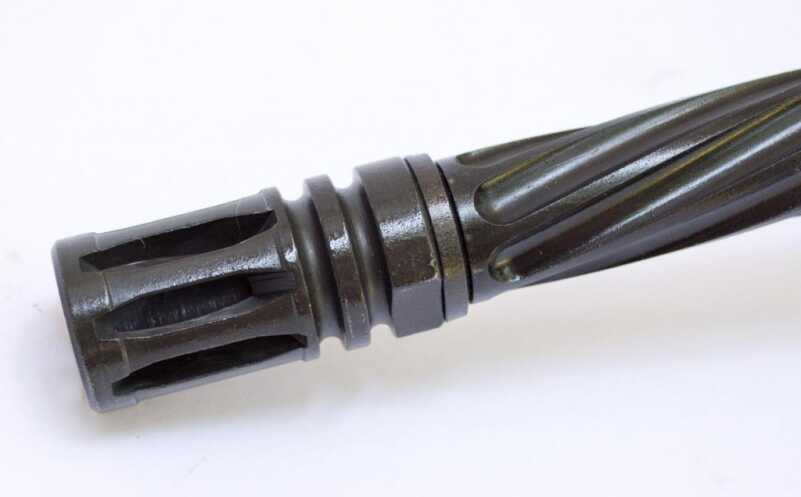
You’ll also see fluted barrel options. In addition to looking cool, there are two very real benefits. First, the fluting adds additional surface area, which helps the barrel dissipate heat faster. Second, removal of metal for the fluted areas removes weight.
Lined or Not Lined?
Another decision to make is whether to go with a lined, or unlined barrel. Some manufacturers offer chrome lining. This surface is applied after the barrel is machined. It’s difficult to apply evenly, and some believe that chrome-lined barrels are every so slightly less accurate as a result. This is another one of those “theoretical” issues. On the other hand, the hard chrome lining makes cleaning easier and adds to the durability of the bore. If you’re going to shoot lots and lots of rounds, consider going chrome-lined.
You’ll also find Melonite coated barrels, which have some of the same benefits as chrome-lined. Friction is reduced, but the coating itself is thinner than chrome, and presumably more even in application.
Chambering
Again, since we’re talking .223 Remington / 5.56mm NATO, this is an easy one. There are two choices that will let you shoot both 5.56mm and .223 Remington ammo safely: 5.56mm NATO or .223 Wylde.
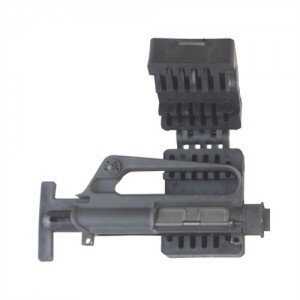
Be sure to use an upper receiver vise, like this Brownell’s model so you don’t bend or crush your upper receiver.
The Wylde chamber size is a compromise of the slight throat variances between a .223 Remington and 5.56mm NATO chamber. The 5.56mm NATO chamber has a slightly longer throat to accommodate higher pressures of the NATO round. The Wylde cut has 5.56mm NATO dimensions and angles, but .223 Remington free bore diameter, so it’s considered slightly more accurate while still being able to handle 5.56mm NATO pressure. All the cool kids are using it due to its perceived accuracy benefit.
Installation
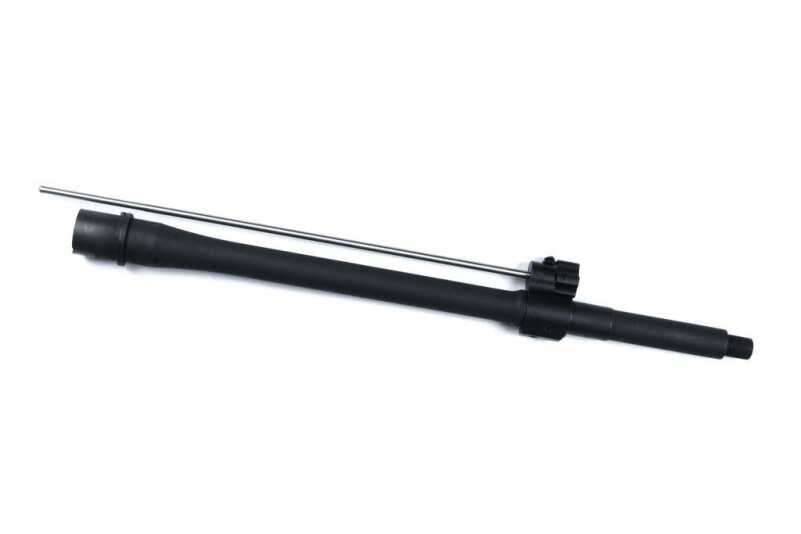
While you can order a barrel without a drilled gas port, most will come with a port and many are available with the gas block already mounted, so that simplifies things. While we’re talking about gas ports, pay attention to which length of gas system you order, so if you buy parts like the gas tube separately, you’ll get the right length.
There are a couple of tools you’ll want to do this right.
Upper receiver vise block and insert. This allows you to firmly clamp the upper receiver into a bench vise, and keep it supported while you tighten the barrel nut. It’s a lot cheaper to use the right tool, than risk crushing or deforming your upper receiver!
AR-15 combination wrench. This wrench has a special fitting that allows you to tighten the barrel nut. It also has cutouts shaped for installation and removal of muzzle devices.
Torque wrench. This allows you to tighten the barrel exactly the right amount for best accuracy.
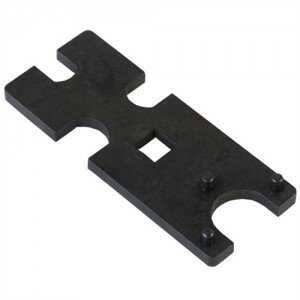
This Brownell’s combination wrench has one end specifically for the barrel nut (right) and cuts for muzzle brakes and use of a torque wrench.
Installation of the barrel is actually pretty darn simple if you have the right tools. Your barrel will also almost certainly come with a barrel extension in place, as that determines headspace. Installation of the barrel involves inserting the barrel extension into the upper receiver and tightening it into place with the barrel but.
For rifle builds that will use a free-floated hand guard, here are the steps:
- Mount the upper receiver in the vise block, install the receiver insert from the rear, and tighten this in your bench vise.
- Plate the barrel nut over the barrel extension with threads facing the receiver.
- Insert the barrel extension into the upper receiver, taking care to make sure the alignment pin on the barrel extension slides into the receiver cutout.
- You’ll probably want to apply a little bit of grease or anti-seize compound to the receiver and barrel nut threads before hand tightening into place.
- Attach your torque wrench to the AR combination wrench and use the barrel nut section to tighten the nut onto the upper receiver. Tighten as close to 30 foot-pounds as possible.
- Next, you need to make sure that one of the holes in the barrel nut lines up perfectly for the gas tube. Either by eyeballing or testing with your gas tube, tighten the nut a fraction of a turn more until the barrel nut hole lines up with the gas tube hole in the receiver. There should be no pressure or stress on the tube itself when it’s installed.
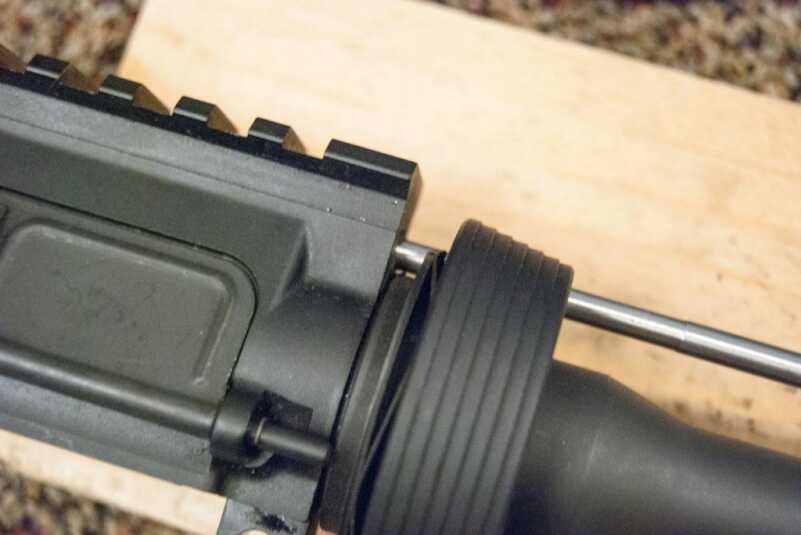
That’s it. If you’re installing a standard mil-spec hand guard, the only difference in the process will be to put the hand guard delta ring, spring, and hand guard retainer ring over the barrel extension before you insert the barrel into the receiver. The hand guard retainer ring will lock into place in the barrel nut. Then, follow the steps for a free-floated barrel installation, and you’re good to go.
While there are lot’s of decisions to make about the characteristics of the barrel you buy, installation is a piece of cake.
Get caught up on the series:
Part 1: Build an AR-15: The Series Introduction
Part 2: Build an AR-15: AR Calibers
Part 3: Build an AR-15: Direct Impingement or Piston Operation
Part 4: Build an AR-15: Tools and Materials
Part 5: The Lowdown on Lowers
Part 6: Intro to Uppers
Buy an AR-15 Upper on GunsAmerica: /AR Upper[/one_half]


A bit late to this party, but I have to make a mention about barrel material. For the barrel material-I used to work for a domestic steelmaker who produces gun barrel quality (GBQ) round bars. It’s chrome moly v, as we call it (CrMoV). You can’t forget the vanadium in that mix as well. It was technically an original Colt spec, but now everybody uses it. Stainless or chrome moly vanadium (which can be in the 4140 or 4150 grade ranges.
Thanks for the article. I would like to make my build as a take down version. Who sells barrels and actions designed with this purpose in mind and might you consider doing an article with that kind of project in mind. I wish to make it in 224 Valkyrie.
Well! I’m in the process of building an AR-15 in .30 carbine. It’s been a trip. Did you know that the .30 Carbine barrel has a twist of 1 in 20? so you cannot just take a .300 Blackout or .300 Whisperer barrel and think that it’ll work. Sure Olympic Arms used to make an AR-15 in this caliber but it didn’t sell…could it have been the short 10.5 inch barrel? I don’t know. What I do know is that do not have any parts left! I watched a Youtube video today that showed that a .223 bolt WILL work with the .30 carbine round. One less obstacle. I purchased a barrel from Sarco that fits a M1 Carbine and will use the method that Steve Matthews used in producing a 9mm AR-15 barrel in Shotgun News. He turned the barrel down and threaded it, then made a sleeve the size of the AR-15, bored it out and threaded it to screw onto the barrel. Voila! A barrel that fits into the AR-15 action. The gas port on the M1 carbine barrel is only about 4 1/2 inches back from the chamber and produces enough gas to move the fairly heavy M1 Carbine bolt so I have purchased not only an adjustable gas block, but also an adjustable gas key for the bolt carrier. Hopefully, between the two I can reduce the amount of gas so the AR-15 bolt will function properly! Wish me luck. Worse comes to worse, i’ll have to drill a new gas hole further forward on the barrel and weld the old one.
Very informative, but you failed to mention the Polygonal Rifling technique. Once I learned of it and how it was more accurate than the Button or hammer forged rifling, That’s what I had to get. I got a Black Hole Weaponry 18″ 1in8 3 Land Polygonal stainless barrel and my 1st. time to shoot the gun at the range was amazing. I had all 7 shots in the bullseye and can cover them with a quarter, a nickel barely shows the edges of 3 shots, 5 shot can be covered with a dime. definitely the barrel and not my shooting skills. I’ve read my barrel is best with a 62 grain, but I could only get 55 grain before going to the range, So it might get even better! This is my 1st. AR rifle, and so glad I built it myself. Got everything I wanted the 1st. time.
One thing to note about polygonal rifling – when used with frangible/sintered bullets (required at some ranges for steel plate shooting), the bore can crush the bullets. Being sintered metal powder, rather than deform (as an ordinary bullet would), they can crack. Upon exiting the barrel, the spin can make them fly apart, disintegrating into a puff of metal dust. Pieces can also strike the flash hider or muzzle brake, destroying it. Ask me how I know!
Well, sort of. Polygonal rifling is a “shape”, not a cutting technique. You can make polygonal rifling with cold-hammer forging or button rifling construction techniques. Cut rifling will have the sharp edges, but the other techniques can produce the smooth “land to groove” contour of polygonal rifling.
A a person in the process of my 1st build, this series is very helpful. Regarding the barrel segment, are there any special considerations to take into account the use of an adjustable gas piston drive rather than the more common gas impingement?
Thanks!
Do yourself a favor and forget using a piston system. A piston system will keep your weapon a lot cleaner than a direct impingement system and works great if you are a soldier that shoots thousands of rounds per day, but as a civialian shooter you’ll find that it also adds recoil that you won’t get with the direct impingement system. If you are an accomplished shooter, you already know that you need to clean your weapon after every shooting session anyways. I have an Adam’s Arms piston AR-15 in 5.45 x 39mm and another AR-15 in the same caliber with direct impingement. As soon as I have the time, I’ll convert the Adam’s Arms to direct impingement. A piston setup is great in a M1A, a Galil or an FN FAL because they all have heft to them that will absorb the recoil. The AR-15 does not. Besides the piston parts cost more so why bother.
Great article! Very informative. One thing I would add is that when tightening the barrel nut always tighten to the desired torque, loosen, tighten again, loosen again, then tighten to the final torque. This will stretch the threads in the aluminum upper and give you a more exact torque. IMHO it makes a significant difference.
One comment about chrome vs. Melonite (aka nitride, QPQ, and similar treatments): Chrome does add a bit to the barrel’s interior surface: about .0001 inch on each side. You said Melonite “coating” is thinner. In fact, Melonite and similar nitrocarburizing treatments aren’t coatings. They are surface treatments that harden and change the chemical composition of the steel, but they don’t actually deposit any additional thickness. This is why Melonite barrels aren’t said to have the slight (very slight) accuracy degradation that chrome lining sometimes produces.
Thank you for posting this. That’s the first thing I wanted to say when the author said melonite “coating”
You guys are absolutely correct, and I know this, but slipped up in my wording. In fact, I’m sending my Beretta 92 steel parts in for that treatment 🙂
Very good basic article about barrel selection. While it is very easy to go nuts over barrels, most shooters, even those which are building an AR variant from scratch, can benefit from a simple article like this one.
If an AR as one drawback, it is a simple one, so many choices as to become overwhelming!!
Not such a bad thing when you think about it. 🙂