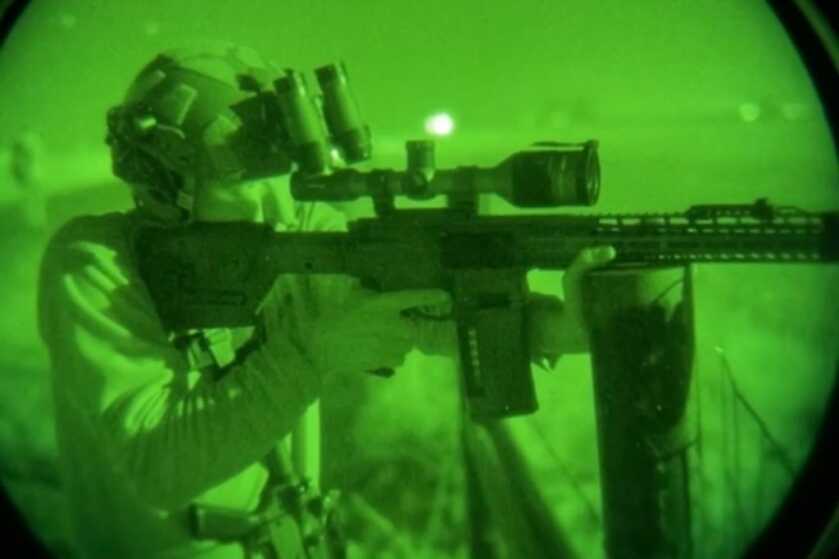
While humans have been blessed with the five senses of vision, hearing, feeling, smelling, and tasting, I find vision to be the most unique and essential for my everyday life. It is also the one thing I would hate to lose the most. Vision shapes our perception of the world, and directly influences our ability to act and react in the environments we find ourselves in. Up until around the mid-1950s, humans could only utilize the full potential of their vision for roughly half of a 24-hour period without using torches or flashlights to illuminate the darkness. For these reasons, it makes sense that our military placed high importance on technologies 70+ years ago that would aid human vision and undertook the R&D to give us the night vision and thermal products available today.
Long story short, vision is complicated. Everything we see is a form of electromagnetic radiation, and humans can typically detect a band of wavelengths ranging from 380 to 700 nanometers (0.38-0.7 µm) which is known as “visible” light.
According to NASA, “All electromagnetic radiation is light, but we can only see a small portion of this radiation—the portion we call visible light. Cone-shaped cells in our eyes act as receivers tuned to the wavelengths in this narrow band of the spectrum. Other portions of the spectrum have wavelengths too large or too small and energetic for the biological limitations of our perception.”
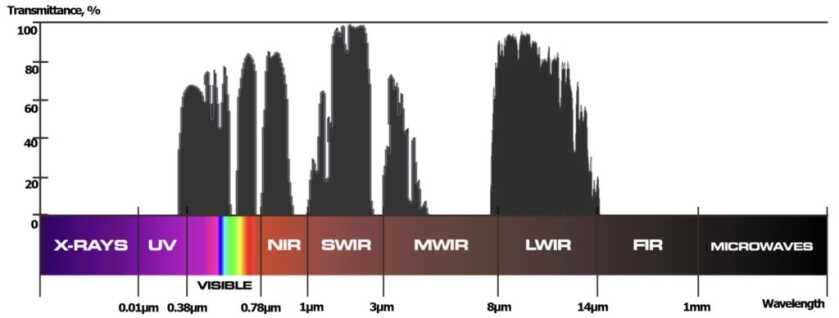
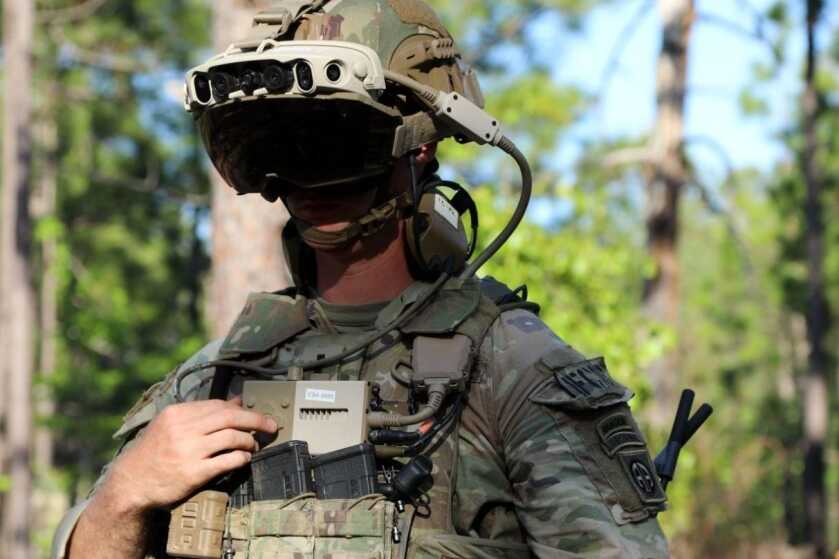
However, technologies have been created which can detect, amplify, and display wavelengths of electromagnetic radiation beyond the scope of what humans can perceive. Night vision and thermal are two totally different technologies but they both display what humans cannot naturally see. Analog night vision amplifies reflected infrared radiation between around 780nm-1,000nm (0.78-1 µm), and currently available civilian thermals detect emitted wavelengths between 3-5.55 µm (MWIR or medium wave infrared) and 8-14 µm (LWIR or long wave infrared). Some digital cameras are also being sold that can pick up even a wider band of wavelengths such as the Sionyx Aurora which can display wavelengths between 400 to 1100nm (.4-1.1 µm) in color. These digital night vision devices seem to have the highest potential as technologies are advanced. Digital night vision is also featured along with other thermal and multi-spectral sensors in the new IVAS systems being developed by Microsoft in partnership with the US Army. The IVAS system is designed to show most of these different spectrums and overlay what digital/analog night vision and thermal traditionally displayed on their own. Fusion is the future, but these capabilities for the most part are not available to civilians at this time.
Since there are so many differences between these different technologies and a growing number of products being sold, I will break down what you as a consumer may like to know.
Analog Night Vision:
So now for some quick pros and cons for night vision.
Pros:
1. You can see in the dark. Night vision is literally an obtainable superpower.
2. Increased situational awareness. A standard single tube PVS14 has a 40-degree field of view which is much better than thermals, and high-end devices such as GPNVG’s provide a 97-degree field of view.
3. Batteries last a long time. Typically a PVS14 will get about 40 hours of runtime on a single CR123A.
4. Infrared light that is invisible to the naked eye can be detected and used with NV.
5. Night vision works through glass and it is great for navigation. Whether that be hiking or driving. You can read text on signs/pages and can identify people and objects clearly.
Cons:
1. Night vision doesn’t work great with little ambient light. With no moonlight and overcast skies, or under thick canopies out in the woods, NV may need infrared or IR illuminators to “see.” NV works by amplifying ambient light, so when deep in a cave without some sort of illuminator, night vision won’t work at all.
2. Night vision is sort of fragile. While mil-spec and aftermarket companies attempt to make rugged housings, the image intensifier tubes are sensitive and shouldn’t be dropped.
3. Image intensifier tubes are continually degrading. While new Gen 3 tubes boast 10,000ish hours of life, their clarity slowly decreases over time. However, 10,000 hours is a serious amount of runtime and will probably last most people their whole lives.
4. The tubes can be burned or “blemmed”. Looking at bright light sources such as lasers or the sun can permanently leave blemishes in the tube which appear as dark spots or streaks when looking through the device. This also means they shouldn’t be used during the day.
Besides these basic pros and cons, there are a lot of differences when it comes to actual analog night vision. *and a quick disclaimer: While there are many budget “night vision” devices, most of these options are actually digital devices instead of analog. I will speak more about these devices later, but they do not perform nearly as well as modern analog night vision.
The roots of the current analog NV have been on a journey and continuously improved upon since the mid-1950s. Throughout the years, advancements in technology brought newer generations to exceed the performance of older tech. These improvements are broken down as follows:
Gen 1: This is the oldest tech and the first of its kind. It is what paved the way for the modern analog night vision we have today. The maximum useful range for these older devices is around 75 yards depending on ambient light. These devices relied upon a built-in IR illuminator which was always on. An IR illuminator is basically just a flashlight that shines light in a wavelength that’s not visible to the human eye, however, it is visible by anyone else who is using night vision, or modern low light cameras. These devices have much more “noise” or static in the tube and lower image resolution than newer tech. The image users see may also be blurry around the edges due to geometric distortion. The life expectancy of Gen 1 tubes is around 1500 hours, their battery life is not great, and the field of view is smaller than newer devices.
Gen 2: Improving upon Gen 1 by adding a micro-channel plate, (MCP) Gen 2 devices give a useful image out to around 200+ yards depending on ambient conditions and individual tube specifications. An MCP features millions of parallel glass tubes, which allows thousands more electrons to pass through providing much more light amplification over Gen 1 systems. The resolution was improved, the field of view widened, and Gen 2 devices could work without an IR illuminator. They also increased the life expectancy of the image intensifier from 1500 hours to around 5000 hours.
Gen 3: This is what is currently issued to the United States Military while being the newest and greatest tech. Adding a self-contained integral power supply, and GaAs photocathode, Gen 3 provides an increase in photosensitivity, resolution, and signal-to-noise ratio. The life expectancy of these devices should exceed 10,000 hours. IR illumination is only needed on the cloudiest of nights and/or under the canopies of the woods. High-spec tubes under a touch of moonlight and clear skies can provide an image very similar to what one would see with their own eyes during the day. The resolution is much improved over previous generations, and autogated image tubes reduce “blooming” from incoming lights.
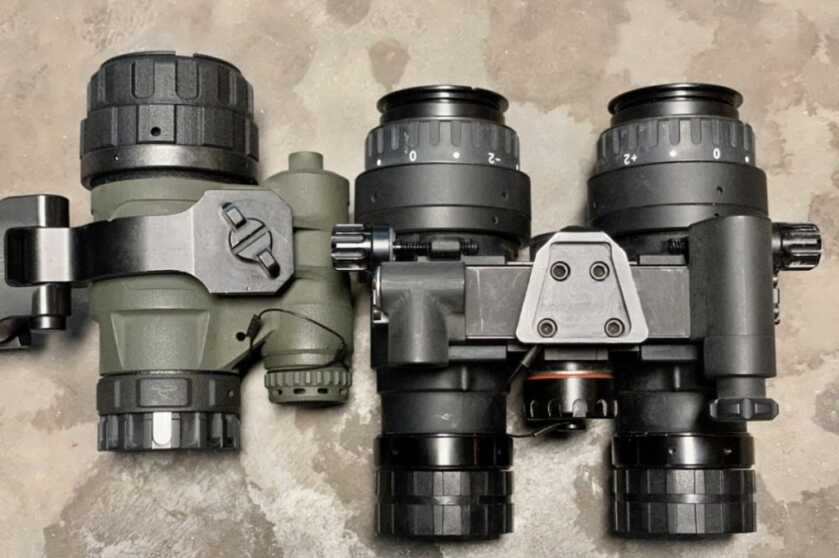
The following are some key terms in regard to night vision devices, and what they mean:
Equivalent Background Illumination (EBI): This is a measure of the amount of light that passes through a night vision device when it is turned on, but there is no light on the photocathode. Think of this as a scale of how well the specific device performs in extremely low light conditions. The lower the EBI, the better. This is what dictates the lowest ambient lighting conditions required to get a usable image.
Resolution: This is the ability of an image intensifier to differentiate between objects. Sort of like a rating of 4K vs 1080p when it comes to cameras. Better resolution means better detail. Resolution is used to measure the capabilities of the image intensifier, as well as the overall system to include the objective and optics used. While the image intensifiers’ value will remain constant, the rating of the system can degrade based on the quality of optics used.
Signal-to-Noise Ratio (SNR): Think of this as the amount of static visible through the night vision device. This is a ratio of the magnitude of the signal to the magnitude of the noise. The higher this value, the better low light performance the device will have, and the clearer the image will seem to appear. According to Licentia Arms, “Omni VIII contract specs indicate a 64 lp/mm minimum center resolution and a 25 signal-to-noise ratio minimum (64 x 25 = 1600 FOM)… We believe that there are three major FOM performance benchmarks that end users can use to judge what system is right for them. The three benchmarks are a 1792 (a solid milspec tube), 2000 (a high-performance tube), and 2376 (aviation level tube) minimum FOM.”
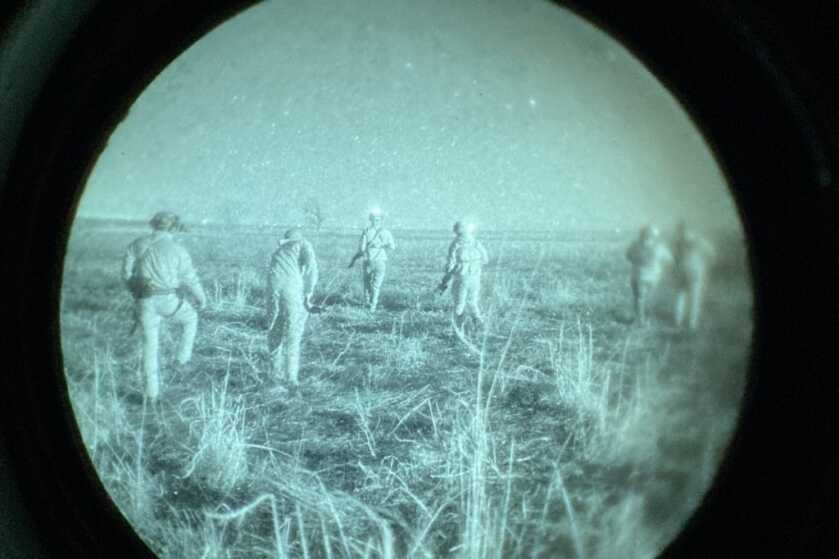
Figure of Merit (FOM): Calculated by multiplying resolution by the signal-to-noise ratio. This is often the most sought-after spec when evaluating different night vision devices. This number can give a quick estimate of the general performance of the device.
Gain: This is measured as the light output divided by the light input. Known as luminance gain, this rates how much light is amplified through a night vision device. The gain represents the amount of multiplication that occurs to electrons passing through the microchannel plate of an image intensifier tube.
Spots/Blems: These are imperfections or spots that are visible when looking through the night vision tube. They are a sign of damage and can come from the manufacturing process, dropping the device, or from photonic reasons such as a laser or the other powerful (vis or IR) light source being aimed at the device.
Blooming: This term comes from a light “whiting out” objects through the view of night vision. Common to older generations of night vision, this is also known as the “halo” effect since it causes a visible “halo” around a visible light source.
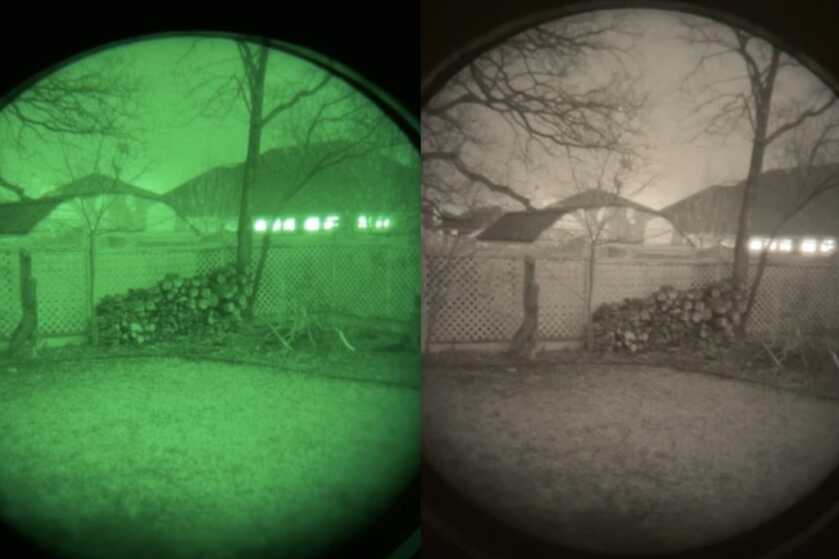
While night vision devices come in all shapes and sizes, they all operate on very similar image intensifier tubes. Now, what are these one might ask? Basically dark magic. They work by amplifying or “intensifying” ambient light. Light is made of photons. These photons are either emitted from a source or reflected off an object. Day or night, these photons are moving even though they may be moving in a wavelength not visible to the human eye. Night vision works by allowing these photons to enter the front of a night vision device, to then hit a light-sensitive surface known as a photocathode. This photocathode converts photons to electrons which then pass through a photomultiplier that multiplies the number of electrons going through the system. All of these new electrons pass into a phosphor screen which emits tiny flashes of light upon impact, and this is the basics of how night vision works. Due to the conversion process, the light of all colors is essentially converted to black and white. Historically a green phosphor screen was chosen to make an image that causes low eye strain and takes advantage of humans’ naturally higher sensitivity to green light. However, white and black displays or “white phosphor” night vision is currently selling and marketing as the top-of-the-line option. I will say having used both, I prefer white phosphor as I seem to pick up better detail than a comparable green phosphor device. Typically white phosphor systems sell at a premium though, so often consumers can find equivalent green phosphor tubes at a better price.
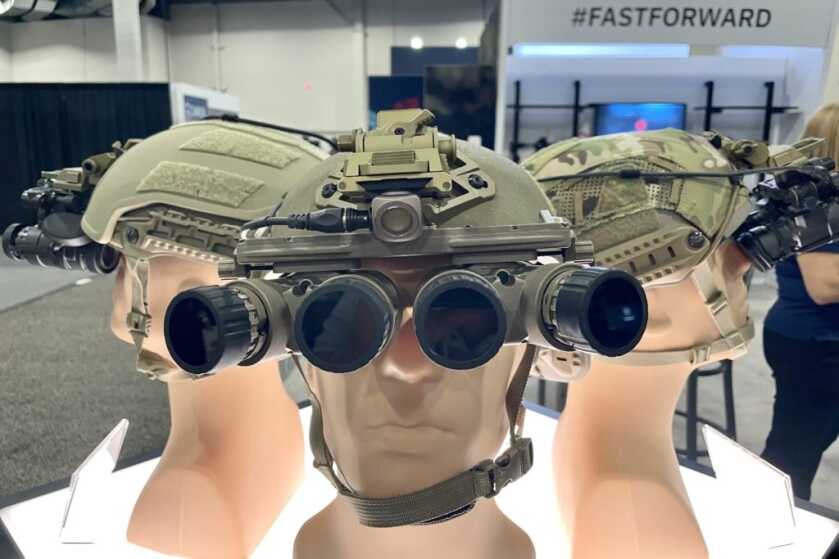
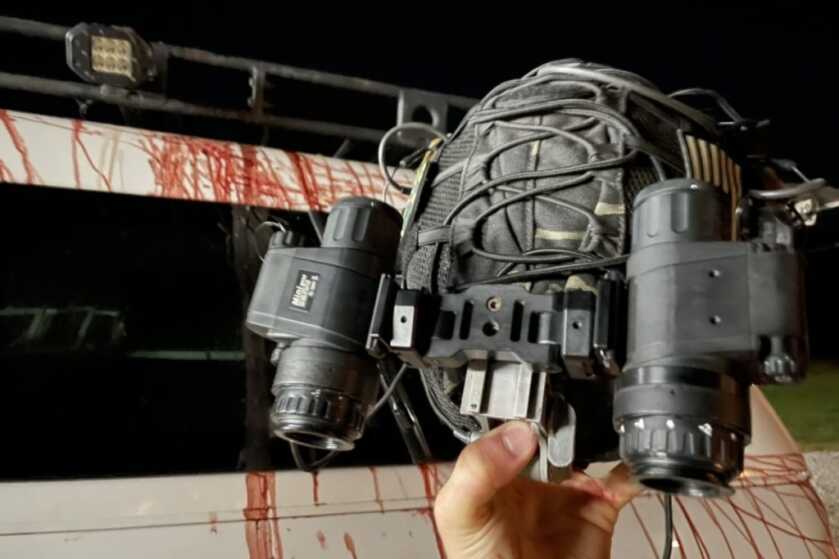
The most common night vision device is the PVS-14. This is a single-tube night vision device that has been used for years. While it is possible to mount these in front of a scope, or behind a red dot for shooting, these are mainly designed to be mounted to a helmet to allow for navigation. As time goes on, more and more options become available. Binocular setups have become more common for good reason, which utilize two separate image intensifiers to allow for both eyes to see. Binocular systems feel much more natural, but they are not the end-all be-all. They come with a price, and without special bridges or housings, they still provide a 40-degree field of view which is the same as a monocular. For those with unlimited budgets, the $40,000 four-tube system known as GPNVG provides a whopping 97-degree field of view for ultimate situational awareness.
Digital Night Vision:

Up until the past few years, digital night vision took a back seat as analog night vision took over the world. However, while analog night vision has just about hit the peak of what its technology is capable of, digital sensors are only just getting started. There have been massive improvements made with these digital technologies over even just the past 5 years. Digital night vision devices can display all colors unlike analog night vision, and as sensor technology continues to improve, digital devices will continue to better detect and transmit more vibrant images with better resolution. Popular cell phones have started to include “night mode” as a picture option which honestly works pretty great. High-end cameras can be left in a static position to take a long exposure picture to create an image with immense detail showing everything from a colored landscape on a dark starlight night, to breathtaking photos of the Milky Way galaxy displaying way more stars than the human eye can detect.
Traditionally digital night vision scopes or monoculars required an IR illuminator similar to Gen 1 analog night vision. Even as of now, basically all digital night vision scopes are using onboard illuminators to be able to see anything past 10 yards on a cloudy night. Most of these are aimed to be budget friendly and offer a more affordable start into the world of night vision. They do not offer any benefit of detection like that of thermal, but they can allow users to see things in the dark when using illuminators projecting light in a wavelength not detectable to humans or animals. These IR lights however are detectable to anyone else with night vision or most digital camera systems.
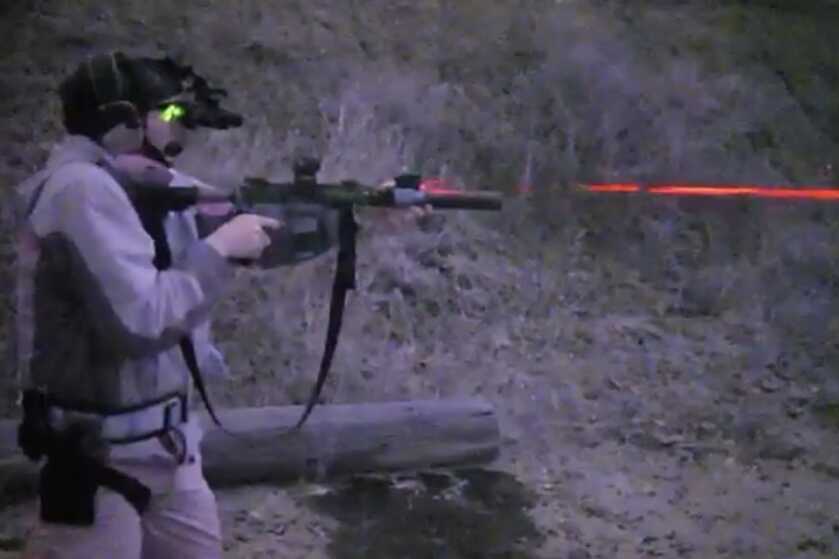
So now for the pros and cons of digital night vision systems:
Pros:
1. Digital devices can see in color.
2. Digital works through glass with backlit areas when not using an illuminator
3. Most digital devices can record what you are observing
Cons:
1. The sensors used in most digital night vision systems are not very impressive. Most of them require onboard illumination which is visible to anyone else with night vision and drain batteries faster.
2. Trying to use a built-in illuminator through glass isn’t going to work well. It all reflects off the glass causing the image to bloom.
3. Looking through fog or mist is the same as what one would see during the day if not worse. There is no benefit here.
4. There is a “lag” between reality and what you see on a screen. While this is typically only fractions of a second, using digital systems helmet mounted can be disorienting, and shooting can get tricky when on the move.
In the end, I still think digital technologies are going to be the future, but in my experience, the affordable options available to civilians as scopes or helmet-mounted options haven’t been phenomenal. High-end cameras have made serious headway in the past few years, but the sensors utilized in them haven’t yet found their way to common digital night vision scopes.
Thermal:
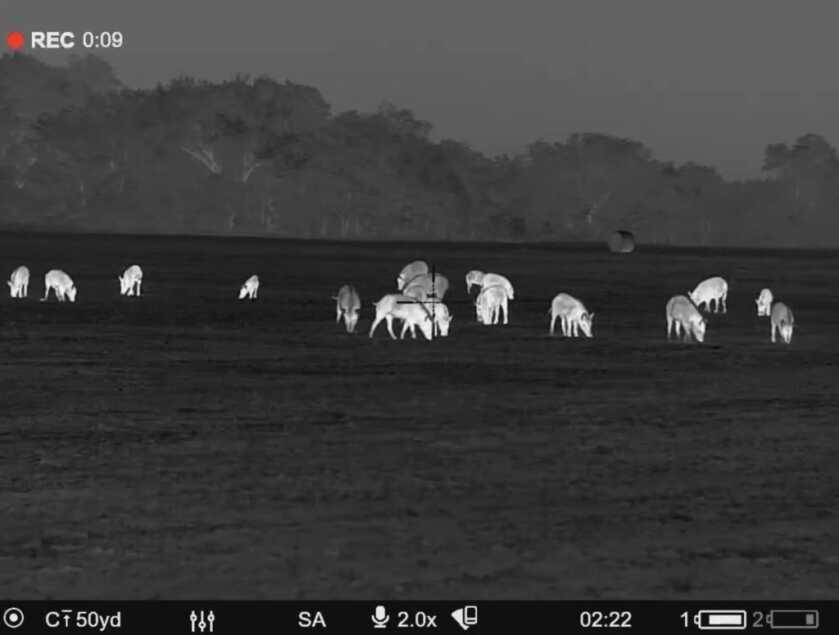
For many of you reading this and just jumping into the world of thermal optics, do not fret, it is not as complicated as some may suggest. While thermal scopes are not cheap, they are an absolute game-changer in the world of night hunting. 5 years ago, I would have never believed how powerful of a tool thermal would become in my hunting game. Fast forward to today, and 90% of my hunting is at night searching for coyotes and pigs with great success due to the technology utilized in these thermal devices. The powers of longwave thermals detecting varying levels of IR radiation given off with respect to temperature should not be underestimated.
When looking for a thermal scope you need to define what your intended purposes are. Like day optics, there are many brands and models available that fit different situations better than others. Personally, I do most of my hunting up close within 100 yards so I prefer thermal scopes which have a wide field of view. Everyone also prefers to have a scope with a clearer image; however clarity comes at a price, and while it is very nice, it isn’t always necessary.
Thermals are unique in that they use an expensive rare earth material called germanium for the front lens. This material is ideal for capturing MWIR and LWIR wavebands but is expensive which drives up the price of thermal devices. They also use a microbolometer that detects differences in temperature. This is converted to a thermogram which is a differential temperature pattern that ends up being displayed on a small electronic screen in the eyepiece of the device.
So now for some quick pros and cons for thermal in general.
Pros:
1. Thermal detects differences in heat and relies on absolutely no ambient light to work. These differences in heat are radiated from objects, which makes detecting warm-blooded creatures very easy. When hunting at night, animals really “pop” or stand out.
2. Thermal can work relatively well through fog. I have had times where I can detect animals with thermal through the heavy mist, where NV wouldn’t see out past about 10 yards.
3. Thermals will work with absolutely ZERO ambient light. Thermals will work just as well deep in a cave with no ambient light or outside in total cloud cover as they would with a full moon. They do not require any sort of external illumination to work.
4. While thermal benefits are mostly realized after the sun has set and its rays are no longer heating things up, thermal still works during the day. Animals can still be detected out in vegetation, but tree trunks, rocks, and other materials also show up as glowing hot due to their ability to absorb and retain heat. These materials will also remain hot and glowing when viewed through thermal giving false positives for a while after dark depending on their properties and ambient conditions.
Cons:
1. Thermal cannot see through glass. You cannot scan or look through windows or windshields.
2. Without batteries, thermals cannot be used. The housing is packed with components, and the eyepiece has a mini TV displaying what the sensors are reading. It is not hollow like a traditional scope, so it cannot be seen through without being turned on.
3. Typically, thermals have a pretty narrow field of view compared to night vision and judging distance is harder.
4. Thermals cannot see flashlights or IR illumination.
Now for some key terms to understand and look for when evaluating thermals. The following are used to describe thermal products and are often misunderstood:
Pixel Pitch – The lower this number, the smaller the individual pixels are and, all other things being equal, the clearer the image you end up seeing.
Sensor resolution – The higher the number, the more pixels there are in your image which also provides a clearer picture. 640 units are twice as clear as the 300 series of systems, but they also are more expensive. In late 2022, iRay started selling a scope with a 1280 sensor which is the first of its kind available to civilians.
Display resolution – The resolution of the screen that the thermal image is displayed on in the eyepiece of the scope.
Magnification – Glass optics and thermal magnification work in fundamentally different ways. While having a 2.5 x 10 zoom, this is just the ability to zoom in on an already existing image. No matter what magnification you are at, the sensor will be displaying the same image, and the zoom function is just zooming the digital display in the eyepiece. There are very few thermals that use an adjustable optical zoom which would actually provide more clarity at higher magnifications. They do exist, but these types of devices are not common.
Range of Detection – The distance where the critical size of an observed object can be fit in two or more pixels of a thermal imaging sensor is called the detection range. Detection only means that the object is visible at a certain distance but does not give any information about its characteristics (i.e. the type of object cannot be determined). This varies based on weather factors such as humidity, ambient temperature, and the type of animal, but normally I feel like I have been able to detect things further than the manufacturer’s listed range.
Sensor NETD, mK – The lower this number is, the better the clarity will be. This is a unit of measure for what the minimum temperature differentials need to be for the thermal sensor to detect a change. I think of this sort of like a topographical map. A lower number would show more “lines” or detail, and a larger number detects less of this range. When looking at an animal, a lower mK value will allow you to see the vivid image such as the hot base of a hair, cooling as it gets further away from the body.
Field of View – This is how wide and tall the image is at a given distance. The wider your field of view, the greater your situational awareness is. I find this to be one of the toughest things to balance when looking to purchase a thermal device. Typically devices with a lower base magnification have wider fields of view and this helps dramatically when shooting at big groups of pigs after they start running. However, due to a lower base magnification, they may not be as clear when zoomed in as a device that has a higher minimum zoom to start out with. For those who will not be engaging multiple targets and mainly intend to take shots at a distance, a device with a higher base magnification and lower field of view will most likely give you better clarity at extended ranges.
With all of the key terms I listed above, it can be hard to know what may be more important for you and your applications. While there is no easy answer or device that is best in every situation, typically you will want the highest sensor resolution you can afford. This is going to be comparing 380ish devices against 640 devices. Some stores may have the thermals you are looking for in stock and let you look through them, but this is not always the case. One of the best ways to actually see the difference in performance is going to be by watching some youtube comparison videos. There may not be side-by-side comparison videos for every combination of thermal devices you may be looking at, but there is a lot of good content currently out there. In the end, it is all application driven. As I previously stated, I want a thermal with a combination of the highest sensor resolution and widest field of view since most of the time I am stalking up within 50 yards of large groups of pigs. For coyote hunters, a 640 sensor with a minimum of 3X magnification may be the better option since it would be clearer at distance than an identical 640 device with a base magnification of 1X zoomed into 3X. The field of view would be narrower, but identification at longer ranges would be better.
Now don’t be disheartened when looking for thermals and you see the prices of the 640 systems. For those on a budget, a 340 sensor is still a very powerful tool. Detection is the biggest benefit of thermal in my eyes, and these 340 devices still have amazing detection ranges. While warm-blooded creatures are harder to identify or distinguish between, they are still easy to spot. This just means it’s time to lace up your hiking boots and get closer to actually identify what the hot object is that you are looking at. While thermal handhelds are popular for search and rescue when hunting with thermal scopes you need to always be 100% sure of what it is that you are shooting at. There are multiple instances where I have heard of farmers’ cattle getting shot because some hunter or poacher mistook them for pigs and just shot at the hot blob they saw through their thermal scope. Know your targets, and what is beyond them.
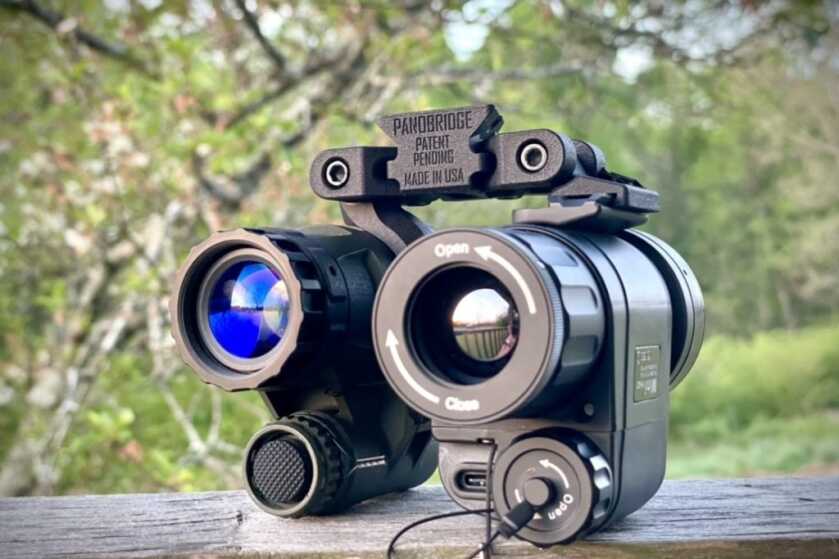
Thermals serve a wide range of purposes and are available in all shapes and sizes. Handhelds, scopes, and clip-on thermal systems have existed for a while, but companies are starting to also make helmet-mounted devices. While all of the above-mentioned terms stay the same across all devices, one thing to note is the size of the objective lens plays a part in clarity as well. From my understanding, if all factors remain the same and the only difference is the size of the germanium objective lens between two thermal devices, the one with the bigger objective will have a clearer image. While this isn’t as easy to quantify on paper as other attributes, it does play a part. I have used many different handhelds, stand-alone scopes, and a few helmet-mounted options, but the stand-alone scopes with identical specs always outperform the smaller systems. Handhelds and helmet-mounted thermals are more versatile, but due to their purpose of being small and lightweight, they lose a little bit of clarity. However, these small versatile options are very useful and I use them every time I go out hunting at night. While I purchased a QD mount for my first thermal to use as both a scanner and a scope, it is convenient to have both units if you can afford them.
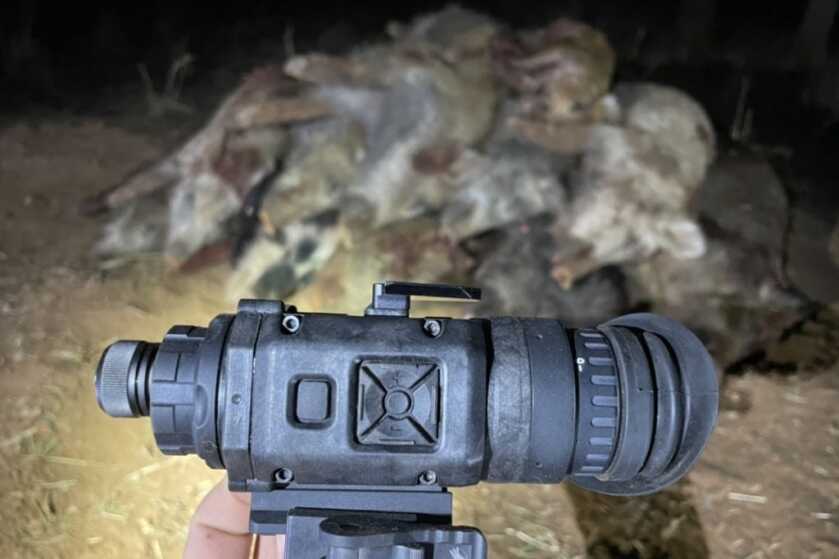
In the end, it comes down to your budget. Typically when it comes to thermals you get what you pay for. However, even a budget $1,500 handheld scanner will give you a significant technological advantage over animals and adversaries who do not have one at all. Clarity is awesome but it comes with a price that is going to be prohibitive for a lot of people. However, as the wise Garand Thumb said, “you should have some type of thermal observation device…if you look at any of the conflicts going on right now, everybody is using thermal. If you do not have thermal, you will die to someone who does have thermal.” Night vision and thermal both have their place. Camouflage and foliage hide against night vision where almost nothing can hide from thermal. I own both, and my night vision hardly leaves my safe, whereas I take my thermal helmet-mounted Iray MH25 and Pulsar Thermion 2 XP50 LRF Pro scope hunting every single time I head out after dark.

Summary:
Each of these different technologies provides a unique set of benefits and may be more useful in some situations than others. Thermal and digital/analog night vision all are aimed to increase our senses and capture what the human eye alone cannot. Technology keeps improving, and each of these systems has gotten drastically more effective, lightweight, compact, and cheaper with time. While alone each of these provides unique benefits, together they define the future. Fusion systems as I mentioned earlier are the future. Merging and overlaying displays, fusion is able to create the best of both worlds by providing true multispectral capabilities. Sadly, however, these fusion systems are not yet available for civilians to purchase. In the meantime, traditional thermal and night vision still provide powerful capabilities. While I am a strong advocate for thermal when it comes to hunting and detection, analog night vision is ideal for navigation and close-quarters situations. In the end, none of these technologies are beneficial if they are not utilized or practiced with. So go get out there, find something that works for you, and put in the time to become proficient with it. While the expensive stuff often works the best or provides the most capability, budget options get you in the door and still give a massive advantage over natural human inabilities.
***Buy and Sell on GunsAmerica! All Local Sales are FREE!***


